MongoDB Connector Example
The MongoDB Connector can be used to perform CRUD operations in the local database as well as in MongoDB Atlas (cloud version of MongoDB).
What you'll build
This example explains how to use MongoDB Connector to insert and find documents from a MongoDB database.
The sample API given below demonstrates how the MongoDB connector can be used to connect to the MongoDB Server and perform insert many and find operations on it.
-
/insertmany: The user sends a request payload that includes the connection information, collection name, and the documents to be inserted. This request is sent to WSO2 EI by invoking the MongodbConnector API. This will insert the documents into the MongoDB database.
-
/find: The user sends the request payload containing the connection information, collection name, and the find query. This request is sent to WSO2 EI by invoking the MongodbConnector API. Once the API is invoked, it returns the documents matching the find query.
If you do not want to configure this yourself, you can simply get the project and run it.
Before you begin
If you want to connect to MongoDB Atlas, follow the steps mentioned below to get the connection string.
-
In the Clusters view, click Connect for the cluster to which you want to connect.
-
Click Choose a connection method.
-
Click Connect your application.
-
Select Java from the Driver menu.
-
Select the correct driver version from the Version menu.
-
Clear the Include full driver code example check box to get the connection string.
Configure the connector in WSO2 Integration Studio
Follow these steps to set up the Integration Project and the Connector Exporter Project.
-
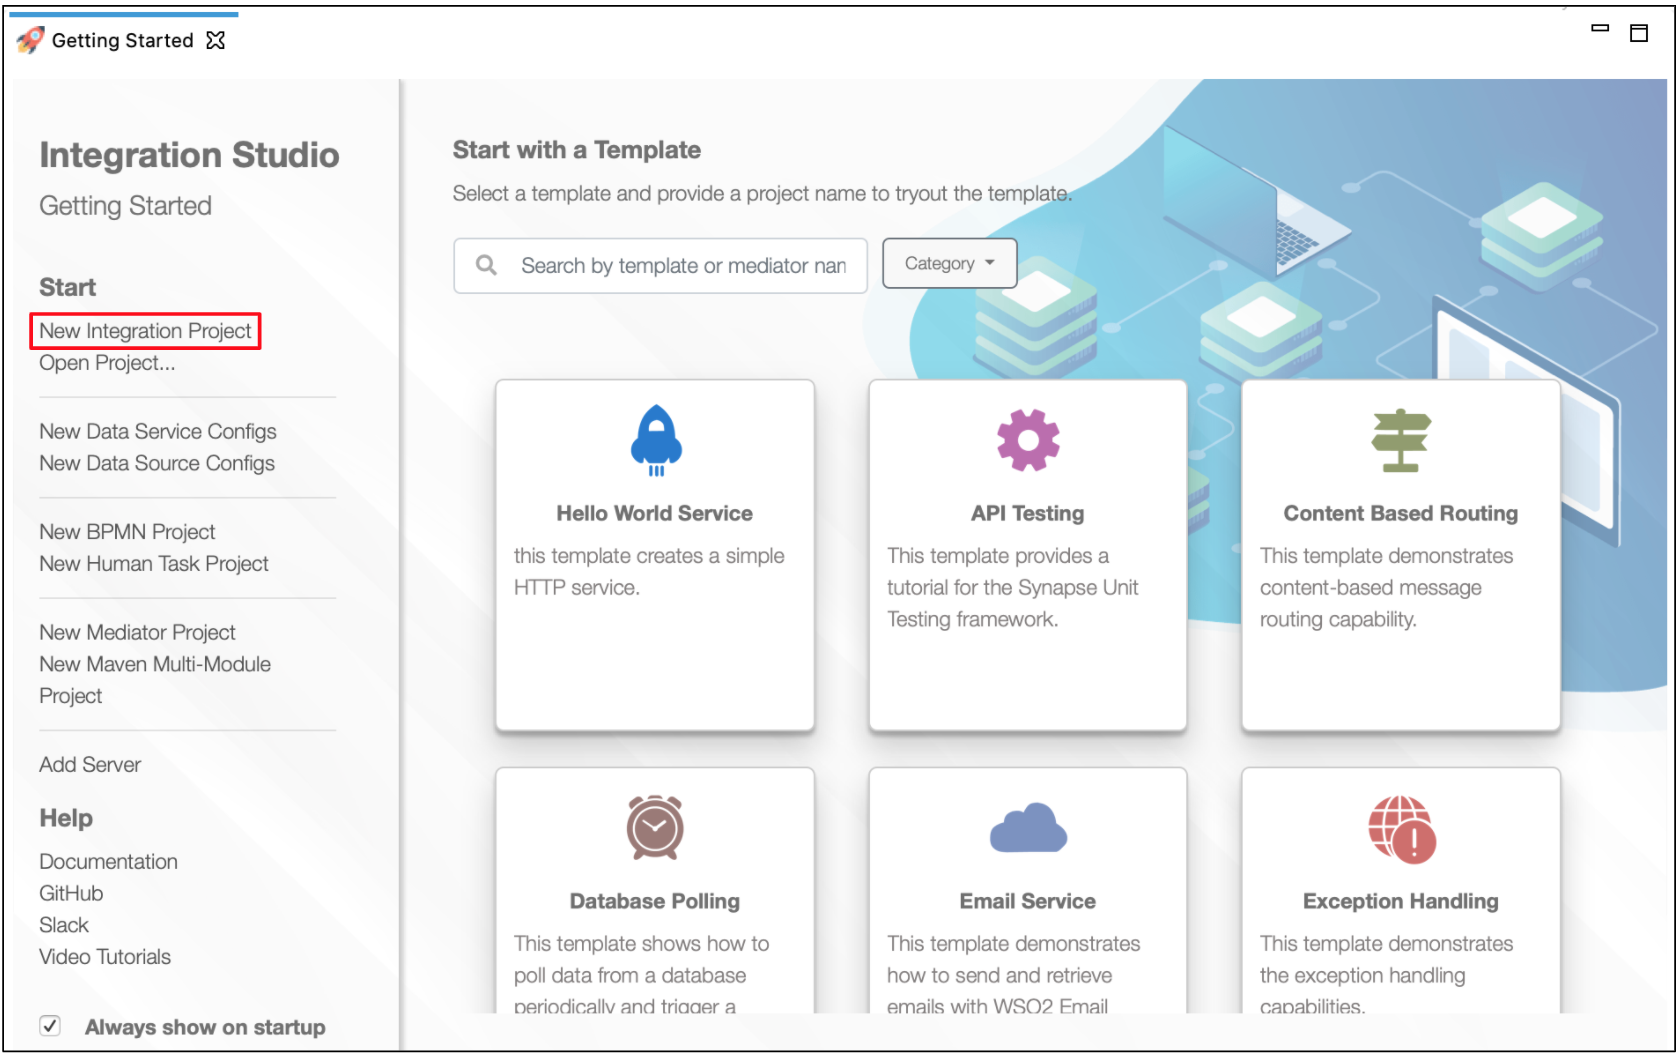
Open WSO2 Integration Studio and create an Integration Project.
-
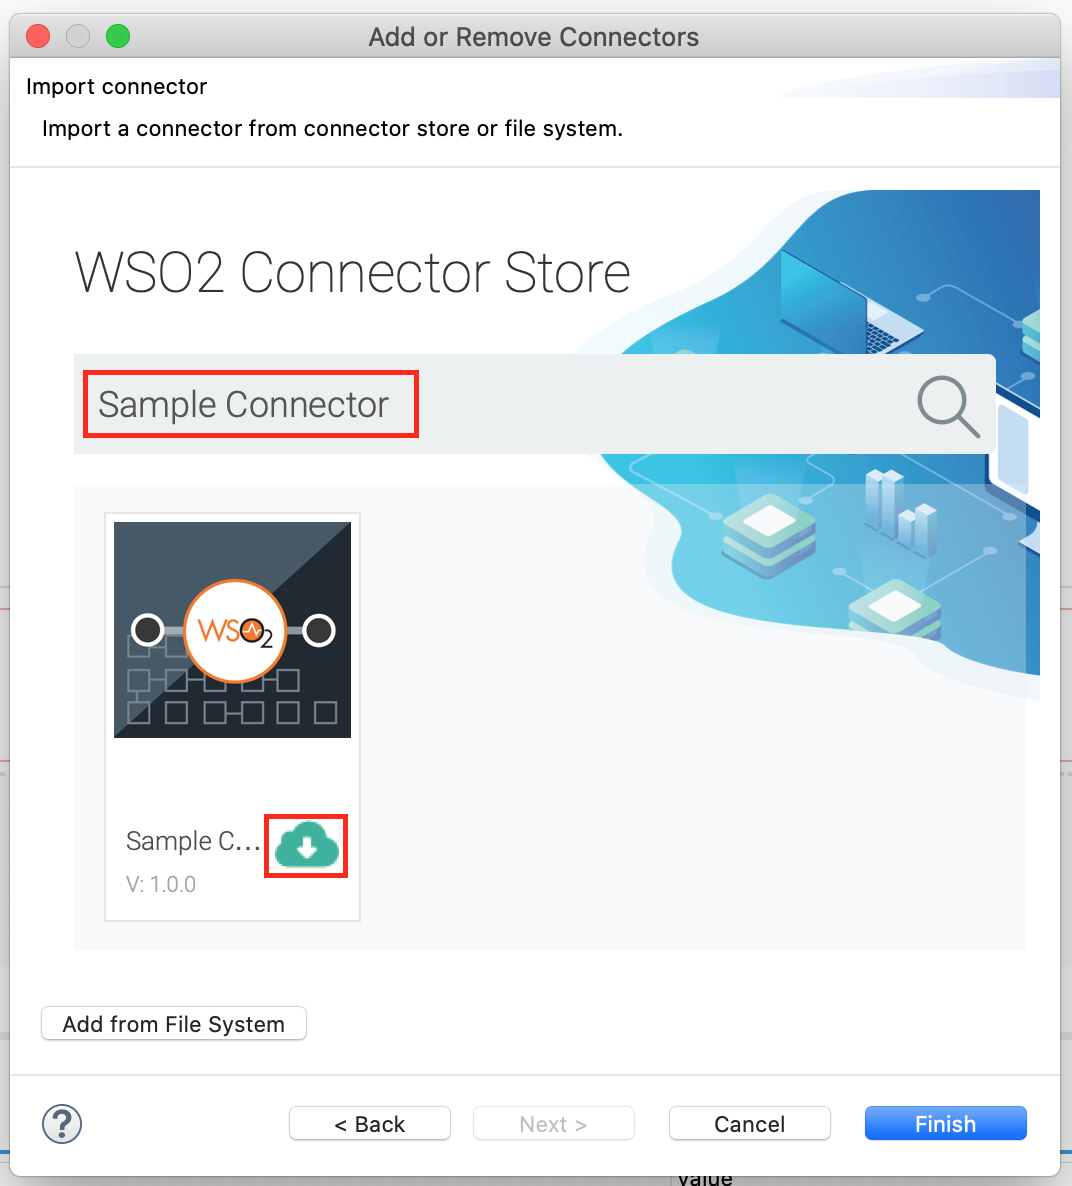
Right click on the project that you created and click on Add or Remove Connector -> Add Connector. You will get directed to the WSO2 Connector Store.
-
Search for the specific connector required for your integration scenario and download it to the workspace.
-
Click Finish, and your Integration Project is ready. The downloaded connector is displayed on the side palette with its operations.
-
You can drag and drop the operations to the design canvas and build your integration logic.

Creating the Integration Logic
-
Create a new integration project named
MongodbConnector. Be sure to enable a Connector Exporter.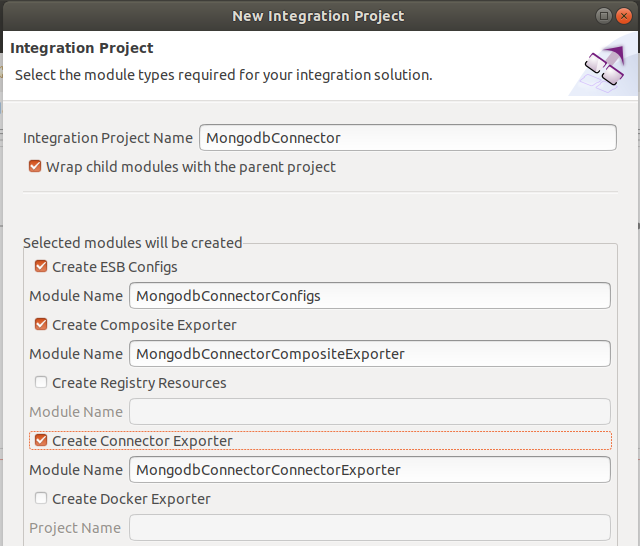
-
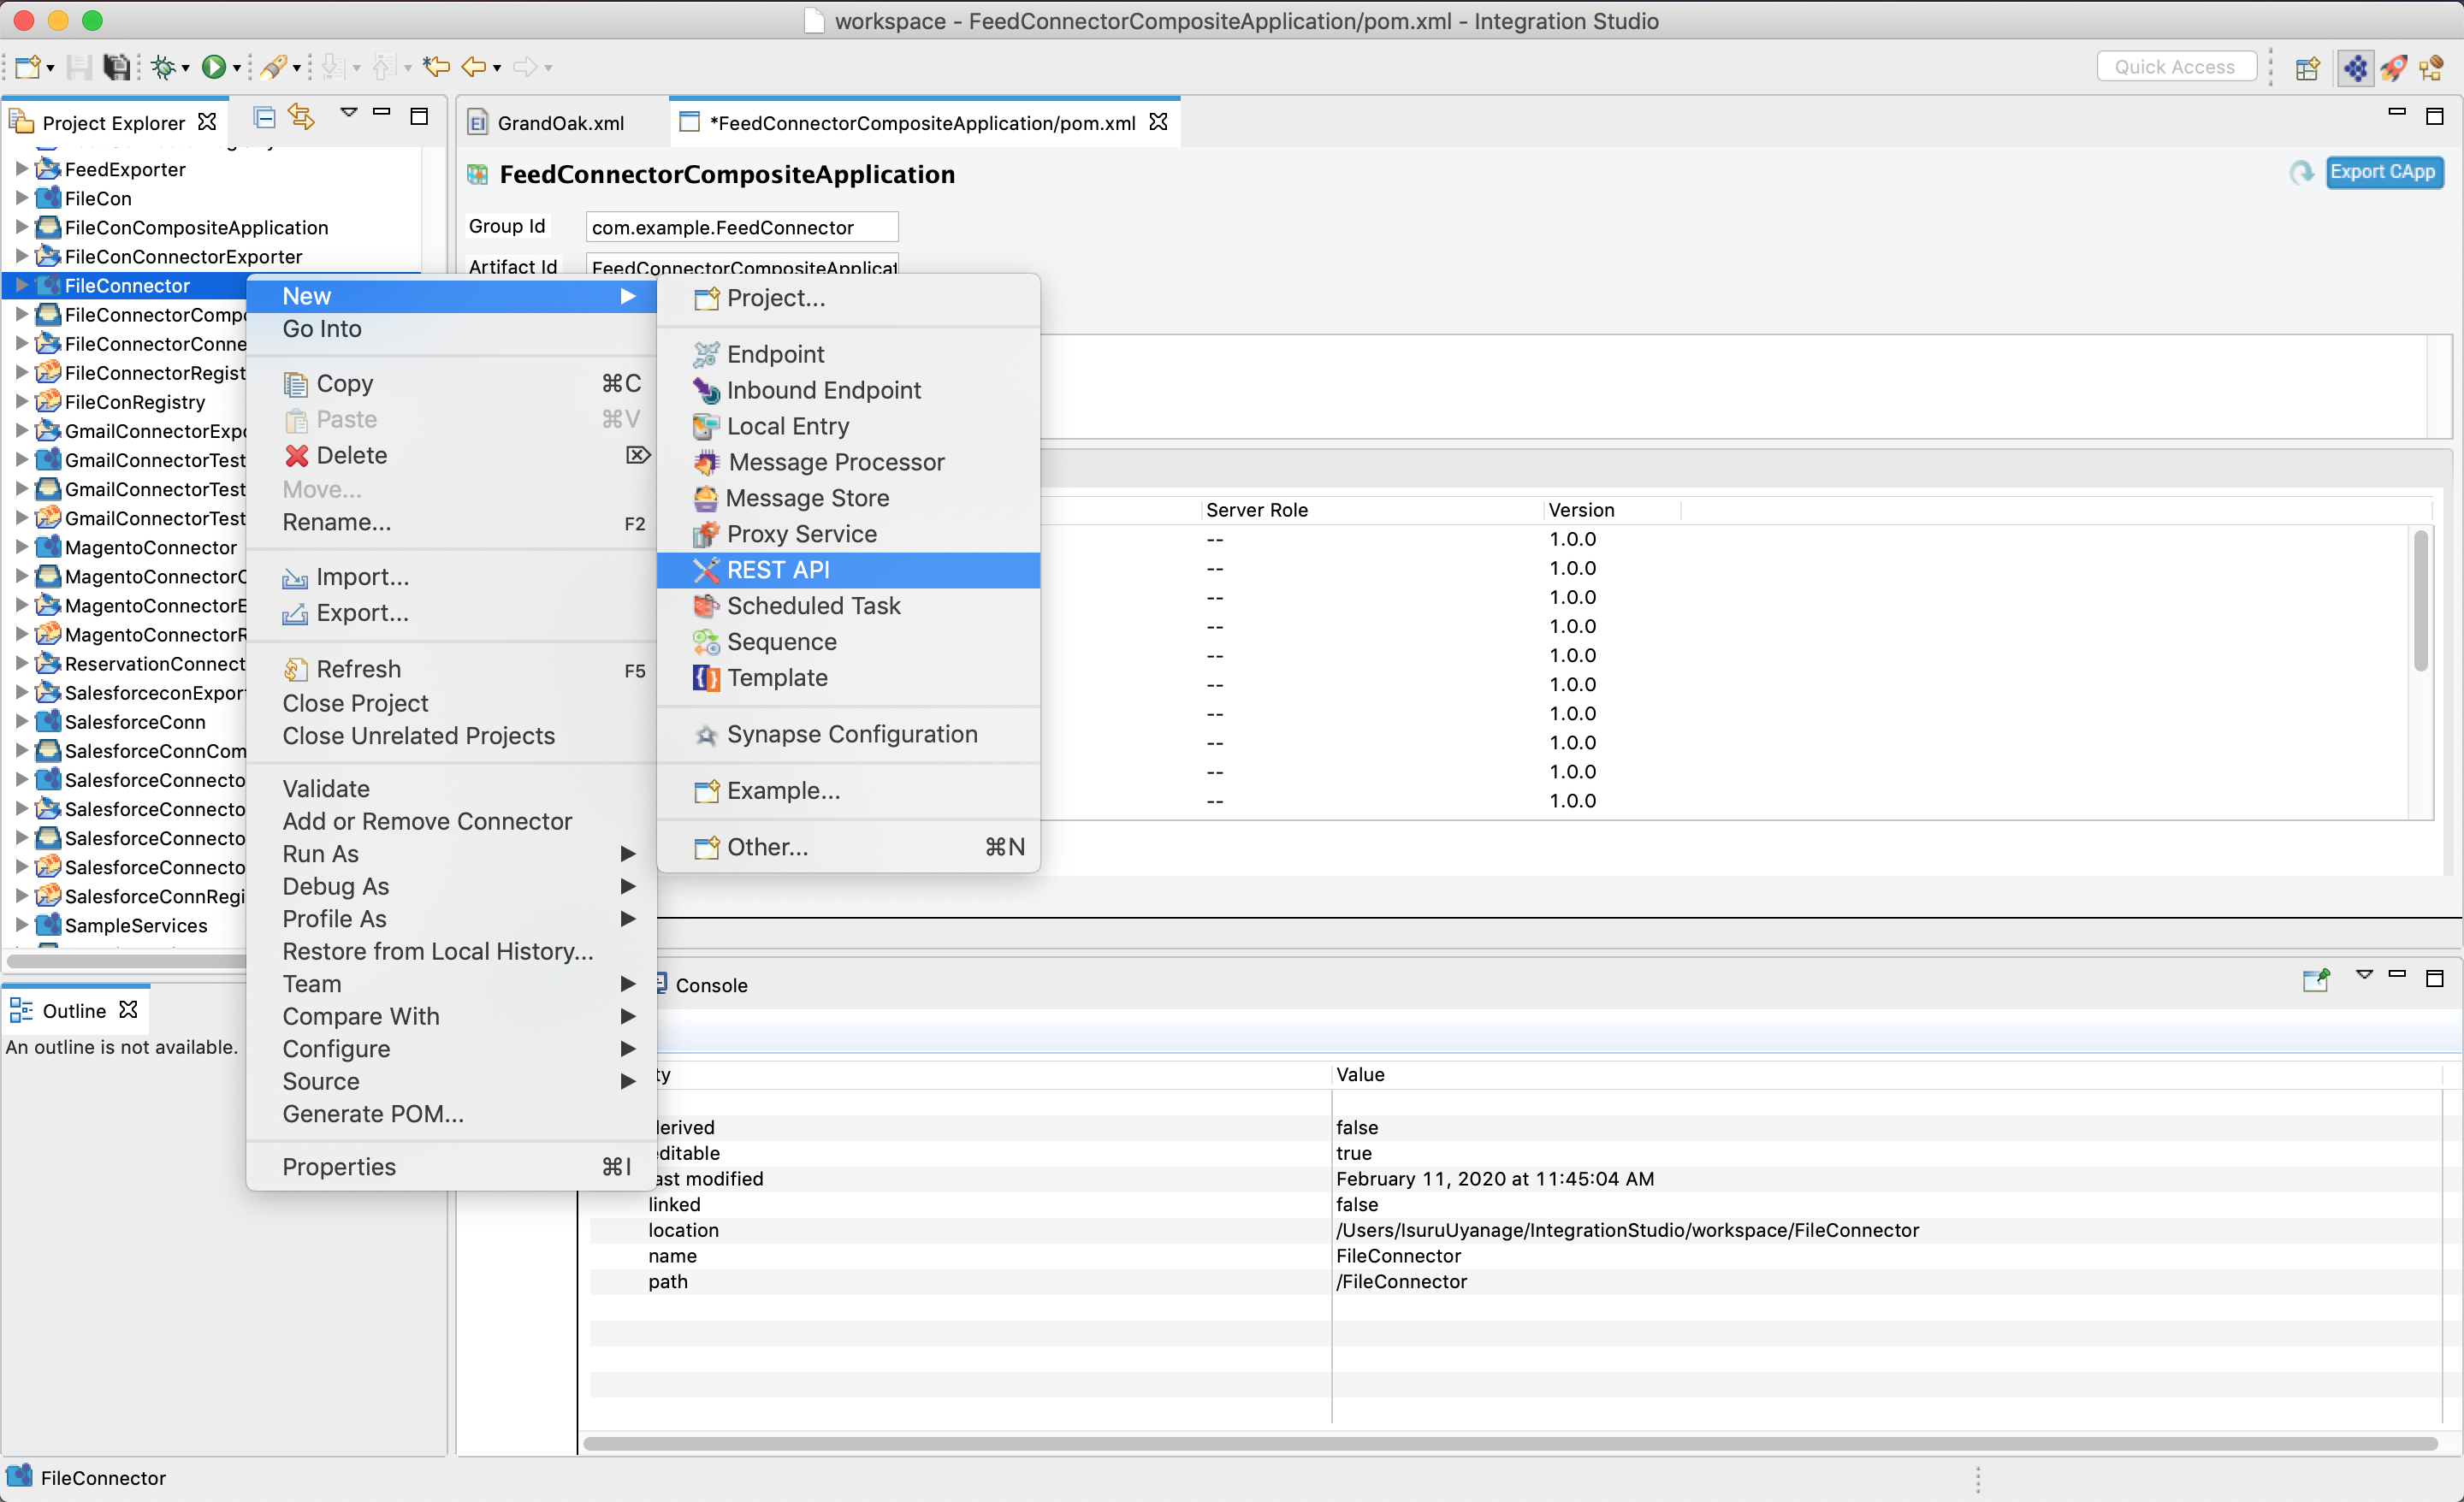
Right-click the created Integration Project and select, -> New -> Rest API to create the REST API.
-
Provide the API name as
MongoConnectorand the API context as/mongodbconnector. -
First, create the
/insertmanyresource. This API resource inserts documents into the MongoDB database.
Right-click on the API Resource and go to the Properties view. Let's use a URL template called/insertmanyas there are two API resources inside a single API. The method isPost.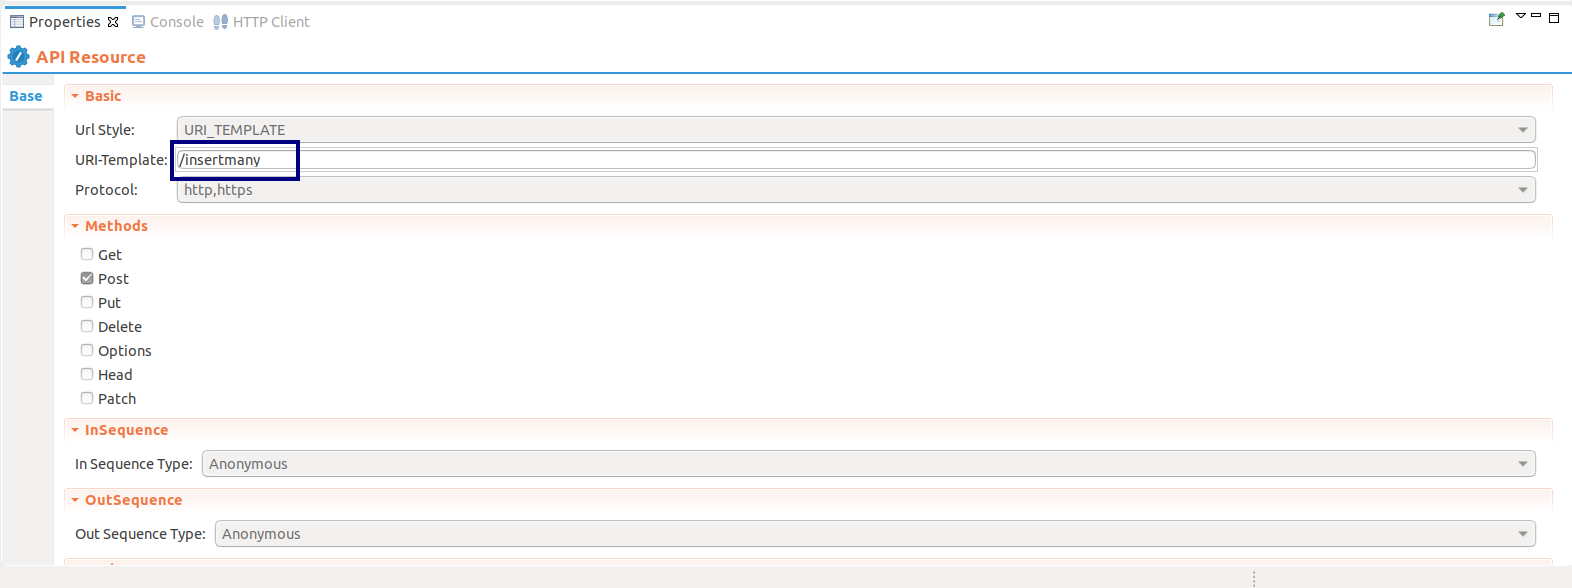
-
Drag the 'insertMany' operation of the MongoDB Connector to the Design view as shown below.

-
Create a connection from the Properties view by clicking the '+' icon as shown below.
Following values can be provided when connecting to the MongoDB database.
- Connection Name - connectionURI
- Connection Type - URI
- Connection URI - mongodb+srv://server.example.com/?connectTimeoutMS=300000&authSource=aDifferentAuthDB
- Database - TestDatabase

-
After the connection is successfully created, you can select the new connection from the 'Connection' menu in the properties view.

-
Next, provide JSON expressions for the following two properties. These expressions will retrieve the respective values from the JSON request payload.
- Collection - json-eval($.collection)
- Documents - json-eval($.documents)
-
Drag the Respond Mediator to the canvas. This returns the response message to the client (after inserting documents) as shown below.

-
Create the next API resource (which is
/find) by dragging another API resource to the Design view. This API resource will find all the documents matching the find query given by the user. This will also be aPOSTrequest. -
Drag the find operation of the Email Connector to the Design view as shown below.
-
Select 'connectionURI' as the connection from the 'Connection' menu in the properties view.
-
Next, provide JSON expressions for the following two properties. These expressions will retrieve the respective values from the JSON request payload.
- Collection - json-eval($.collection)
- Query - json-eval($.query)
-
Drag the Respond Mediator to the canvas. This returns the response message to the client (after retrieving documents) as shown below.
-
You can find the complete API XML configuration below. You can go to the source view and copy paste the following config.
<?xml version="1.0" encoding="UTF-8"?>
<api context="/mongodbconnector" name="MongodbConnector" xmlns="http://ws.apache.org/ns/synapse">
    <resource methods="POST" uri-template="/insertmany">
        <inSequence>
            <mongodb.insertMany configKey="connectionURI">
                <collection>{json-eval($.collection)}</collection>
                <documents>{json-eval($.documents)}</documents>
                <ordered>True</ordered>
            </mongodb.insertMany>
            <respond/>
        </inSequence>
        <outSequence/>
        <faultSequence/>
    </resource>
    <resource methods="POST" uri-template="/find">
        <inSequence>
            <mongodb.find configKey="connectionURI">
                <collection>{json-eval($.collection)}</collection>
                <query>{json-eval($.query)}</query>
            </mongodb.find>
            <respond/>
        </inSequence>
        <outSequence/>
        <faultSequence/>
    </resource>
</api>
Exporting Integration Logic as a CApp
CApp (Carbon Application) is the deployable artifact on the Enterprise Integrator runtime. Let us see how we can export integration logic we developed into a CApp along with the connector.
Creating Connector Exporter Project
In order to bundle Connector into a CApp a Connector Exporter Project is needed.
-
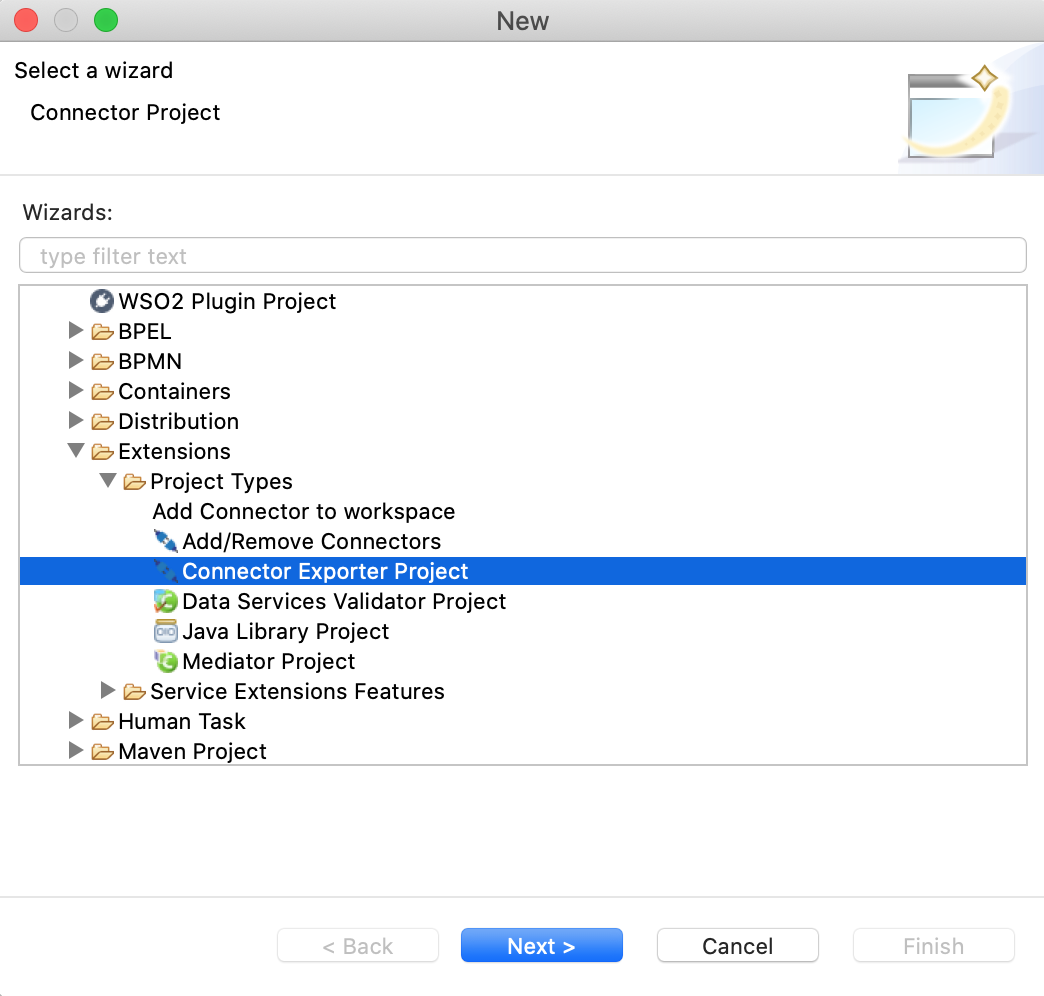
Navigate to File -> New -> Other -> WSO2 -> Extensions -> Project Types -> Connector Exporter Project.
-
Enter a name for the Connector Exporter Project.
-
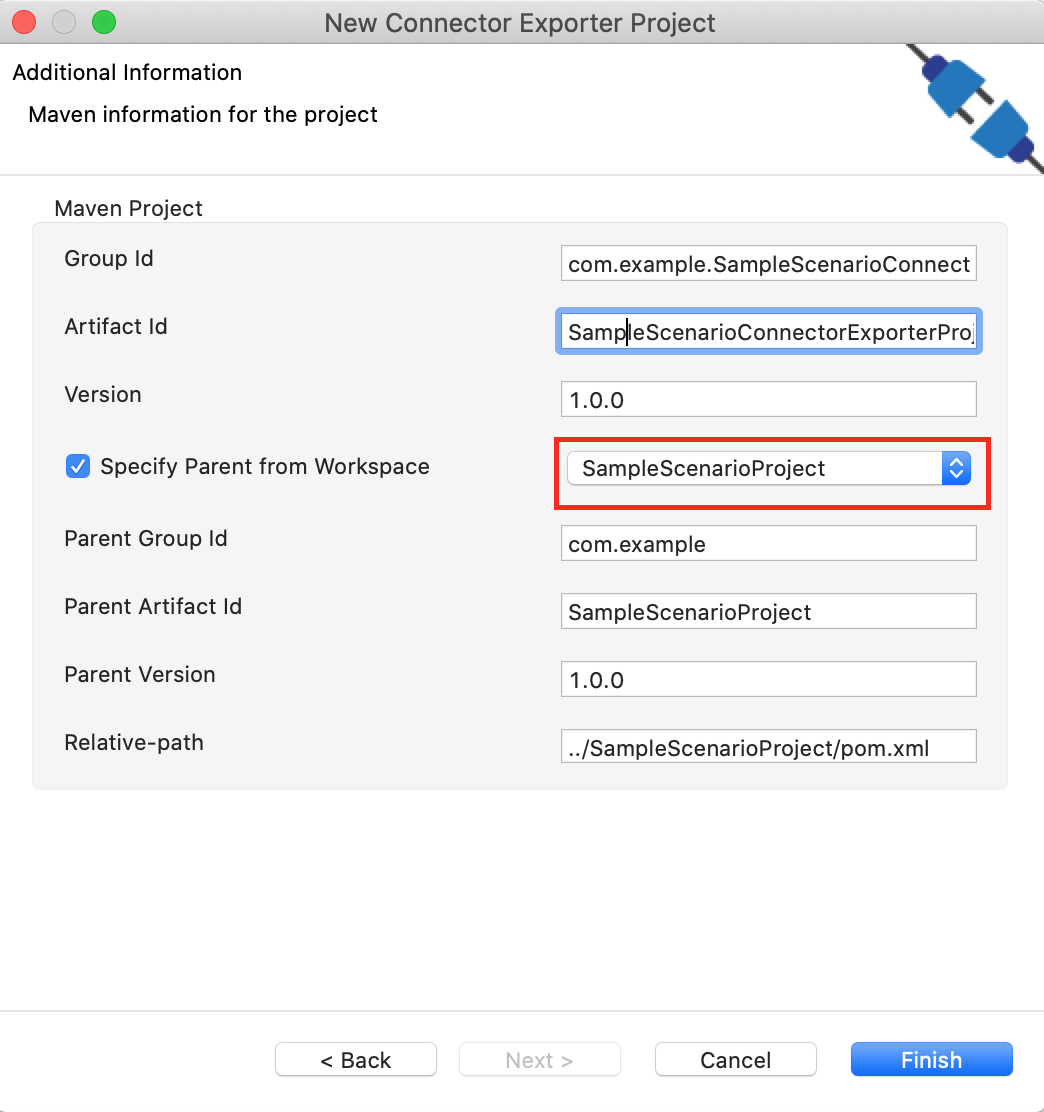
In the next screen select, Specify the parent from workspace and select the specific Integration Project you created from the dropdown.
-
Now you need to add the Connector to Connector Exporter Project that you just created. Right click on the Connector Exporter Project and select, New -> Add Remove Connectors -> Add Connector -> Add from Workspace -> Connector
-
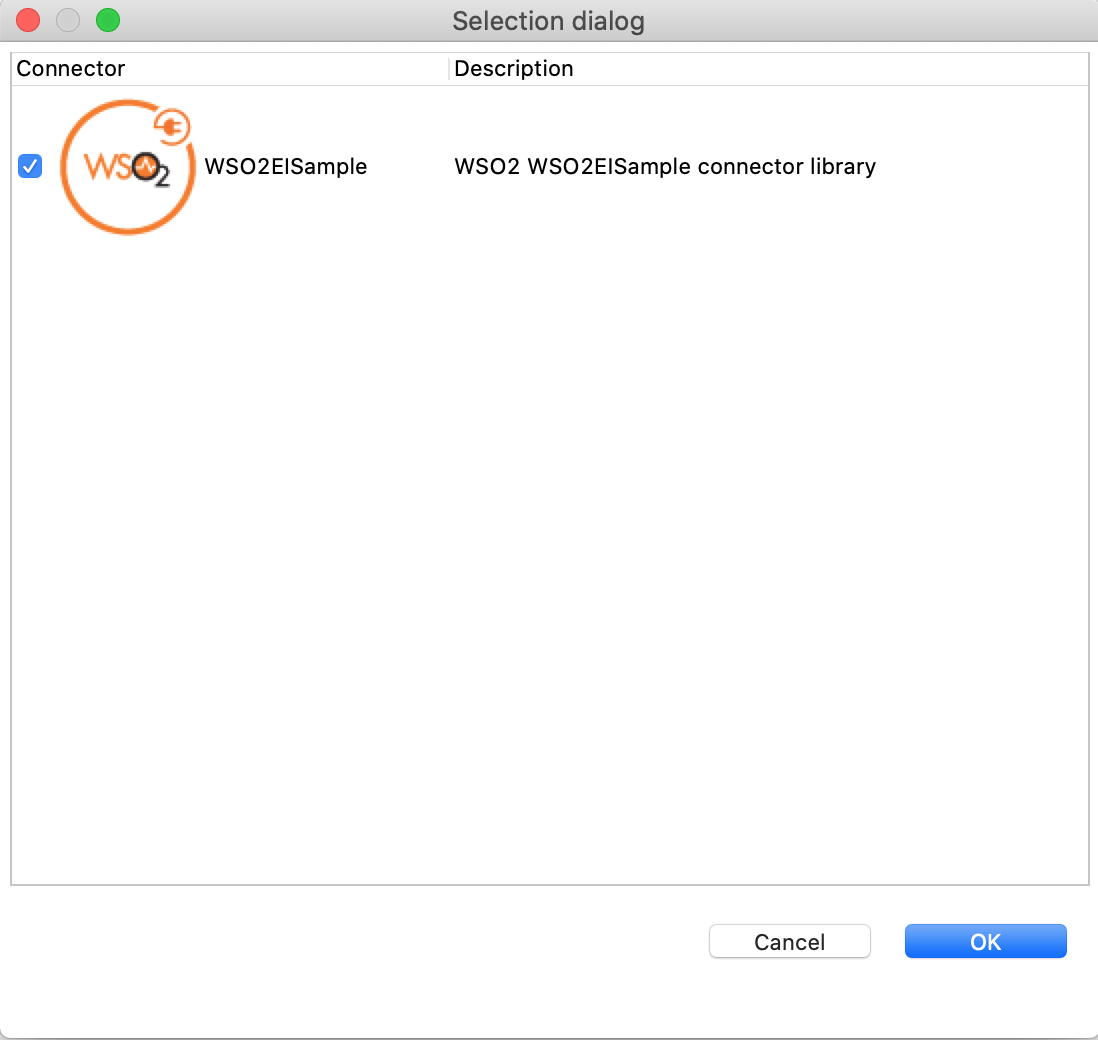
Once you are directed to the workspace, it displays all the connectors that exist in the workspace. You can select the relevant connector and click Ok.
Creating a Composite Application Project
To export the Integration Project as a CApp, a Composite Application Project needs to be created. Usually, when an Integration project is created, this project can be created as part of that project by Integration Studio. If not, you can specifically create it by navigating to File -> New -> Other -> WSO2 -> Distribution -> Composite Application Project.
Exporting the Composite Application Project
-
Right click on Composite Application Project and click on Export Composite Application Project.
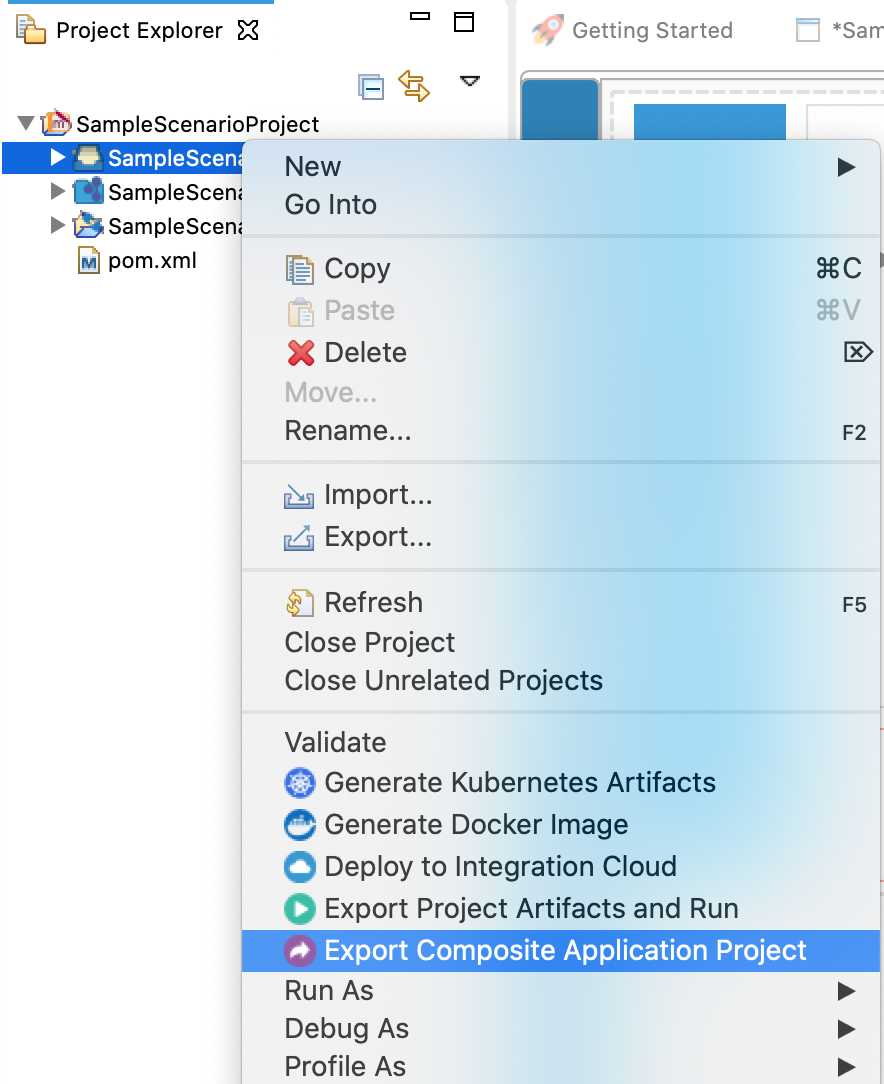
-
Select an Export Destination where you want to save the .car file.
-
In the next Create a deployable CAR file screen, select both the created Integration Project and the Connector Exporter Project to save and click Finish. The CApp will get created at the specified location provided at the previous step.

Get the project
You can download the ZIP file and extract the contents to get the project code.
Deployment
Follow these steps to deploy the exported CApp in the Enterprise Integrator Runtime.
Click here for instructions on removing the iterative mongodb server logs
Add the configuration below to remove the iterative org.mongodb.driver.cluster server logs;
-
Add the following logger to the
log4j2.propertiesfile in the<PRODUCT_HOME>/conffolder.logger.org-mongodb-driver-cluster.name = org.mongodb.driver.cluster logger.org-mongodb-driver-cluster.level = WARN -
Then, add
org-mongodb-driver-clusterto the list ofloggers.
Prerequisite
-
Download the Mongo java driver from here.
-
Add the driver to the
<PRODUCT_HOME>/dropinsfolder. -
Restart the server.
Testing
Insert Many Operation
-
Create a file named
insertmany.jsonwith the following payload:{ "collection": "TestCollection", "documents": [ { "name": "Jane Doe", "_id": "123" }, { "name": "John Doe", "_id": "1234" }, { "name": "Jane Doe", "_id": "12345" } ] } -
Invoke the API as shown below using the curl command.
Info
The Curl application can be downloaded from here.
curl -H "Content-Type: application/xml" --request POST --data @insertmany.json http://localhost:8290/mongodbconnector/insertmanyExpected Response : You should get a response as given below and the data will be added to the database.
{
    "InsertManyResult": "Successful"
}
Find Operation
Note
In order to find documents by ObjectId, the find query payload should be in the following format:
{
    "query": {
        "_id": {
            "$oid": "6011b180007ce60ab2ad74a5"
        }
    }
}-
Create a file called
find.jsonwith the following payload.{ "collection": "TestCollection", "query": { "name": "Jane Doe" } } -
Invoke the API using the curl command shown below.
Info
Curl Application can be downloaded from here.
curl -H "Content-Type: application/xml" --request POST --data @find.json http://localhost:8290/mongodbconnector/findExpected Response : You should get a response similar to the one given below.
[
    {
        "_id": "123",
        "name": "Jane Doe"
    },
    {
        "_id": "12345",
        "name": "Jane Doe"
    }
]
What's Next
- You can deploy and run your project on Docker or Kubernetes. See the instructions in Running the Micro Integrator on Containers.
- To customize this example for your own scenario, see MongoDB Connector Configuration documentation for all operation details of the connector.
