Documentum Connector Example
Documentum Connector can be used to perform operations on OpenText Documentum Enterprise content management system.
What you'll build
This example explains how to use Documentum Connector to create a folder and retrieve cabinet details from Documentum. The user sends a payload with the repository name, parent folder ID and name of the folder to be created. Then the connector communicates with Documentum to create a folder under the parent folder in the specified cabinet.
The example consists of an API named as Documentum API with two resources create folder and get cabinets.
Create Folder /createfolder: The user sends the request payload which includes the repository, parent folder ID and folder name. This request is sent to WSO2 EI by invoking the Documentum API. It will create the new folder in Documentum under the parent folder given.
Get Cabinets /getcabinets: The user sends the request payload, containing the repository name to list cabinets present under that in Documentum. This request is sent to WSO2 EI where the Documentum Connector API resides. Once the API is invoked, it returns the list of cabinets.
Create Document /createdocument: The user sends the request payload which includes the folder ID and document name. This request is sent to WSO2 EI where the Documentum Connector API resides. Once the API is invoked, it will create the new Document in Documentun under the given folder ID.
The following diagram shows the overall solution.

If you do not want to configure this yourself, you can simply get the project and run it.
Configure the connector in WSO2 Integration Studio
Connectors can be added to integration flows in WSO2 Integration Studio, which is the tooling component of WSO2 EI. Once added, the operations of the connector can be dragged onto your canvas and added to your resources.
Import the connector
Follow these steps to set up the Integration Project and the Connector Exporter Project.
-
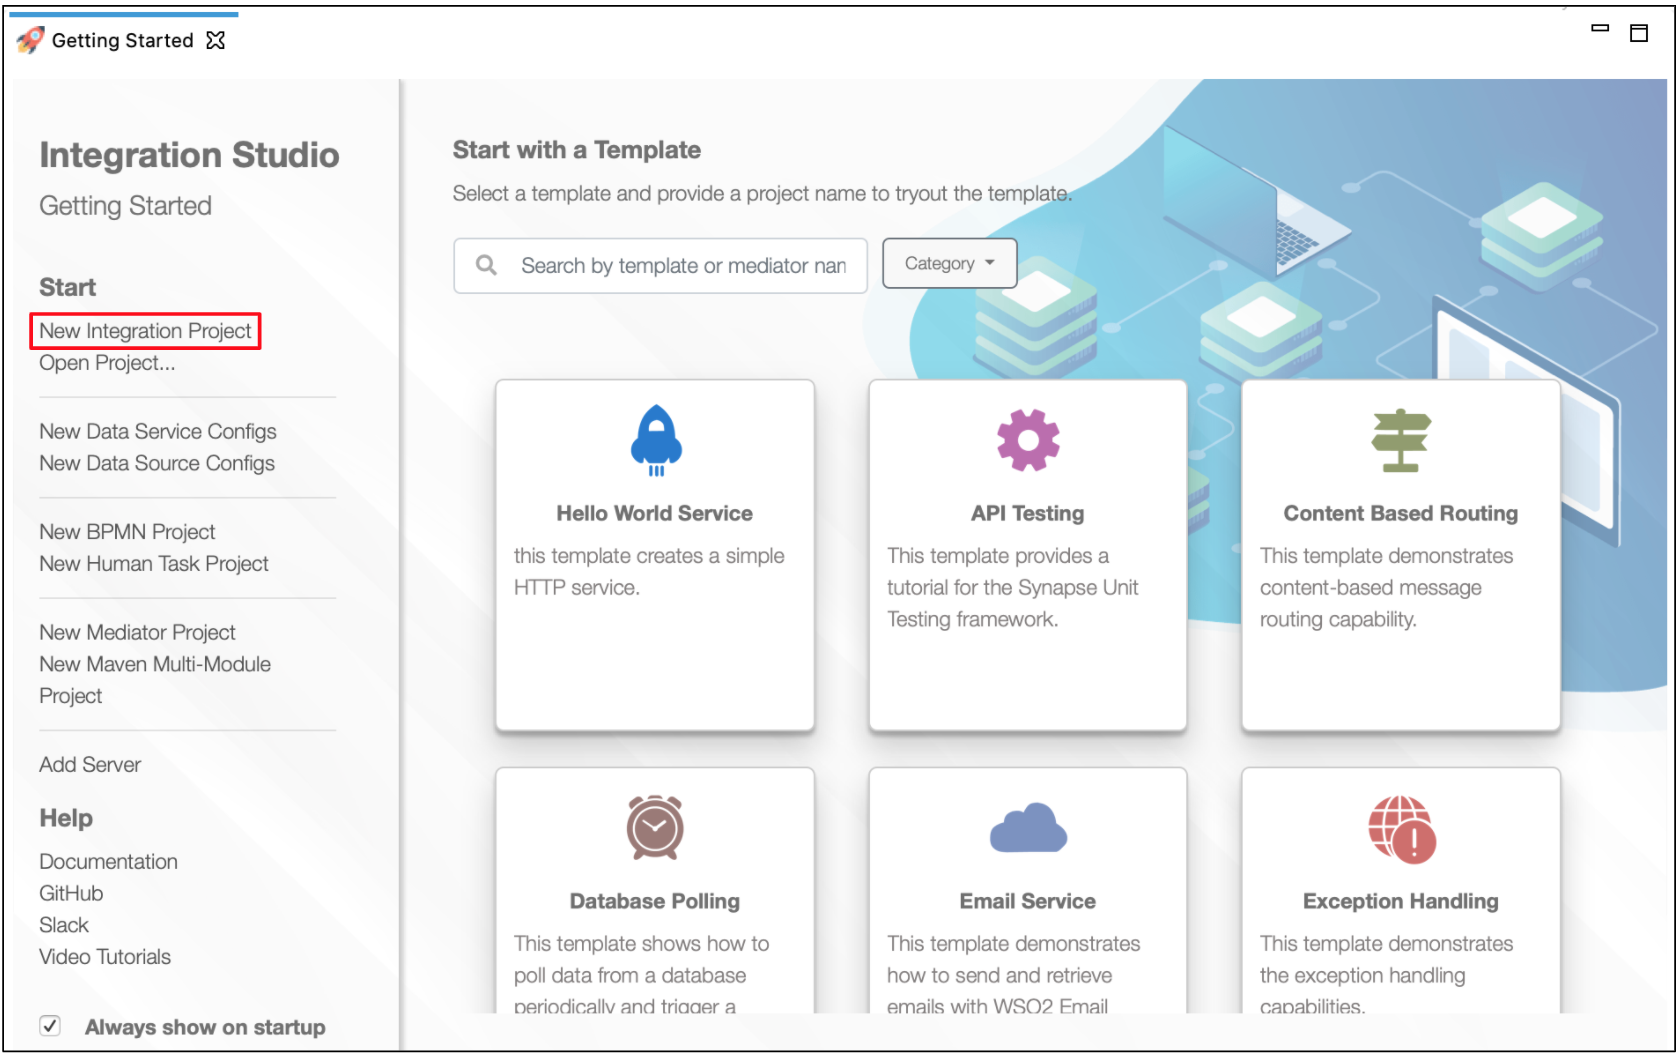
Open WSO2 Integration Studio and create an Integration Project.
-
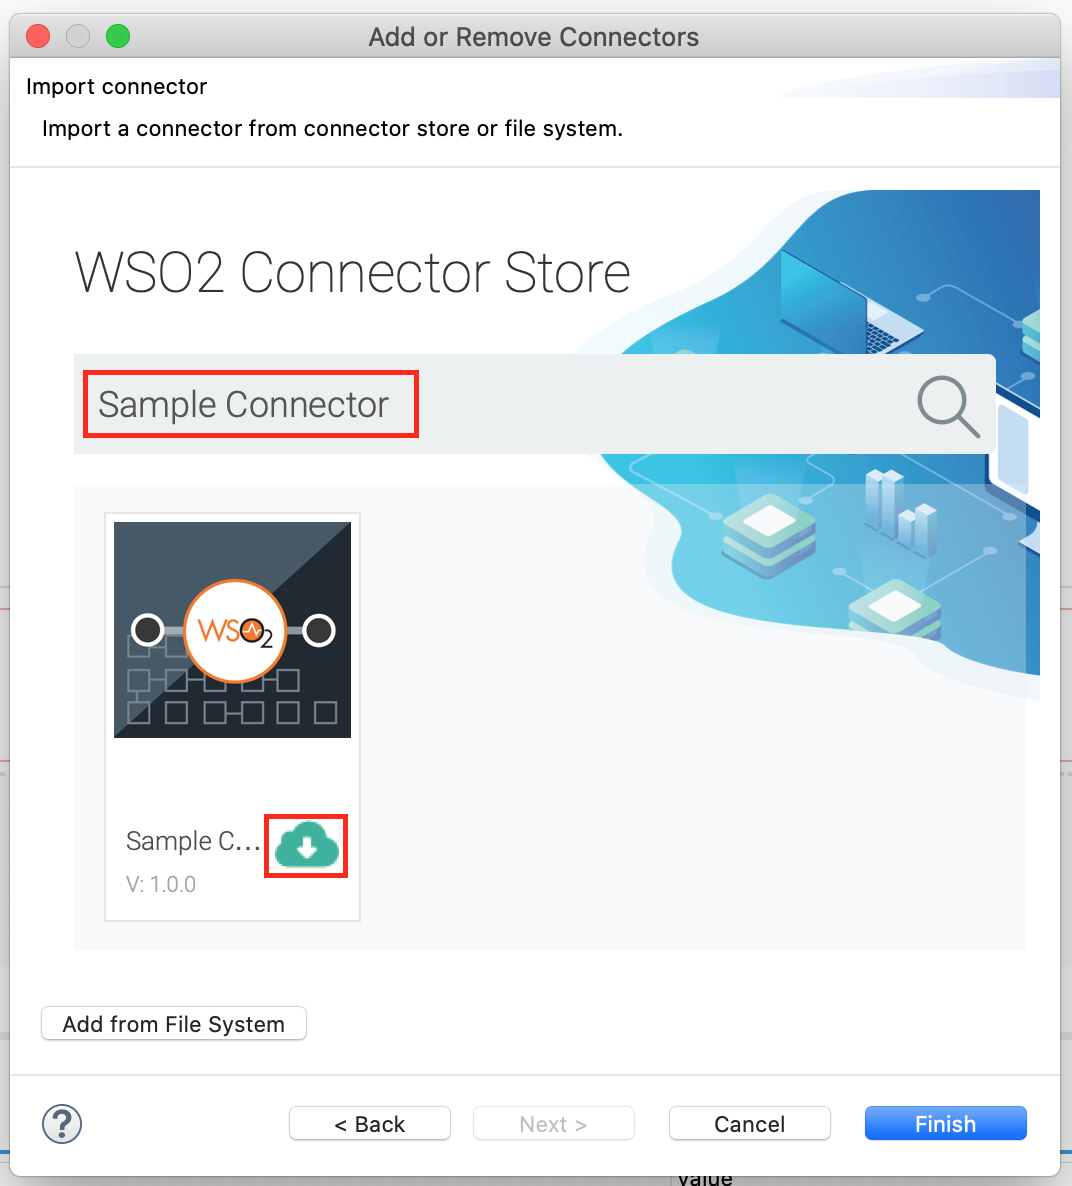
Right click on the project that you created and click on Add or Remove Connector -> Add Connector. You will get directed to the WSO2 Connector Store.
-
Search for the specific connector required for your integration scenario and download it to the workspace.
-
Click Finish, and your Integration Project is ready. The downloaded connector is displayed on the side palette with its operations.
-
You can drag and drop the operations to the design canvas and build your integration logic.

Now the connector is added to the palette.
Configure a Proxy Service
-
Right click on the project and go to New -> Proxy Service.
-
Select Create A New Proxy Service from the options that appear and click Next.
-
Provide a name for the proxy service and click Finish.
-
Add the following configuration to the source view of the project.
<?xml version="1.0" encoding="UTF-8"?>
<proxy name="documentum_createfolder" startOnLoad="true" transports="http https" xmlns="http://ws.apache.org/ns/synapse">
    <target>
        <inSequence>
            <property expression="json-eval($.repo)" name="repo" scope="default" type="STRING"/>
            <property expression="json-eval($.objectcodeID)" name="objectcode" scope="default" type="STRING"/>
            <property expression="json-eval($.foldername)" name="foldername" scope="default" type="STRING"/>
            <documentum.createfolder>
                <repo>{$ctx:repo}</repo>
                <objectcode>{$ctx:objectcode}</objectcode>
                <foldername>{$ctx:foldername}</foldername>
            </documentum.createfolder>
            <respond/>
        </inSequence>
        <outSequence/>
        <faultSequence/>
    </target>
</proxy>
You can see the newly added connector in the design palette.
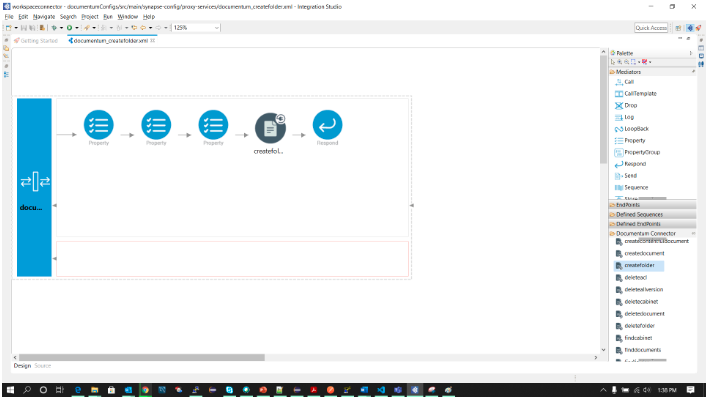
Configure the connection and create folder operation
-
Do the following configurations to initialize the connector.
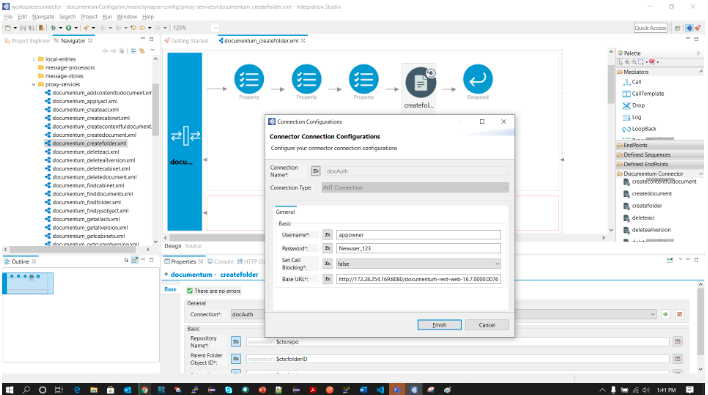
-
Do the following configurations to set up the
create folderoperation.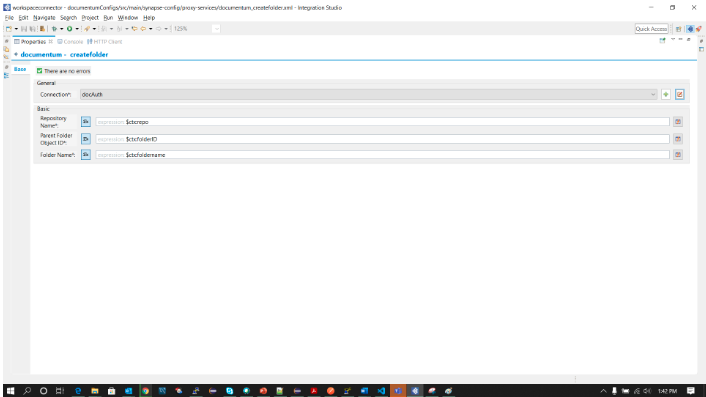
Now we can export the imported connector and the API into a single CAR application. CAR application is the one we are going to deploy to server runtime.
Exporting Integration Logic as a CApp
CApp (Carbon Application) is the deployable artifact on the Enterprise Integrator runtime. Let us see how we can export integration logic we developed into a CApp along with the connector.
Creating Connector Exporter Project
In order to bundle Connector into a CApp a Connector Exporter Project is needed.
-
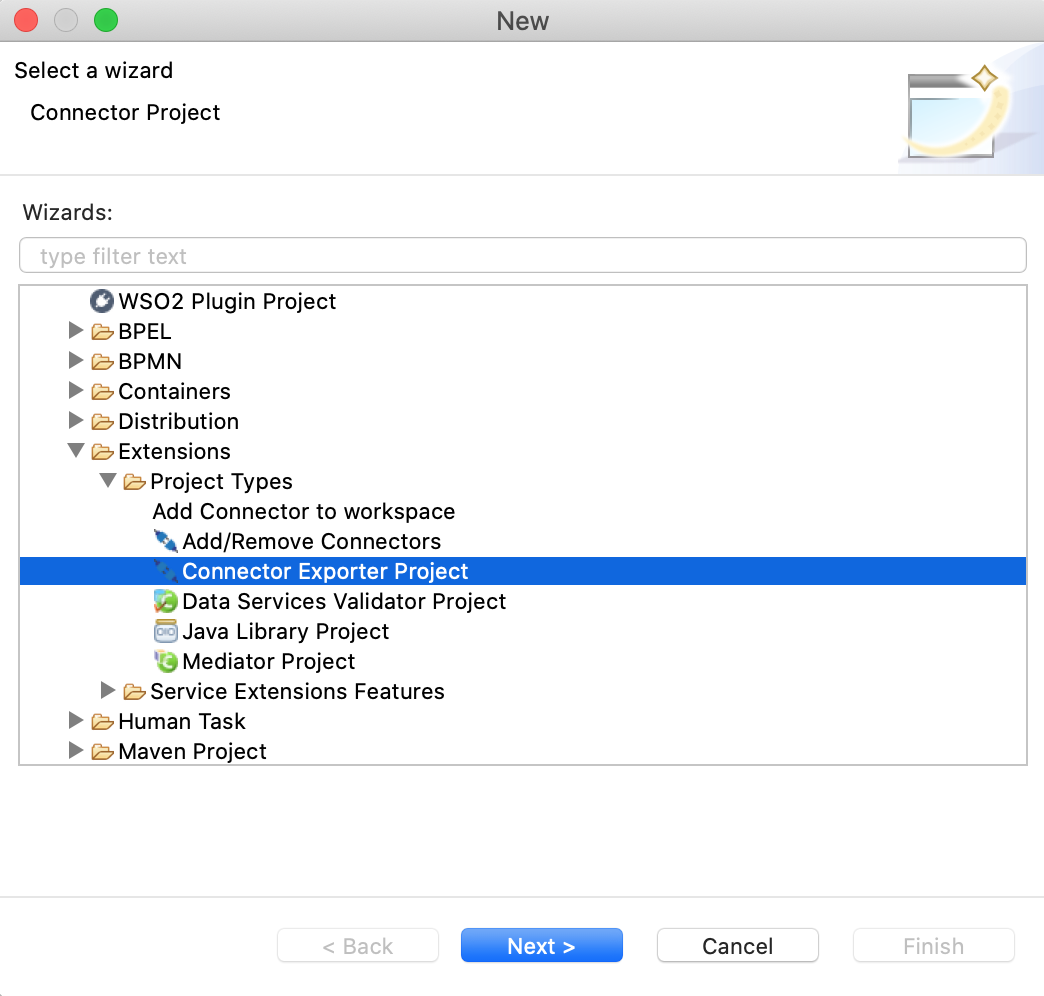
Navigate to File -> New -> Other -> WSO2 -> Extensions -> Project Types -> Connector Exporter Project.
-
Enter a name for the Connector Exporter Project.
-
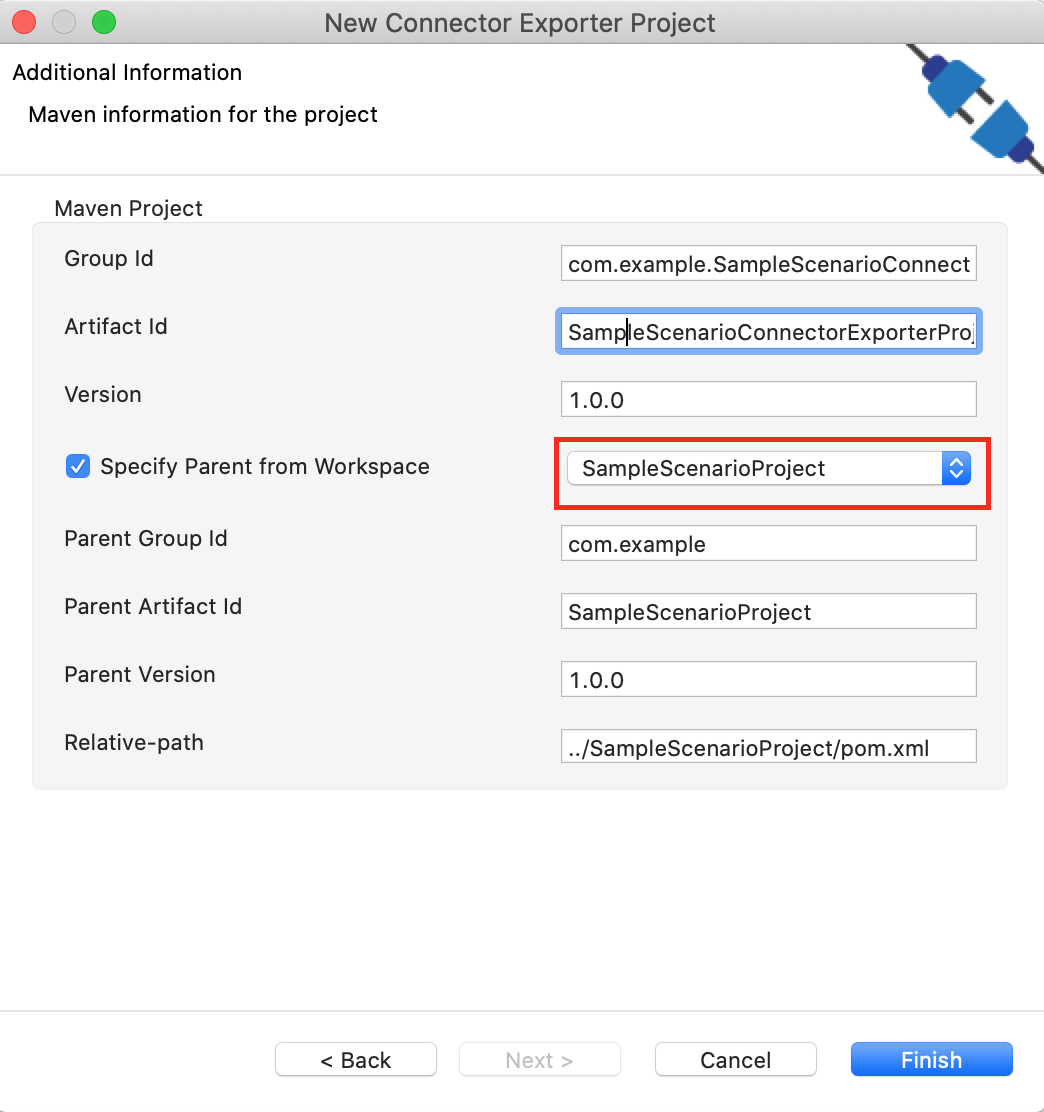
In the next screen select, Specify the parent from workspace and select the specific Integration Project you created from the dropdown.
-
Now you need to add the Connector to Connector Exporter Project that you just created. Right click on the Connector Exporter Project and select, New -> Add Remove Connectors -> Add Connector -> Add from Workspace -> Connector
-
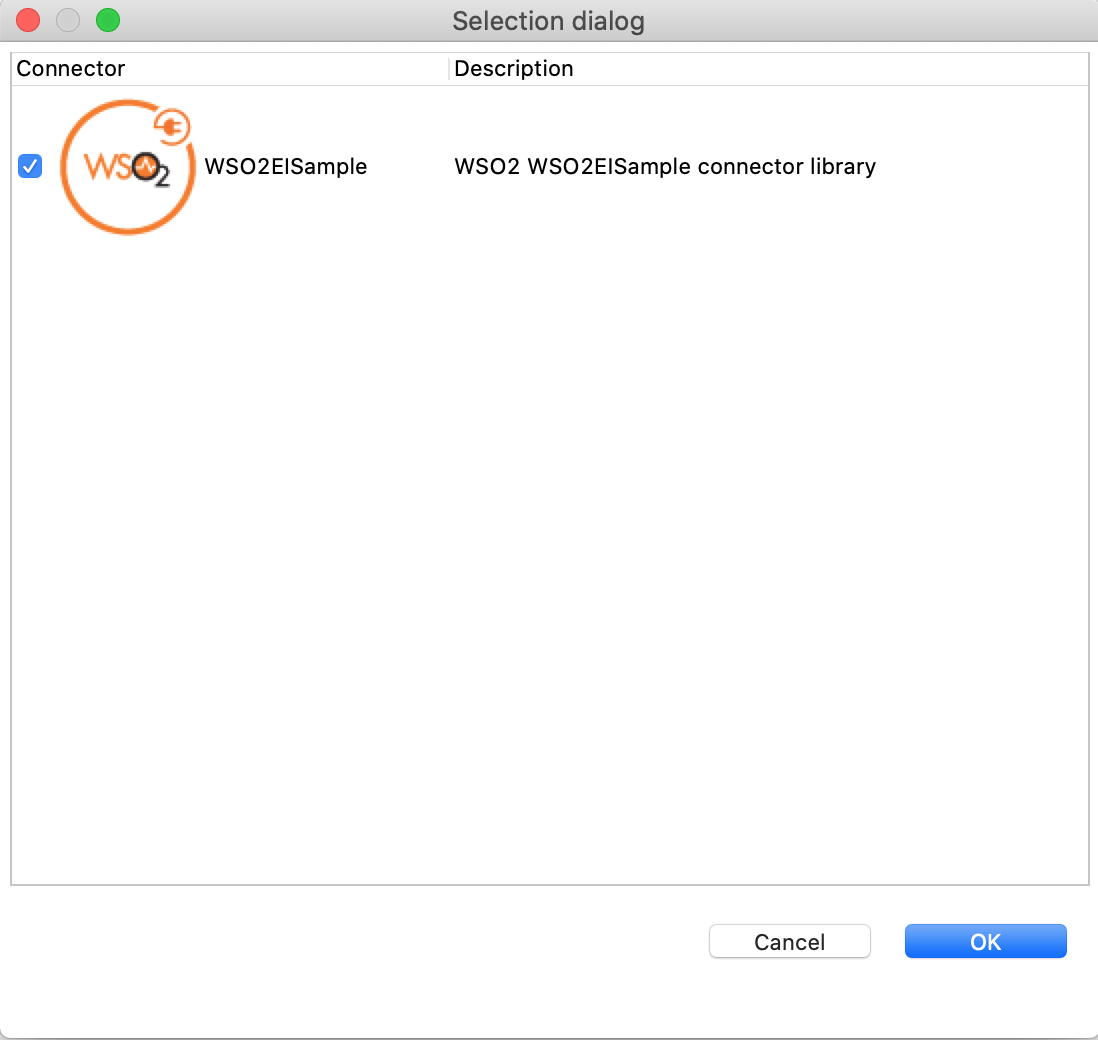
Once you are directed to the workspace, it displays all the connectors that exist in the workspace. You can select the relevant connector and click Ok.
Creating a Composite Application Project
To export the Integration Project as a CApp, a Composite Application Project needs to be created. Usually, when an Integration project is created, this project can be created as part of that project by Integration Studio. If not, you can specifically create it by navigating to File -> New -> Other -> WSO2 -> Distribution -> Composite Application Project.
Exporting the Composite Application Project
-
Right click on Composite Application Project and click on Export Composite Application Project.
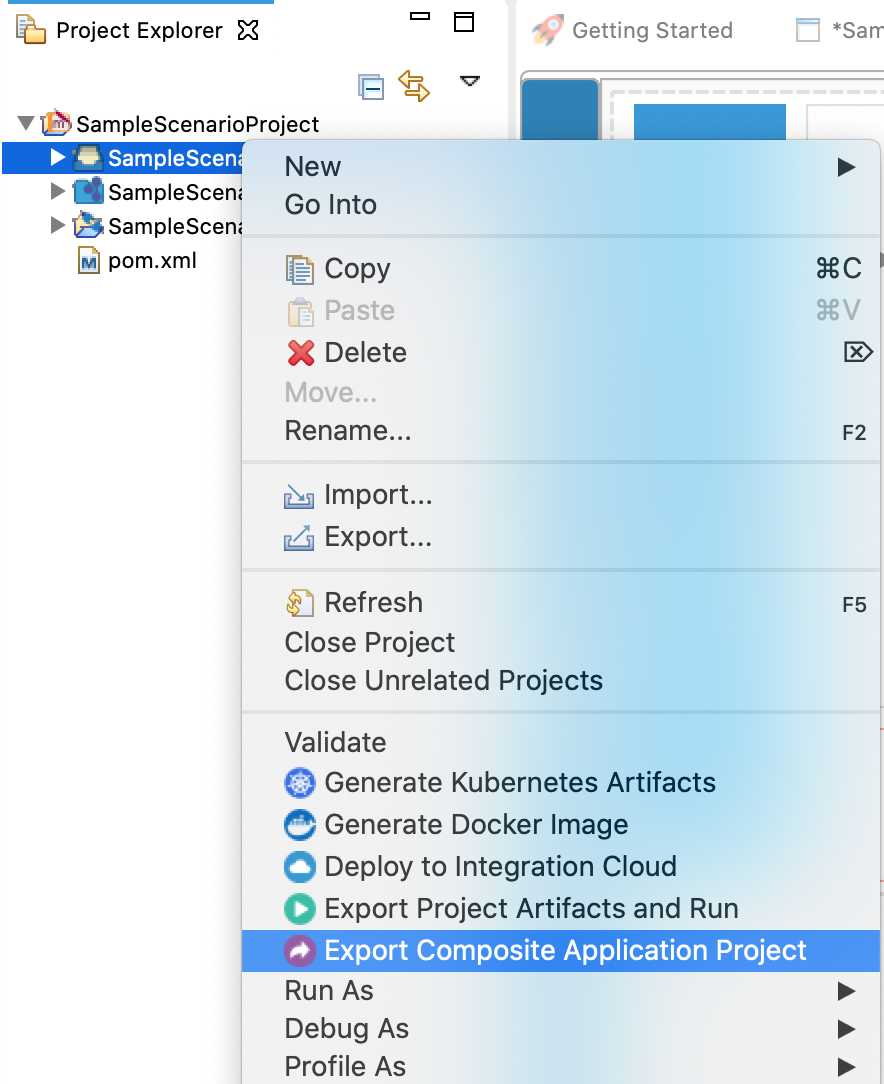
-
Select an Export Destination where you want to save the .car file.
-
In the next Create a deployable CAR file screen, select both the created Integration Project and the Connector Exporter Project to save and click Finish. The CApp will get created at the specified location provided at the previous step.

Now the exported CApp can be deployed in Enterprise Integrator Runtime so that we can run it and test.
Get the project
You can download the ZIP file and extract the contents to get the project code.
Tip
You may need to update the simulator details and make other such changes before deploying and running this project.
Deployment
Follow these steps to deploy the exported CApp in the Enterprise Integrator Runtime.
Testing
Create folder operation
-
Open Postman and use a POST operation with the following sample request payload, then click on Send.
{ "repos":"doctest", "objectcodeID":"0b0277b68004e7dd", "foldername":"demo" } -
You will see the following sample response payload.
    {
        "name":"folder",
        "type":"dm_folder",
        "definition":"http://183.28.254.179:8078/documentum-rest-web-16.7.0000.0076/repositories/doctest/types/dm_folder",
        "properties": {
            "object_name":"testchildfolder",
            "r_object_type":"dm_folder",
            "title":"",
            "subject":"",
            "authors": null,
            "keywords": null,
            "a_application_type": "",
            "a_status": "",
            "r_creation_date": "2020-07-17T04:30:56.000+00:00",
            "r_modify_date": "2020-07-17T04:30:56.000+00:00",
            "r_modifier": "appowner",
            "r_access_date": null,
            "a_is_hidden": false,
            "i_is_deleted": false,
            "a_retention_date": null,
            "a_archive": false,
            "a_compound_architecture": "",
            "a_link_resolved": false,
            "i_reference_cnt": 1,
            "i_has_folder": true,
            "i_folder_id": [
                "0b0277b68004e7dd"
            ],
            "r_composite_id": null,
            "r_composite_label": null,
            "r_component_label": null,
            "r_order_no": null,
            "r_link_cnt": 0,
            "r_link_high_cnt": 0,
            "r_assembled_from_id": "0000000000000000",
            "r_frzn_assembly_cnt": 0,
            "r_has_frzn_assembly": false,
            "resolution_label": "",
            "r_is_virtual_doc": 0,
            "i_contents_id": "0000000000000000",
            "a_content_type": "",
            "r_page_cnt": 0,
            "r_content_size": 0,
            "a_full_text": true,
            "a_storage_type": "",
            "i_cabinet_id": "0c0277b68002952c",
            "owner_name": "appowner",
            "owner_permit": 7,
            "group_name": "docu",
            "group_permit": 5,
            "world_permit": 4,
            "i_antecedent_id": "0000000000000000",
            "i_chronicle_id": "0b0277b6800584f7",
            "i_latest_flag": true,
            "r_lock_owner": "",
            "r_lock_date": null,
            "r_lock_machine": "",
            "log_entry": "",
            "r_version_label": [
                "1.0",
                "CURRENT"
            ],
            "i_branch_cnt": 0,
            "i_direct_dsc": false,
            "r_immutable_flag": false,
            "r_frozen_flag": false,
            "r_has_events": false,
            "acl_domain": "appowner",
            "acl_name": "dm_450277b680000101",
            "a_special_app": "",
            "i_is_reference": false,
            "r_creator_name": "appowner",
            "r_is_public": true,
            "r_policy_id": "0000000000000000",
            "r_resume_state": 0,
            "r_current_state": 0,
            "r_alias_set_id": "0000000000000000",
            "a_effective_date": null,
            "a_expiration_date": null,
            "a_publish_formats": null,
            "a_effective_label": null,
            "a_effective_flag": null,
            "a_category": "",
            "language_code": "",
            "a_is_template": false,
            "a_controlling_app": "",
            "r_full_content_size": 0.0,
            "a_extended_properties": null,
            "a_is_signed": false,
            "a_last_review_date": null,
            "i_retain_until": null,
            "r_aspect_name": null,
            "i_retainer_id": null,
            "i_partition": 0,
            "i_is_replica": false,
            "i_vstamp": 0,
            "r_folder_path": [
                "/WSO2 Connector/Sample/testchildfolder"
            ],
            "i_ancestor_id": [
                "0b0277b6800584f7",
                "0b0277b68004e7dd",
                "0c0277b68002952c"
            ],
            "r_object_id": "0b0277b6800584f7"
        }
    }
What's next
- You can deploy and run your project on Docker or Kubernetes. See the instructions in Running the Micro Integrator on Containers.
