Setting up the Google PubSub Environment
The Google Pub/Sub connector allows you to access the Google Cloud Pub/Sub API Version v1 through WSO2 EI.
To work with the Google Pub/Sub connector, you need to have a Google Cloud Platform account. If you do not have a Google Cloud Platform account, go to console.cloud.google.com, and create a Google Cloud Platform trial account.
Google Pub/Sub uses the OAuth 2.0 protocol for authentication and authorization. All requests to the Google Cloud Pub/Sub API must be authorized by an authenticated user. For information on how to obtain authentication and authorization user credentials, see the following section.
Obtaining user credentials
Follow the steps below to generate user credentials.
Obtaining a client ID and client secret
-
Go to https://console.developers.google.com/projectselector/apis/credentials, and sign in to your Google account.

-
If you do not already have a project, you create a new project, click Create credentials and then select OAuth client ID.

-
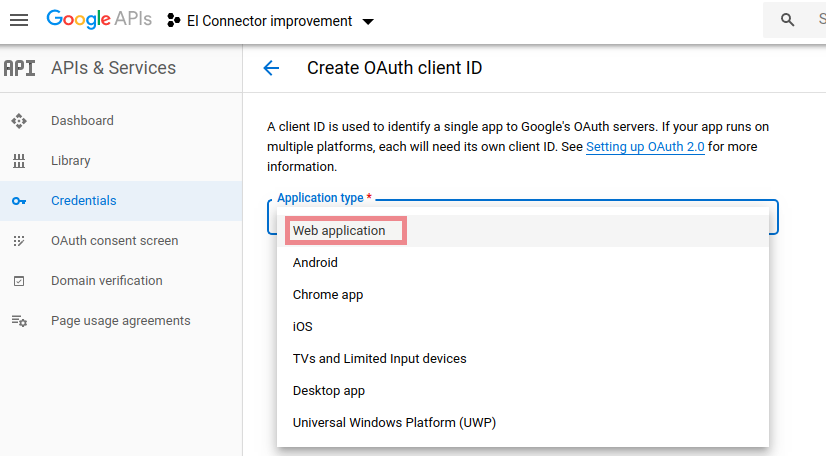
Next, select Web Application, and create a client.
-
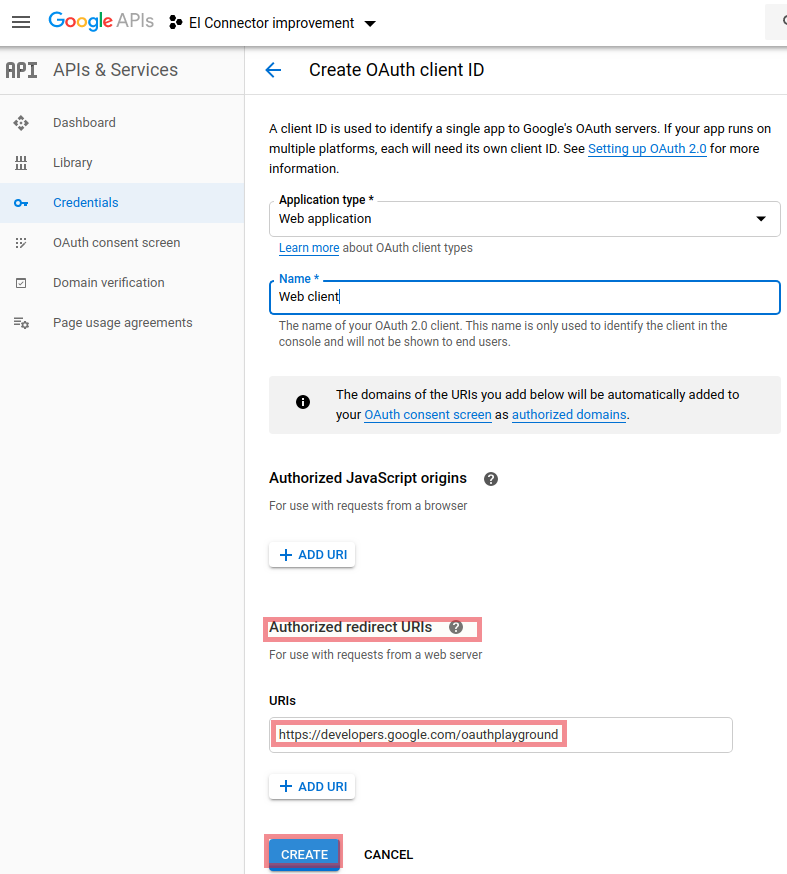
Add https://developers.google.com/oauthplayground as the redirect URL under Authorized redirect URIs, and then click Create. This displays the client ID and client secret.
-
Make a note of the client ID and client secret that is displayed, and then click OK.

-
Click Library on the left navigation pane.

-
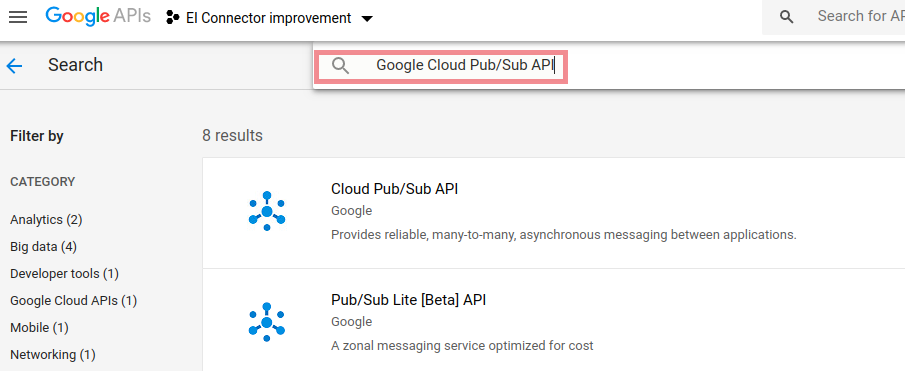
Search Google Cloud Pub/Sub API under the Big data or Networking category.
-
Click Enable. This enables the Google Cloud Pub/Sub API.
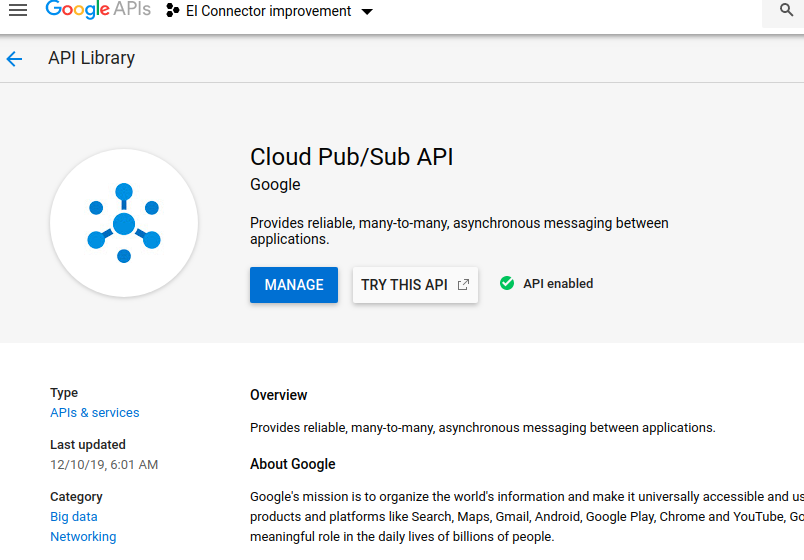
Obtaining an access token and refresh token
-
Navigate to OAuth playground, click the gear icon on the top right corner of the screen, and select Use your own OAuth credentials.
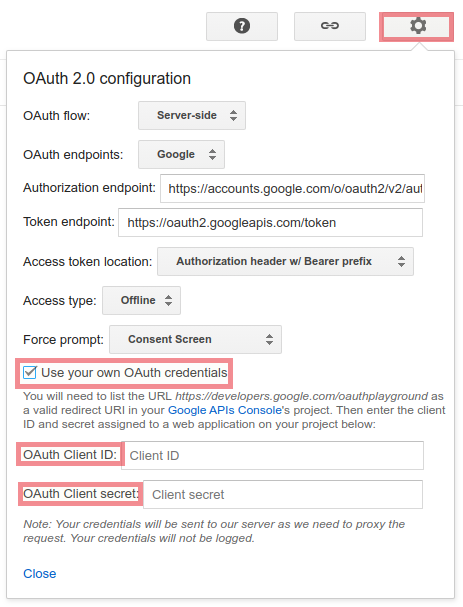
-
Specify the client ID and client secret that you obtained in step 3 above, and click Close.
-
Under Step 1 on the screen, select Google Cloud Pub/Sub API from the list of APIs, and select all the scopes that are listed down under Google Cloud Pub/Sub API.
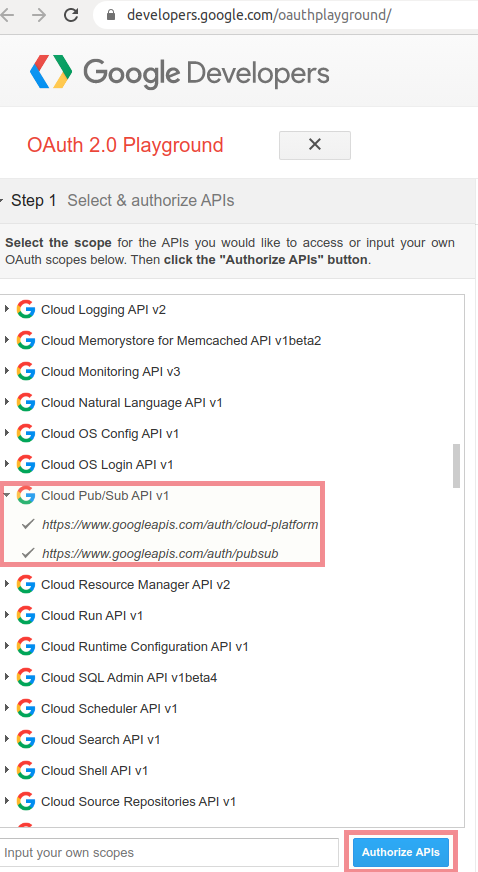
-
Click Authorize APIs. This requests for permission to access your profile details.
-
Click ALLOW.
-
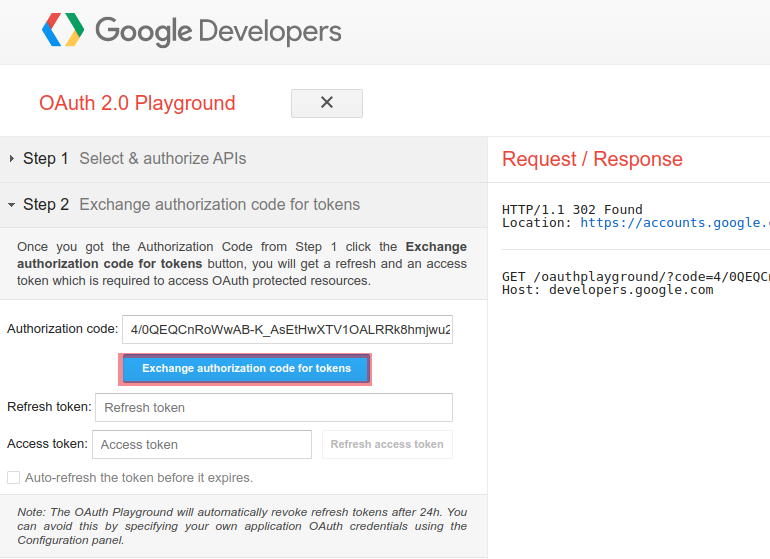
In Step 2 on the screen, click Exchange authorization code for tokens to generate and view the access token and refresh token.
