Connecting Web APIs/Cloud Services
What you'll build
When you integrate the systems in your organizaion, it is also necessary to integrate with third-party systems and its capabilities to enhance your services. WSO2 Micro Integrator uses Connectors for the purpose of referring the APIs of third-party systems.
In this tutorial, when a client sends an appointment reservation request to the Micro Integrator, the client should receive an email confirming the appointment reservation details. To build this use case, you can add a GMail connector to the mediation flow of the REST resource that you defined in the previous tutorial.
Let's get started!
Step 1: Set up the workspace
Set up WSO2 Integration Studio as follows:
- Download the relevant WSO2 Integration Studio based on your operating system. The path to the extracted/installed folder is referred to as
MI_TOOLING_HOMEthroughout this tutorial. - If you did not try the asynchronous messaging tutorial yet:
- Download the pre-packaged project.
- Open WSO2 Integration Studio and go to File -> Import.
- Select Existing WSO2 Projects into workspace under the WSO2 category, click Next, and then upload the pre-packaged project.
Optionally, you can set up the CLI tool for artifact monitoring. This will later help you get details of the artifacts that you deploy in your Micro Integrator.
- Go to the WSO2 Micro Integrator website.
- Click Download -> Other Resources and click CLI Tooling to download the tool.
- Extract the downloaded ZIP file. This will be your
MI_CLI_HOMEdirectory. - Export the
MI_CLI_HOME/bindirectory path as an environment variable. This allows you to run the tool from any location on your computer using themicommand. Read more about the CLI tool.
Step 2: Develop the integration artifacts
Creating a Client ID and Client Secret
Follow the steps below if you want to use your own email address for sending the emails.
- As the email sender, navigate to the URL and log in to your google account.
- If you do not already have a project, create a new project.
-
Now, navigate again to the URL and click Google APIs -> Credentials -> Create Credential -> OAuth client ID.
Note
At this point, if the consent screen name is not provided, you will be prompted to do so.
-
Select Web Application and create a client.
-
Provide https://developers.google.com/oauthplayground as the redirect URL under Authorized redirect URIs and click Create. The client ID and client secret will then be displayed.
Info
See Gmail API documentation for details on creating the Client ID and Client Secret.
-
Click on the Library on the side menu and select Gmail API.
- Click Enable.
Obtaining the Access Token and Refresh Token
Follow these steps to automatically refresh the expired token when connecting to Google API:
-
Navigate to the https://developers.google.com/oauthplayground URL, click
 at the top right corner of the screen and select Use your own OAuth credentials.
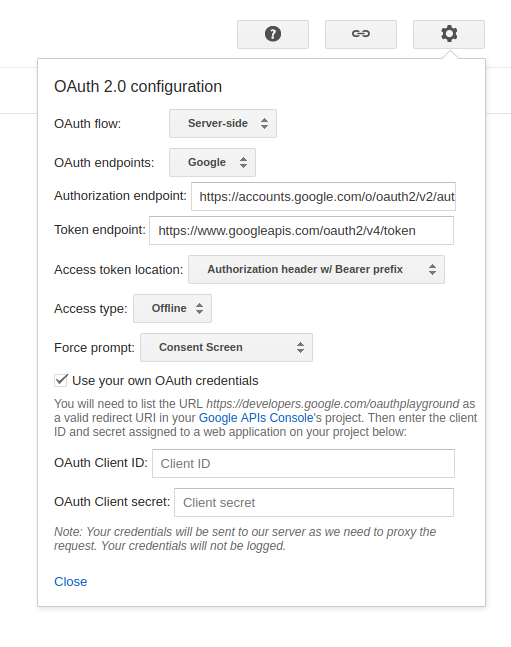
-
Provide the client ID and client secret you previously created and click Close.
-
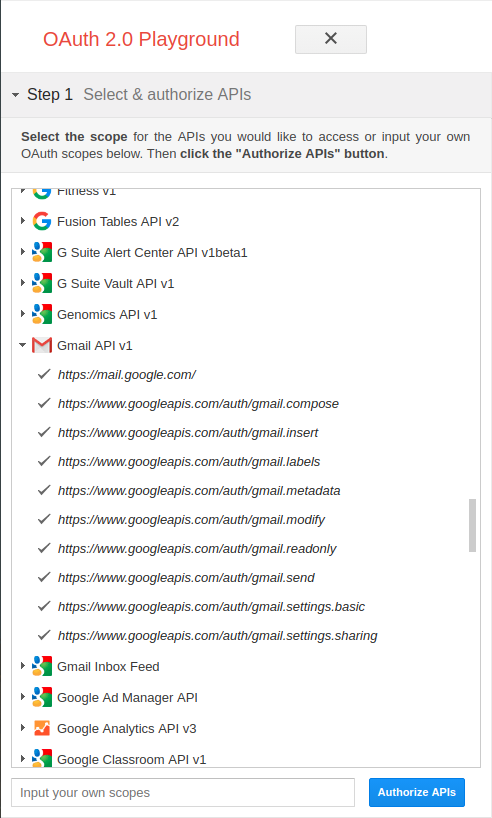
Now under Step 1, select Gmail API v1 from the list of APIs, select all the scopes listed under it, and click Authorize APIs.
-
You will then be prompted to allow permission, click Allow.
- Now , click Exchange authorization code for tokens to generate and display the access token and refresh token.
Importing the Gmail Connector into WSO2 Integration Studio
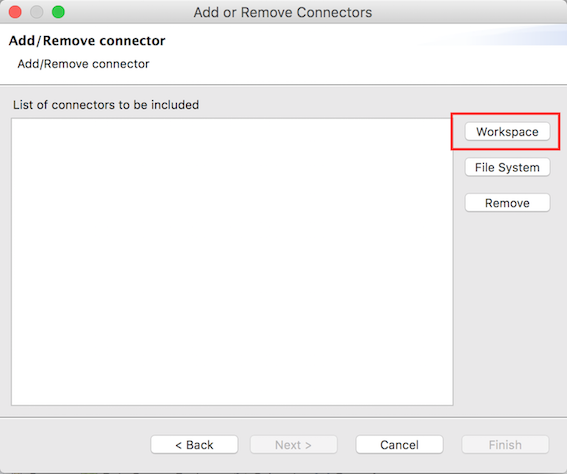
- Right click on Sample Services in the Project Explorer and select Add or Remove Connector.
- Select Add Connector and click Next. You are now connected to the WSO2 Connector store.
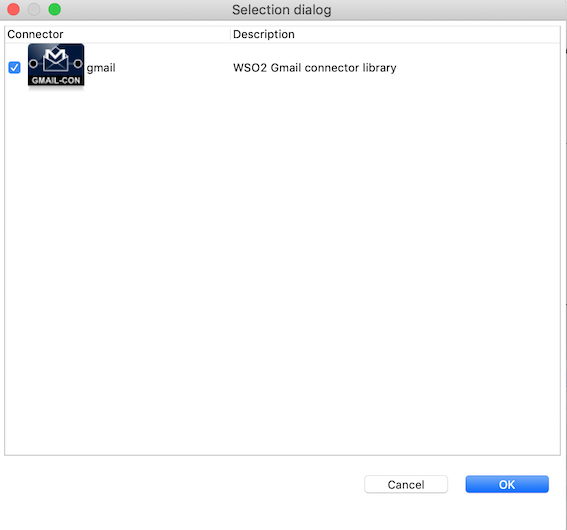
-
Find Gmail from the list of connectors and click the Download button (for the Gmail connector).
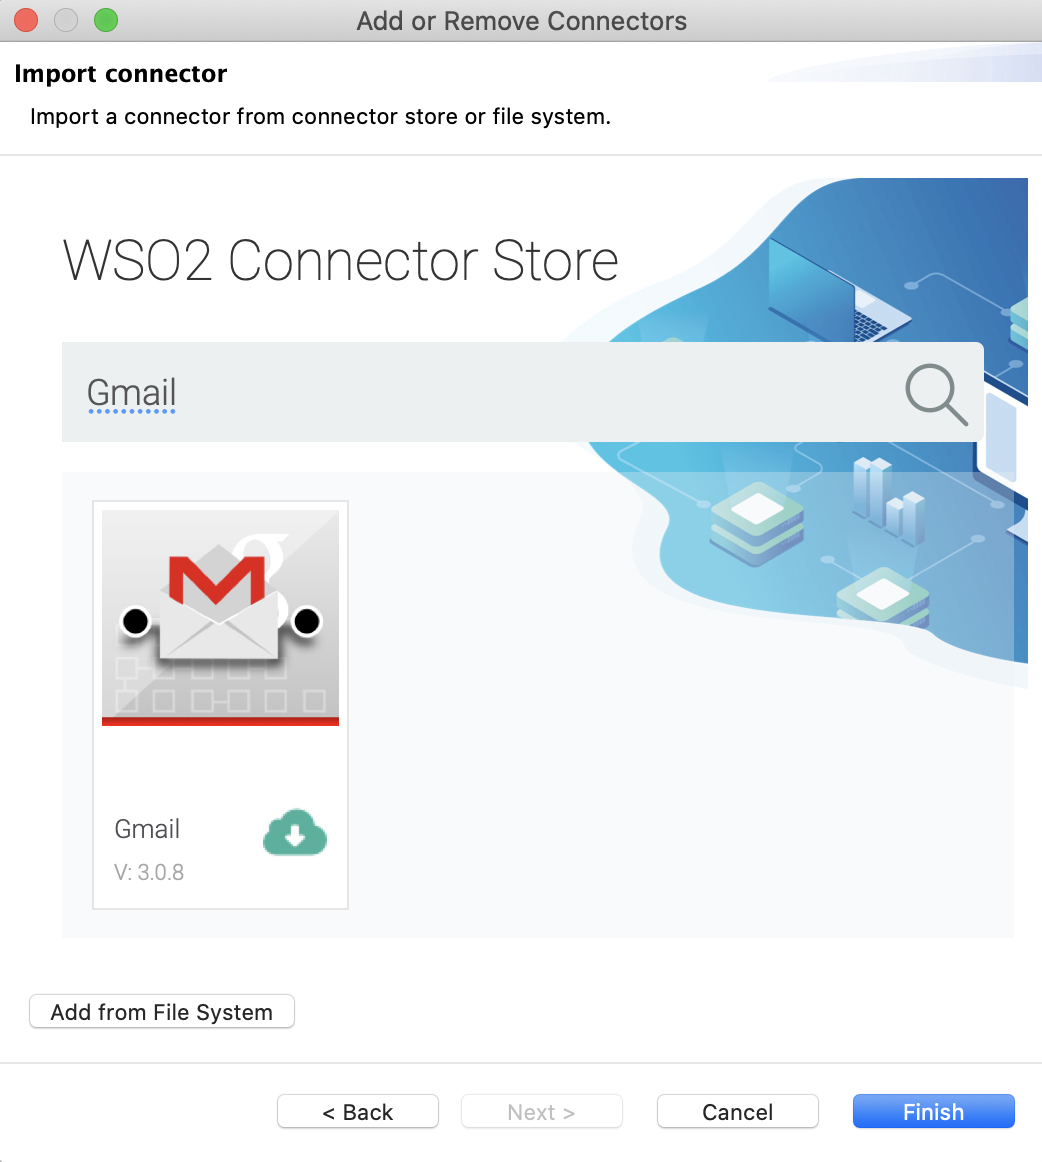
-
Click Finish. The connector is now downloaded to your workspace in WSO2 Integration Studio and the connector operations are available in the Gmail Connector palette.
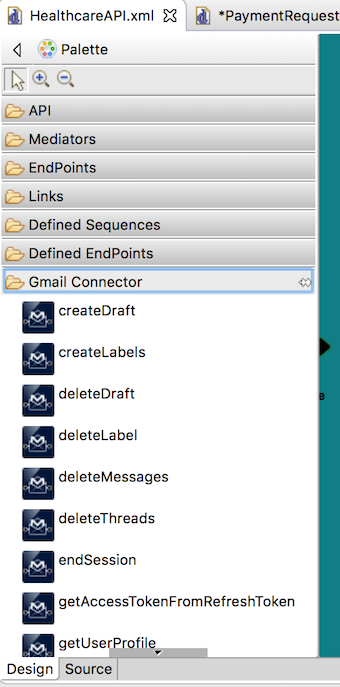
Let's use these connector operations in the configuration.
Update the message flow
The connector operations are used in the sequence named PaymentRequestProcessingSequence. Select this sequence and do the following updates:
-
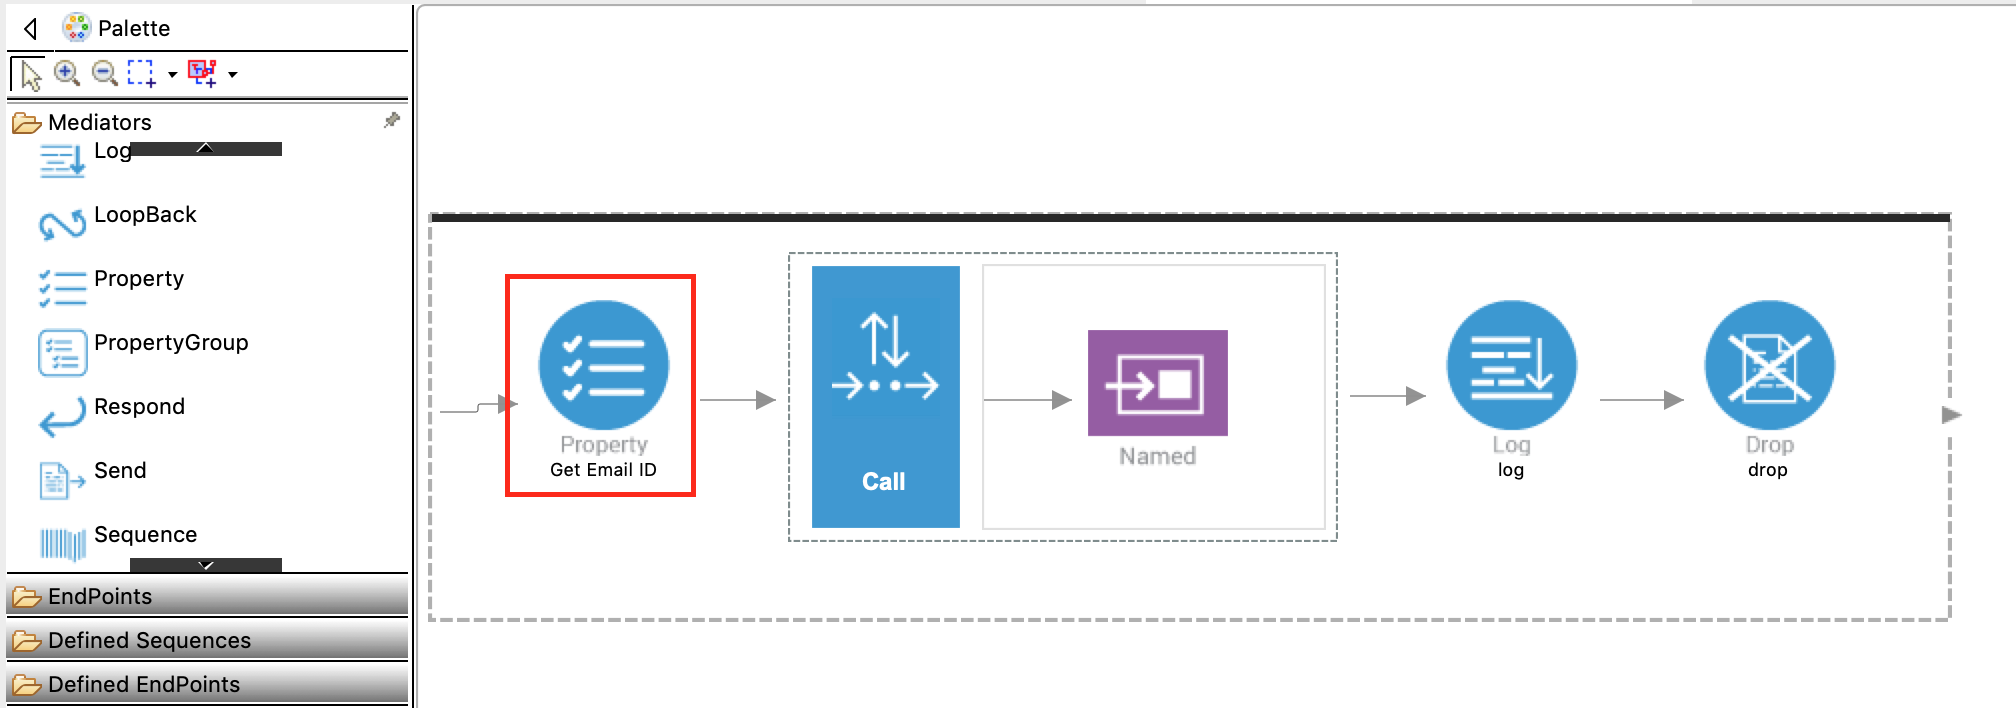
Add a Property Mediator just before the Call mediator to retrieve and store the patient's email address.
-
With the Property mediator selected, access the Property tab of the mediator and fill in the information in the following table:
Property Description Property Name Enter New Property....New Property Name Enter email_id.Property Action Enter set.Value Type Enter EXPRESSION.Value Expression Follow the steps given below to specify the expression:
- Click the text box for the Value Expression field. This opens the Expression Selector dialog box.
- Select Expression from the list.
- Enter
json-eval($.patient.email)to overwrite the default expression. - Click OK.
Description Get Email ID -
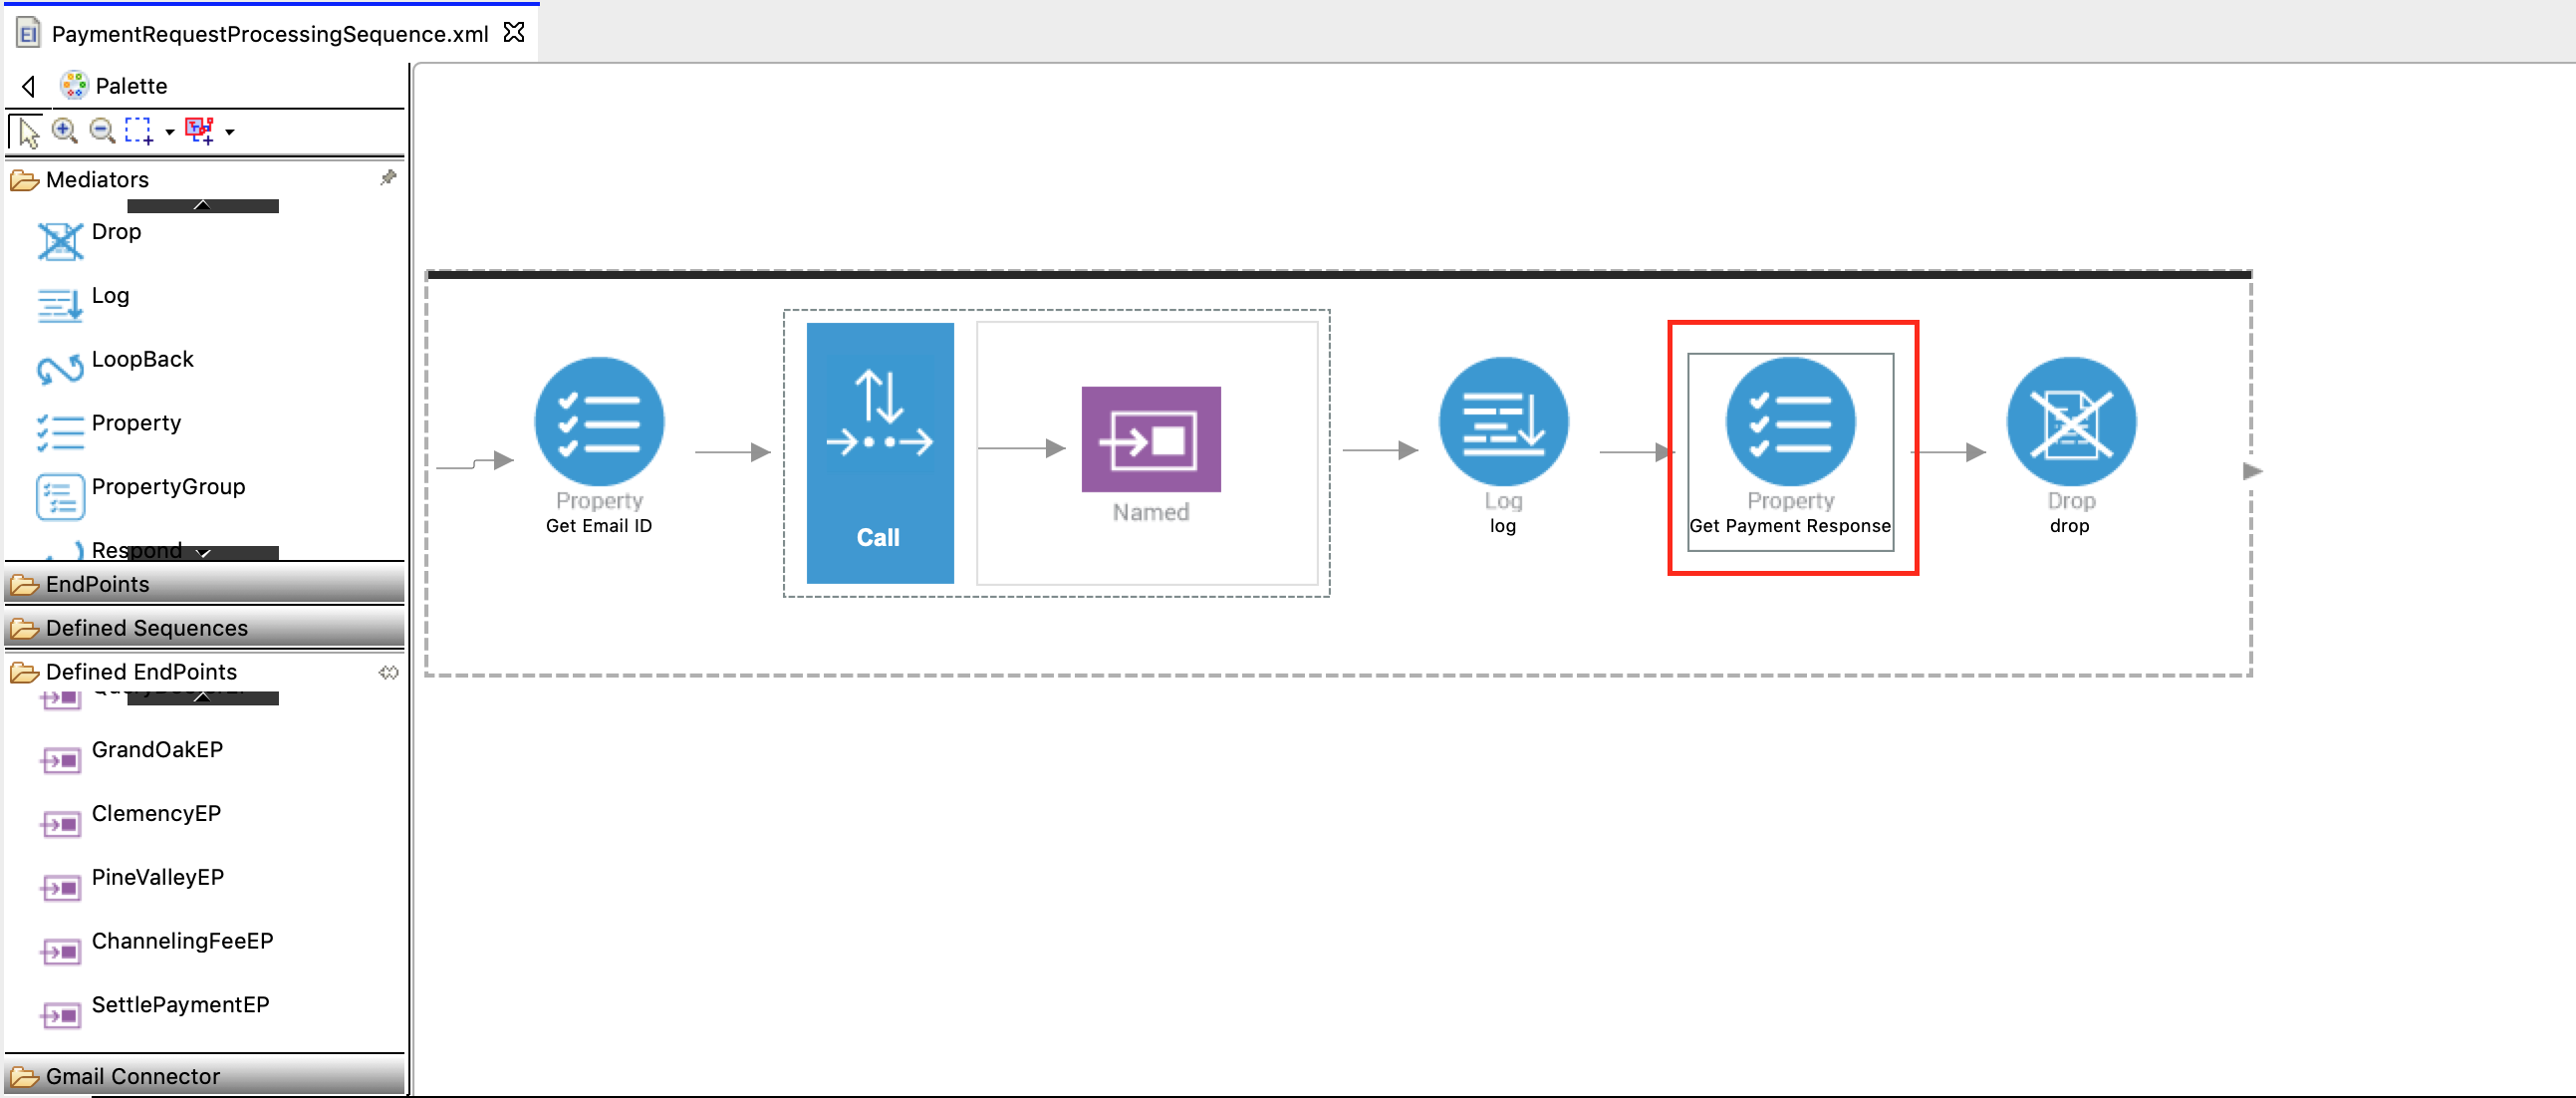
Add another Property mediator just after the Log mediator to retrieve and store the response sent from SettlePaymentEP. This will be used within the body of the email.
-
With the Property mediator selected, access the Property tab and specify the details given below.
Property Value Property Name Select New Property New Property Name payment_response Property Action Select Set Value Type Select Expression Value Expression json-eval($.) Description Get Payment Response -
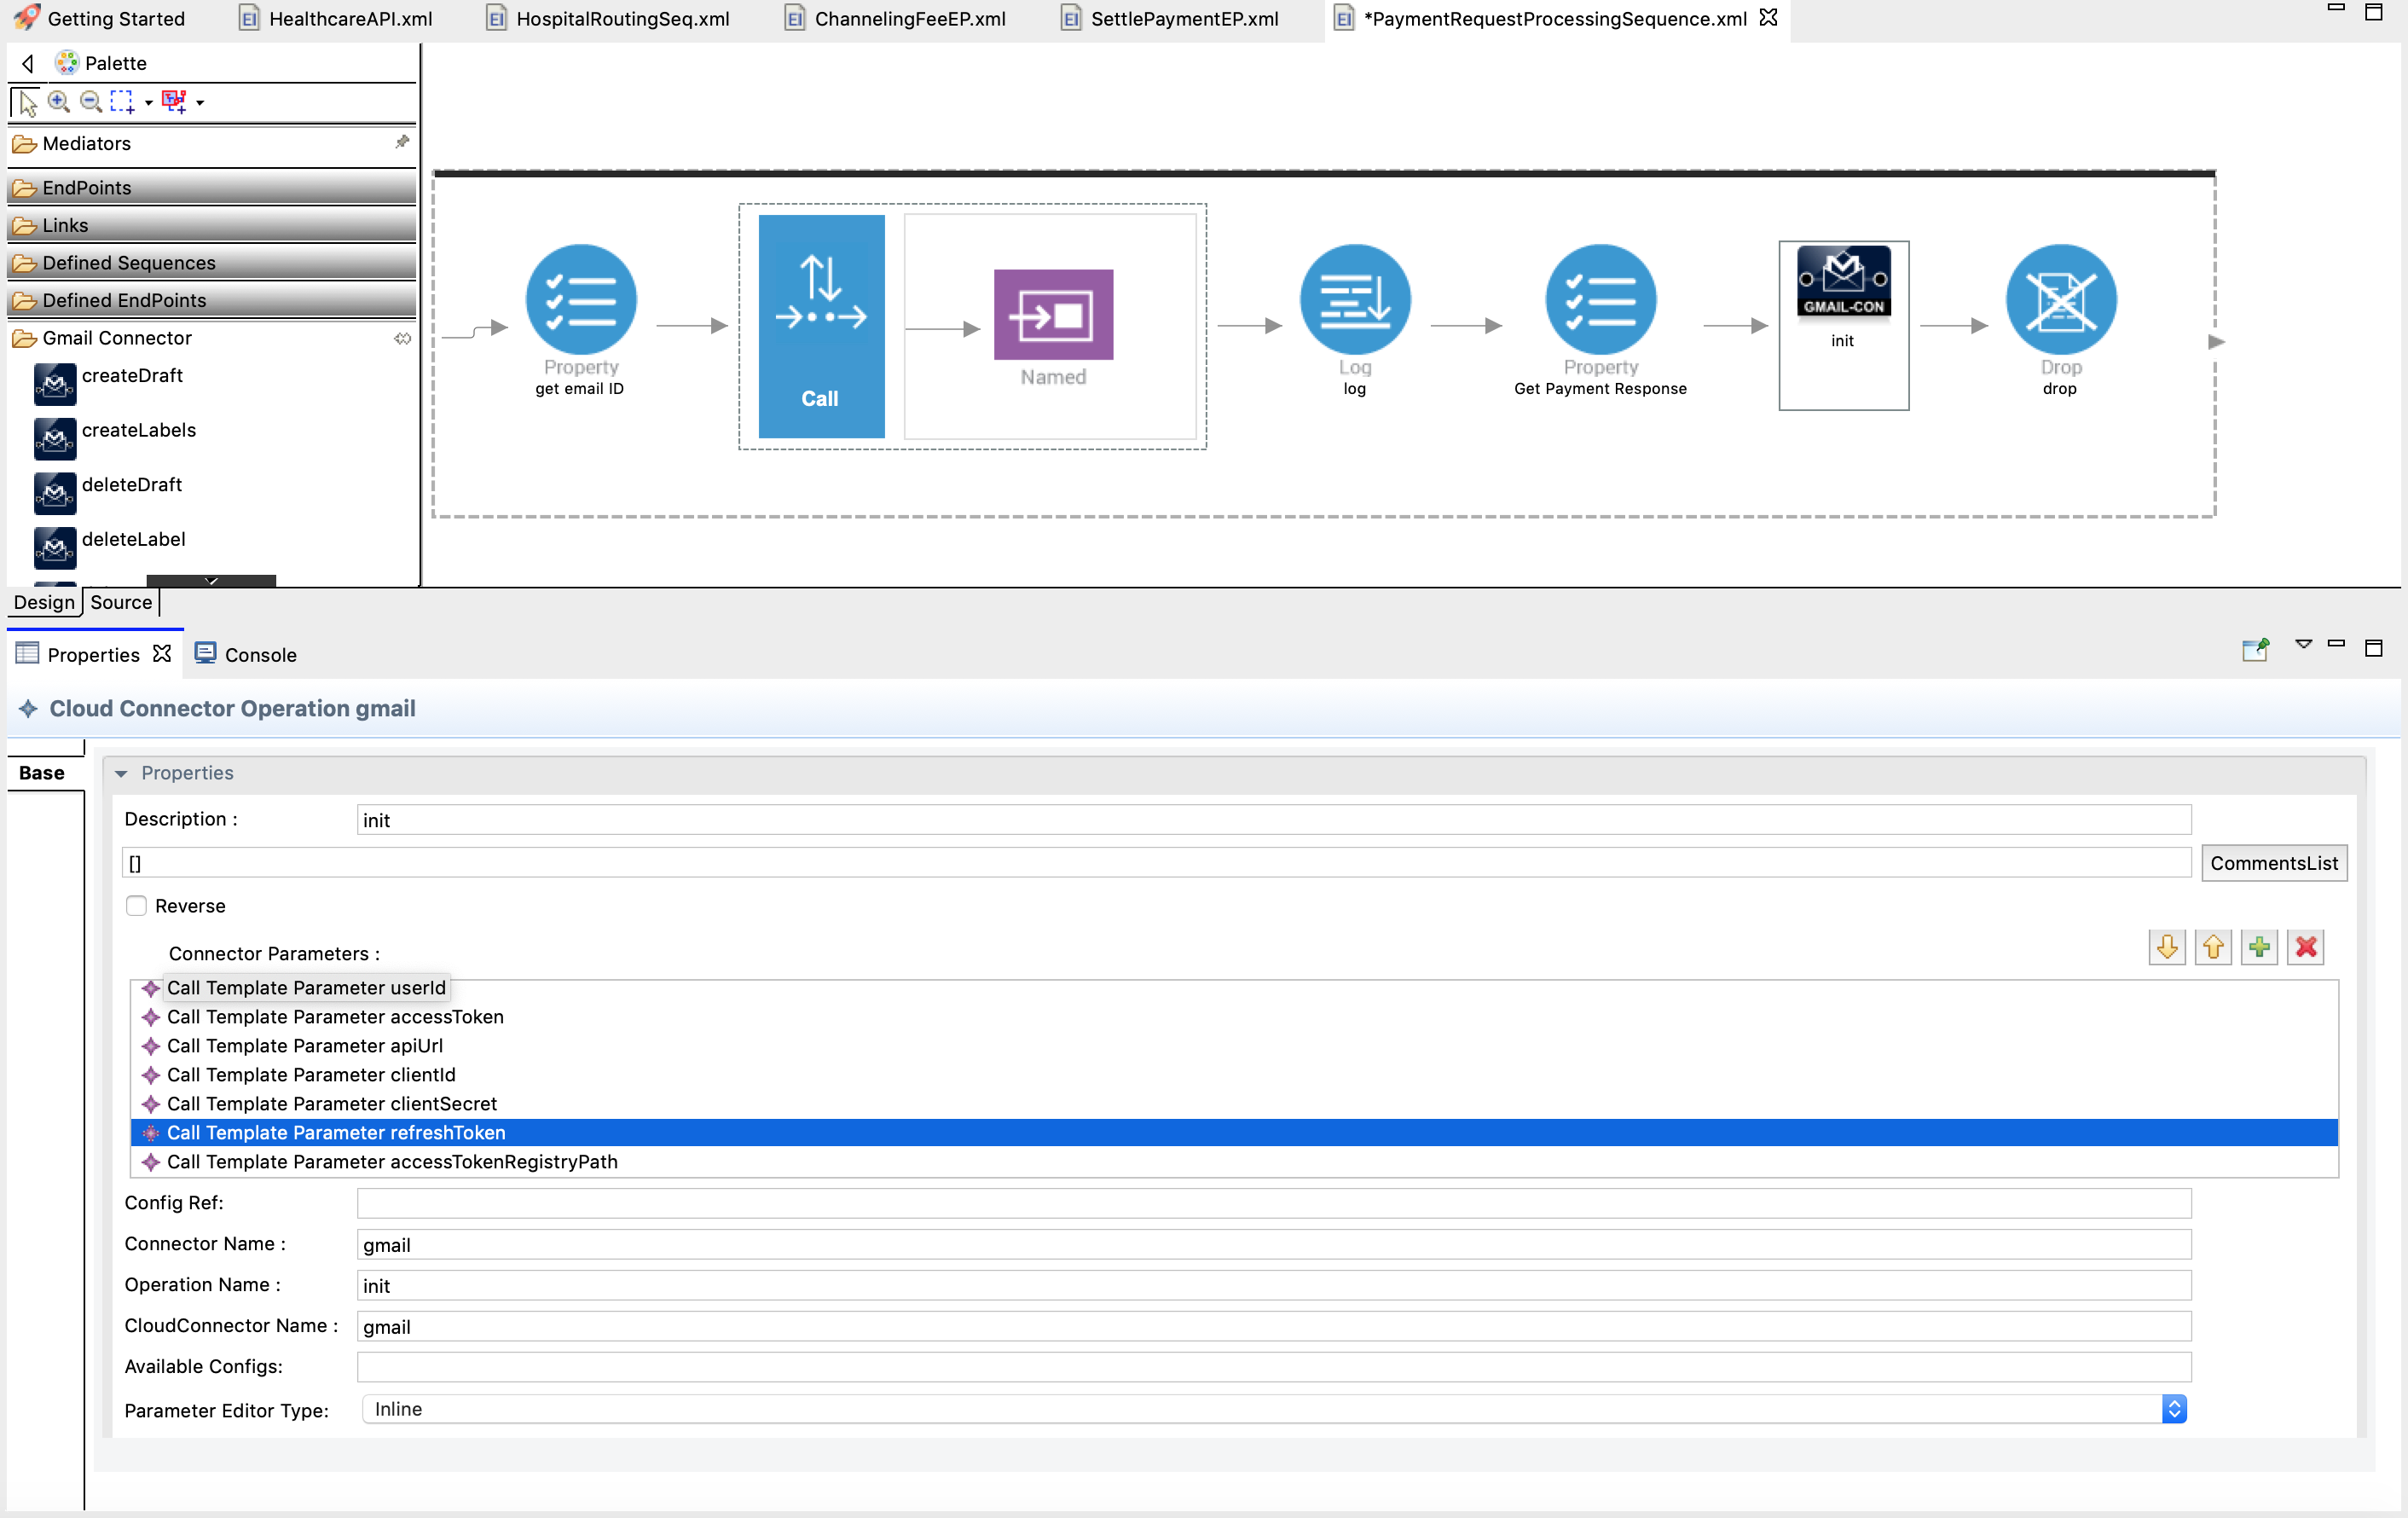
Drag and drop the init method from the Gmail Connector palette adjoining the Property mediator you added in the previous step.
-
With the init method selected, access the Property tab and specify the details given below.
Property Value Parameter Editor Type Select inline userId The sender's email address (use the email address that you used to configure the client ID and secret.) accessToken The access token you obtained. apiUrl https://www.googleapis.com/gmail clientId The client ID you created. clientSecret The client secret you created. refreshToken The refresh token you obtained. -
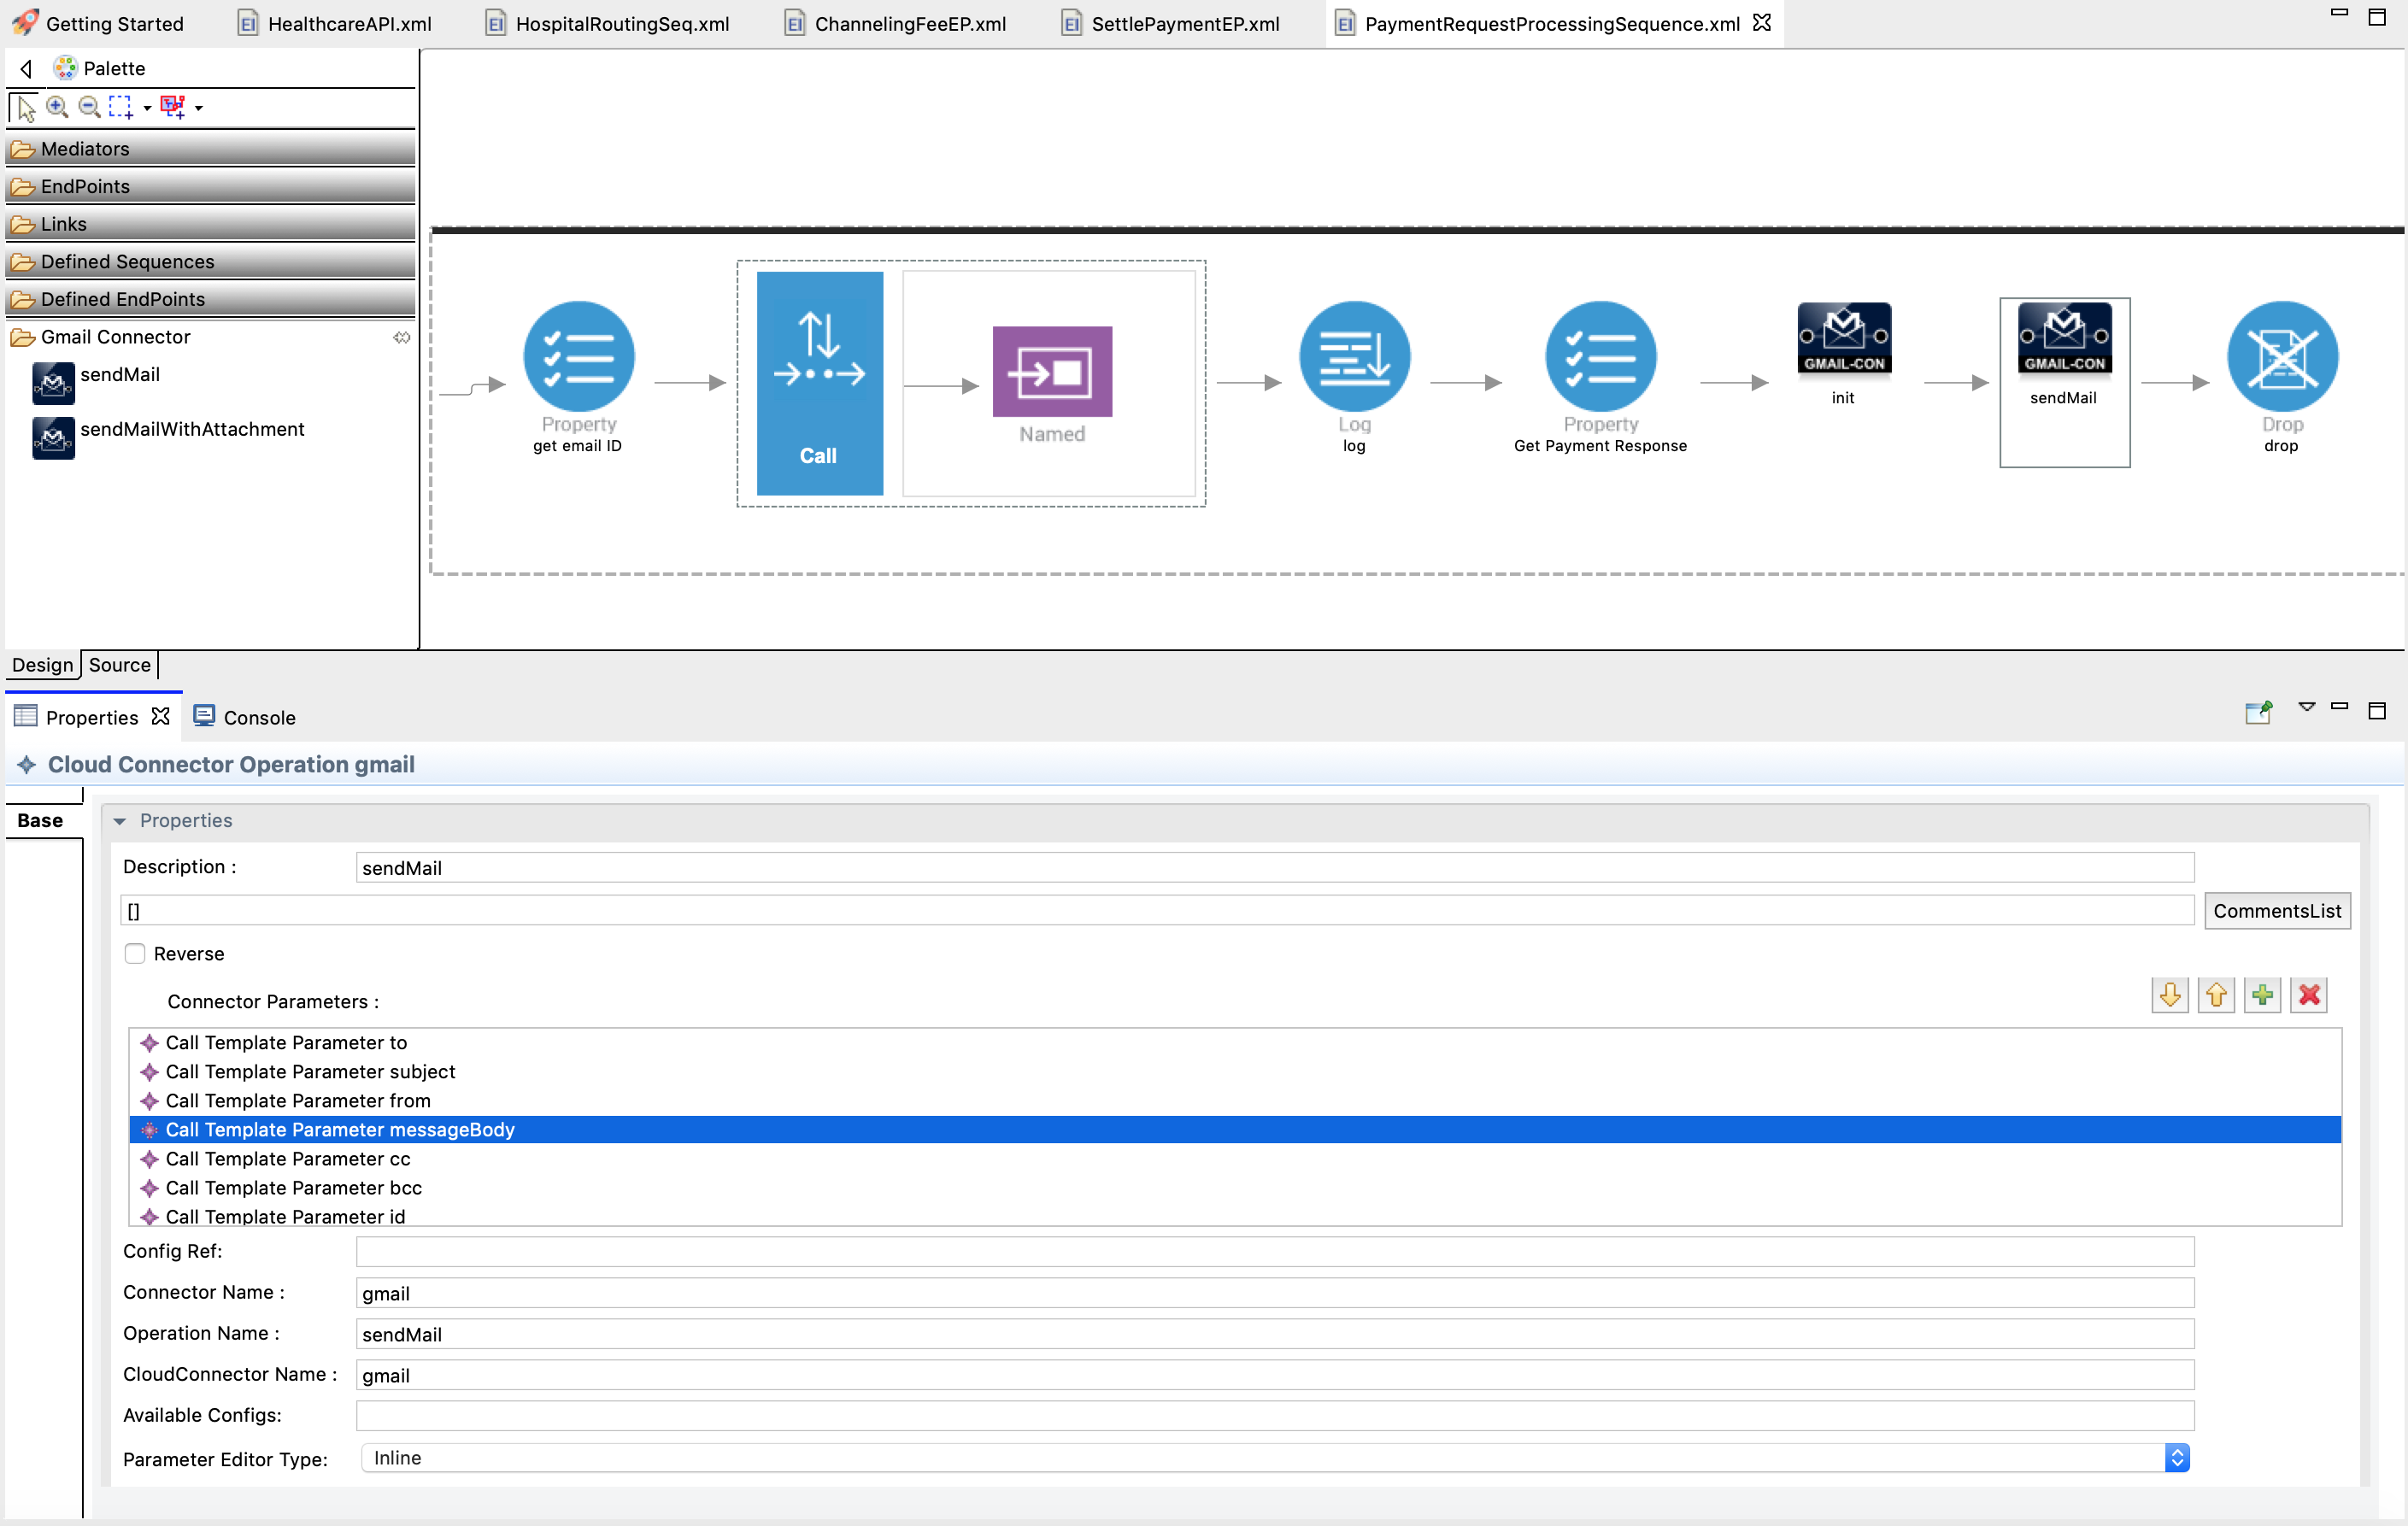
Add the sendMail method from the Gmail Connector palette and access the Property tab and specify the following details;
Property Description to Enter {$ctx:email_id}as the value. This retrieves the patient email address that was stored in the relevant Property mediator.
subject Enter Payment Statusas the value. This is the subject line in the email that is sent out.messageBody Enter {$ctx:payment_response}as the value. This retrieves the payment response that was stored in the relevant Property mediator.The updated PaymentRequestProcessingSequence should now look like this:
-
Save the updated sequence configuration.
-
Right click on SampleServicesConnectorExporter and navigate to New → Other → Add/Remove Connectors and select Add connector and click on Next . Select Workspace to list down the connectors that were added.
-
Select the Gmail connector from the list and click OK and then Finish.
Step 3: Package the artifacts
Package the artifacts in your composite application project (SampleServicesCompositeApplication project), the registry resource project (SampleRegistryResource project), and the Connector project (SampleServicesConnectorExporter project) to be able to deploy the artifacts in the server.
- Open the
pom.xmlfile in the composite application project POM editor. -
Ensure that the following projects and artifacts are selected in the POM file.
- SampleServicesCompositeApplicationProject
HealthcareAPIClemencyEPGrandOakEPPineValleyEPChannelingFeeEPSettlePaymentEPPaymentRequestMessageStorePaymentRequestProcessingSequencePaymentRequestProcessor
- SampleServicesRegistryProject
- SampleServicesConnectorExporter
- SampleServicesCompositeApplicationProject
-
Save the project.
Step 4: Build and run the artifacts
To test the artifacts, deploy the packaged artifacts in the embedded Micro Integrator:
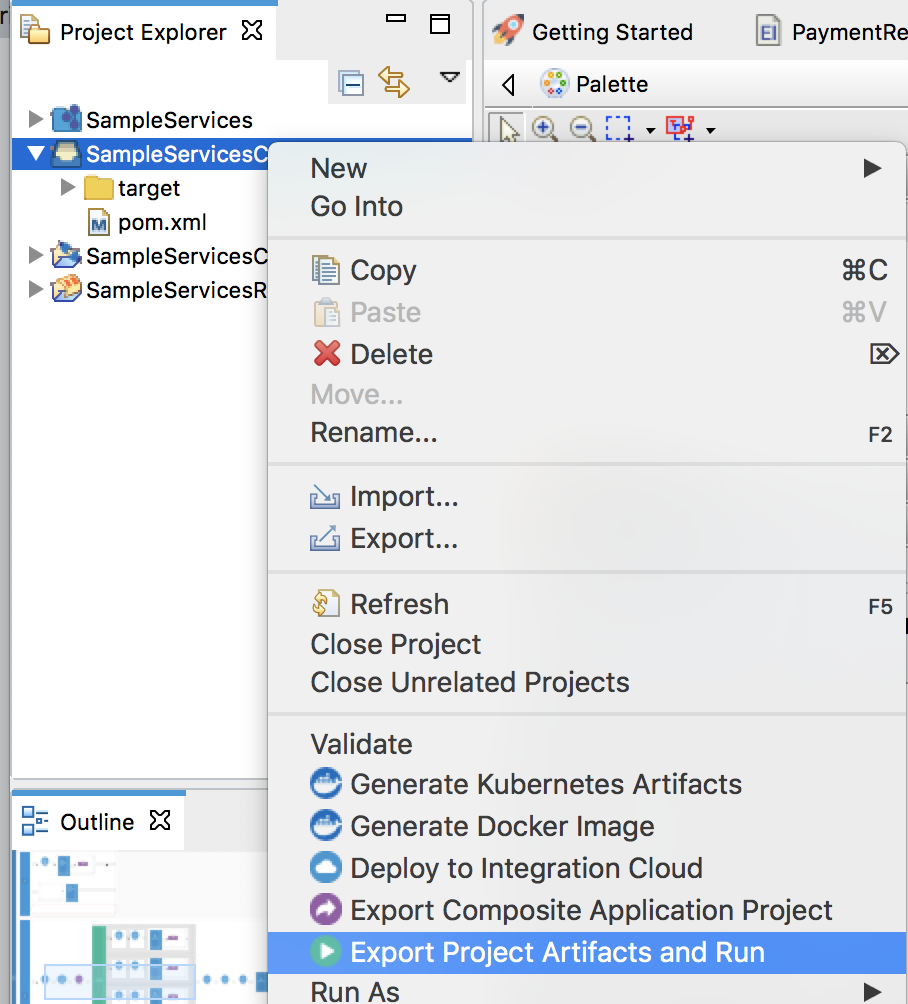
- Right-click the composite application project and click Export Project Artifacts and Run.
- In the dialog that opens, select the artifacts that you want to deploy.
- Click Finish. The artifacts will be deployed in the embedded Micro Integrator and the server will start. See the startup log in the Console tab.
Warning
Stop the Micro Integrator before proceeding to test. This is because you need to start the broker profile before starting the Micro Integrator.
Step 5: Test the use case
Let's test the use case by sending a simple client request that invokes the service.
Start the backend service
- Download the JAR file of the back-end service from here.
- Open a terminal, navigate to the location where your saved the back-end service.
-
Execute the following command to start the service:
java -jar Hospital-Service-2.0.0-EI7.jar
Start the Message Broker runtime
Set up the Message Broker profile of WSO2 EI 6.6.0. This is required because the Message Broker profile is used for guaranteed message delivery in this use case.
-
Download WSO2 EI 6.6.0, which includes the Message Broker profile. The path to this folder is referred to as
EI_6.6.0_HOMEthroughout this tutorial. -
Add the following JAR files from the
EI_6.6.0_HOME/wso2/broker/client-lib/directory to theMI_TOOLING_HOME/Contents/Eclipse/runtime/microesb/lib/(in MacOS) orMI_TOOLING_HOME/runtime/microesb/lib(in Windows/Linux) directory.- andes-client-*.jar
- geronimo-jms_1.1_spec-*.jar
- org.wso2.securevault-*.jar
-
Open the
deployment.tomlfile from theMI_TOOLING_HOME/Contents/Eclipse/runtime/microesb/conf/(in MacOS) orMI_TOOLING_HOME/runtime/microesb/conf/(in Windows/Linux) directory and add the configurations given below. This is required for enabling the broker to store messages.[[transport.jms.listener]] name = "myQueueListener" parameter.initial_naming_factory = "org.wso2.andes.jndi.PropertiesFileInitialContextFactory" parameter.broker_name = "wso2mb" parameter.provider_url = "conf/jndi.properties" parameter.connection_factory_name = "QueueConnectionFactory" parameter.connection_factory_type = "queue" parameter.cache_level = "consumer" [[transport.jms.sender]] name = "myQueueSender" parameter.initial_naming_factory = "org.wso2.andes.jndi.PropertiesFileInitialContextFactory" parameter.broker_name = "wso2mb" parameter.provider_url = "conf/jndi.properties" parameter.connection_factory_name = "QueueConnectionFactory" parameter.connection_factory_type = "queue" parameter.cache_level = "producer" [transport.jndi.connection_factories] 'connectionfactory.QueueConnectionFactory' = "amqp://admin:admin@clientID/carbon?brokerlist='tcp://localhost:5675'" [transport.jndi.queue] PaymentRequestJMSMessageStore="PaymentRequestJMSMessageStore"
To start the Message Broker:
- Open a terminal and navigate to the
EI_6.6.0_HOME/wso2/broker/bindirectory. -
Execute the following command to run the message broker.
-
On MacOS/Linux/CentOS:
sh wso2server.sh -
On Windows:
wso2server.bat
See the WSO2 EI 6.6.0 documentation for more information on how to run the Message Broker profile.
-
Restart the Micro Integrator
Let's restart the Micro Integrator with the deployed artifacts:
Right-click the composite application project and click Export Project Artifacts and Run as shown below.
Get details of deployed artifacts (Optional)
Let's use the CLI Tool to find the URL of the REST API (that is deployed in the Micro integrator) to which you will send a request.
Tip
Be sure to set up the CLI tool for your work environment as explained in the first step of this tutorial.
-
Open a terminal and execute the following command to start the tool:
mi -
Log in to the CLI tool. Let's use the server administrator user name and password:
mi remote login admin adminYou will receive the following message: Login successful for remote: default!
-
Execute the following command to find the APIs deployed in the server:
mi api showYou will receive the following information:
NAME : HealthcareAPI
URL : http://localhost:8290/healthcare
Similarly, you can get details of Connectors as well as other artifacts deployed in the server. Read more about using the CLI tool.
Send the client request
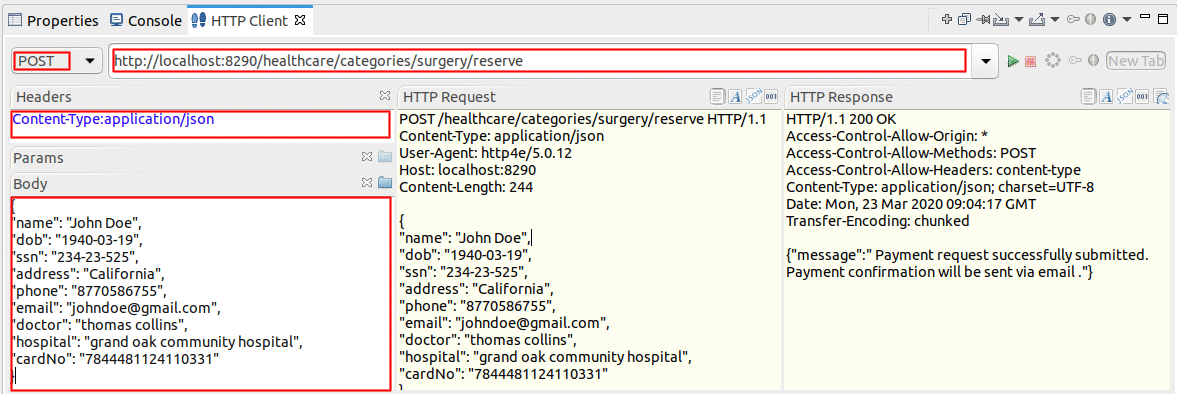
Let's send a request to the API resource. You can use the embedded HTTP Client of WSO2 Integration Studio as follows:
-
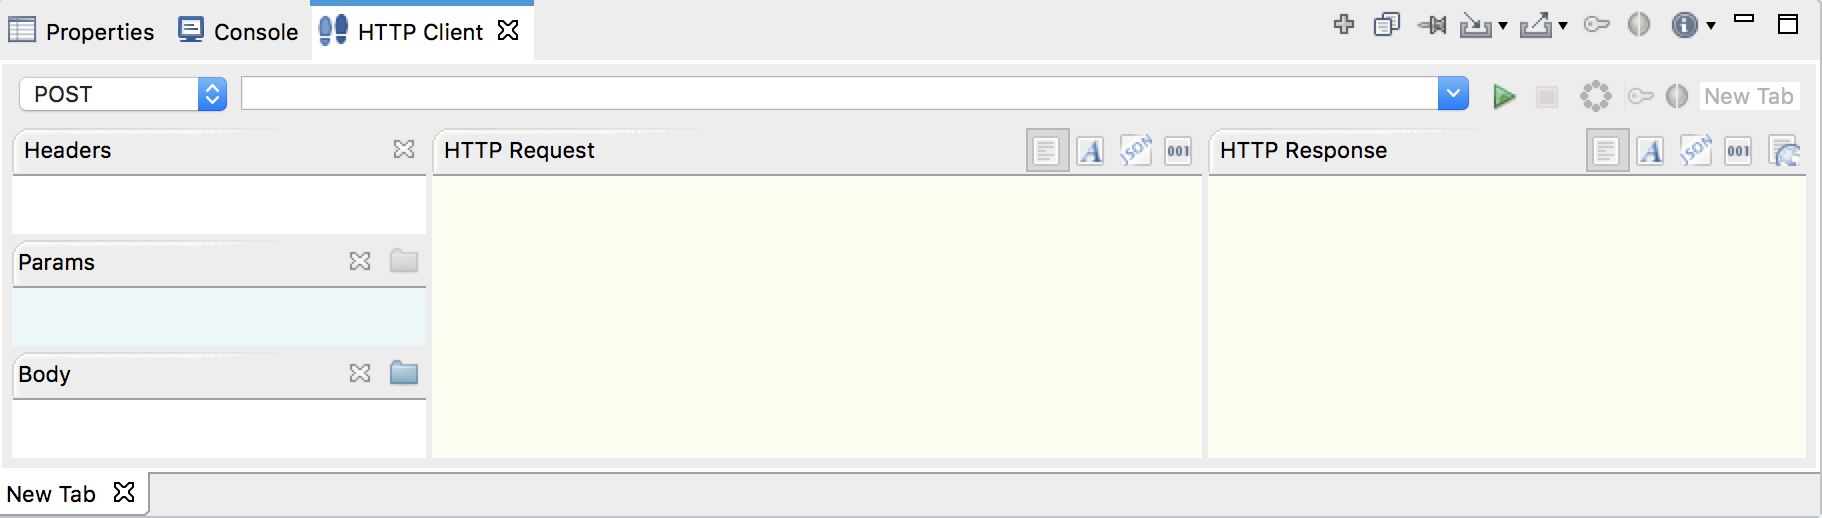
Open the HTTP Client of WSO2 Integration Studio.
Tip
If you don't see the HTTP Client tab, go to Window -> Show View - Other and select HTTP Client to enable the client.
-
Enter the request information as given below and click the Send icon (
 ).
).Method POSTHeaders Content-Type=application/jsonURL http://localhost:8290/healthcare/categories/surgery/reserve-
The URI-Template format that is used in this URL was defined when creating the API resource:
http://.: /categories/{category}/reserve
Body { "name": "John Doe", "dob": "1940-03-19", "ssn": "234-23-525", "address": "California", "phone": "8770586755", "email": "[email protected]", "doctor": "thomas collins", "hospital": "grand oak community hospital", "cardNo": "7844481124110331", "appointment_date": "2025-04-02" }- This JSON payload contains details of the appointment reservation, which includes patient details, doctor, hospital, and data of appointment.
-
The URI-Template format that is used in this URL was defined when creating the API resource:
If you want to send the client request from your terminal:
-
Install and set up cURL as your REST client.
-
Create a JSON file names
request.jsonwith the following request payload. Make sure you provide a valid email address so that you can test the email being sent to the patient.{ "name": "John Doe", "dob": "1940-03-19", "ssn": "234-23-525", "address": "California", "phone": "8770586755", "email": "[email protected]", "doctor": "thomas collins", "hospital": "grand oak community hospital", "cardNo": "7844481124110331", "appointment_date": "2025-04-02" } -
Open a command line terminal and execute the following command from the location where the
request.jsonfile you created is saved:curl -v -X POST --data @request.json http://localhost:8290/healthcare/categories/surgery/reserve --header "Content-Type:application/json"
Analyze the response
You will see the response as follows:
{"message":"Payment request successfully submitted. Payment confirmation will be sent via email."}An email will be sent to the provided patient email address with the following details:
Note
If you haven't received the mail yet, there are possibilities that your access token might have expired.
Follow the steps in obtaining-the-access-token-and-refresh-token to obtain a new access token and update the gmail init operation.
Subject: Payment Status

Message:
    {"appointmentNo":2,"doctorName":"thomas collins","patient":"John
    Doe","actualFee":7000.0,"discount":20,"discounted":5600.0,"paymentID":"8458c75a-c8e0-4d49-8da4-5e56043b1a20","status":"Settled"}
You have now explored how to import the Gmail connector to the Micro Integrator and then use the connector operations to send emails.
Top