Creating Unit Test Suite
Once you have developed an integration solution, WSO2 Integration Studio allows you to build unit tests for the following:
- Test mediation sequences, proxy services, and REST apis with multiple test cases
- Test the artifacts with registry resources.
-
Test the artifacts with Connectors.
Note
Scheduled Tasks are not supported by the Unit Testing framework.
Create Unit Test Suite
- Open WSO2 Integration Studio.
- Open an existing project with your integration solution.
-
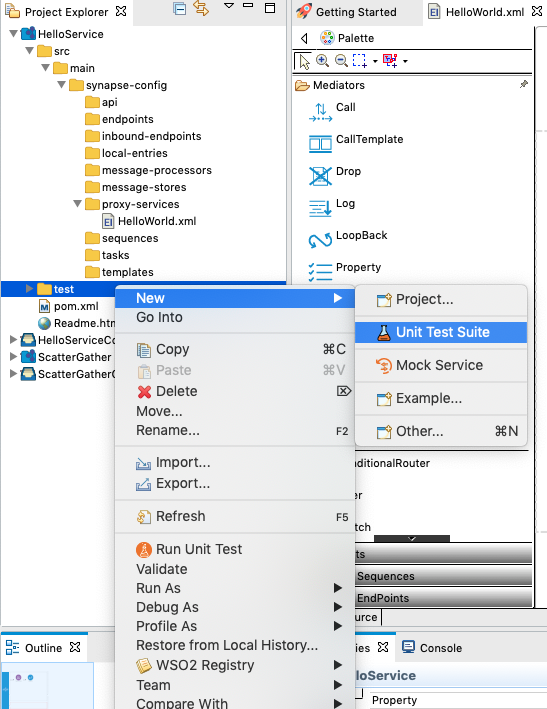
Right-click the test folder, which is parallel to the src folder and go to New -> Unit Test Suite as shown below.
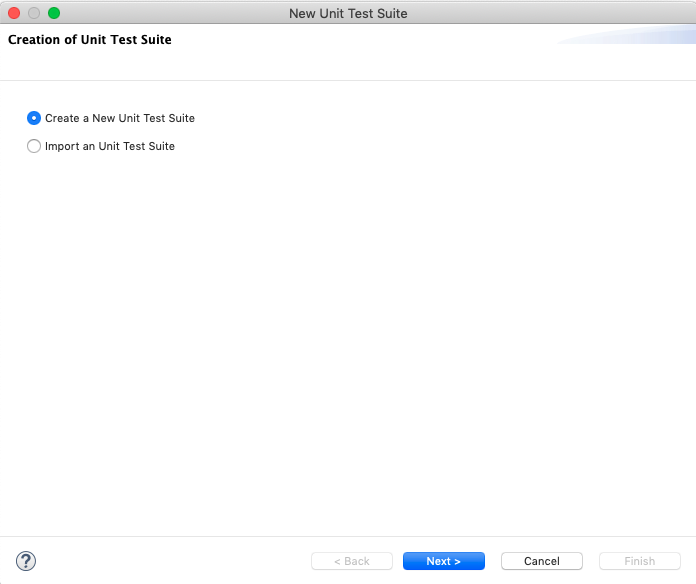
The New Unit Test Suite wizard opens.
-
Select Create a New Unit Test Suite and click Next.
-
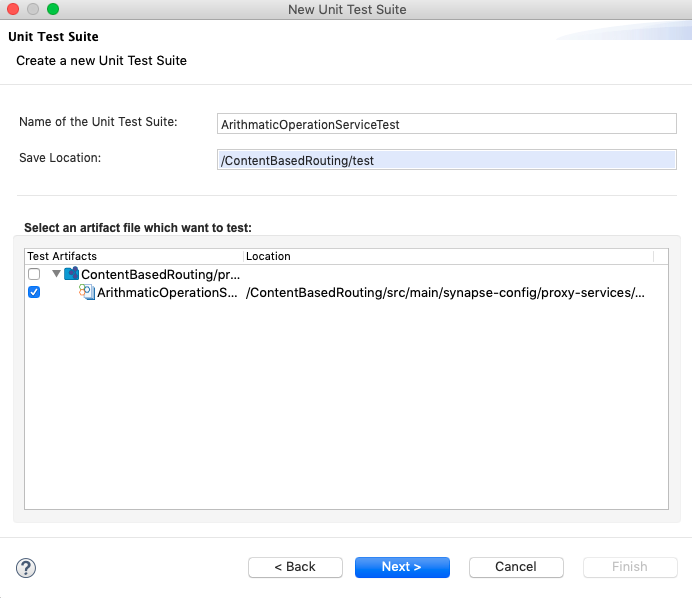
Specify a name for the unit test suite. Then, select the artifact file that you want to test from the file list and click Next.
Note
You can only select one sequence, proxy service, or API artifact per unit test suite.
-
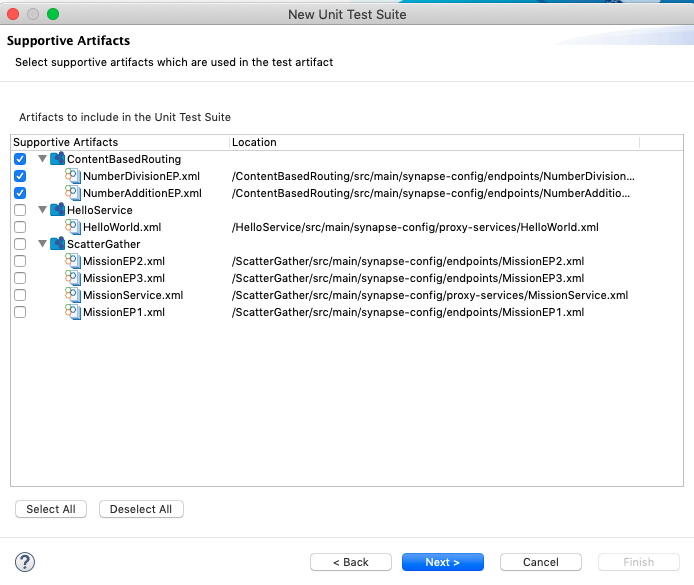
Select the supporting artifacts from the list as shown below and click Next.
-
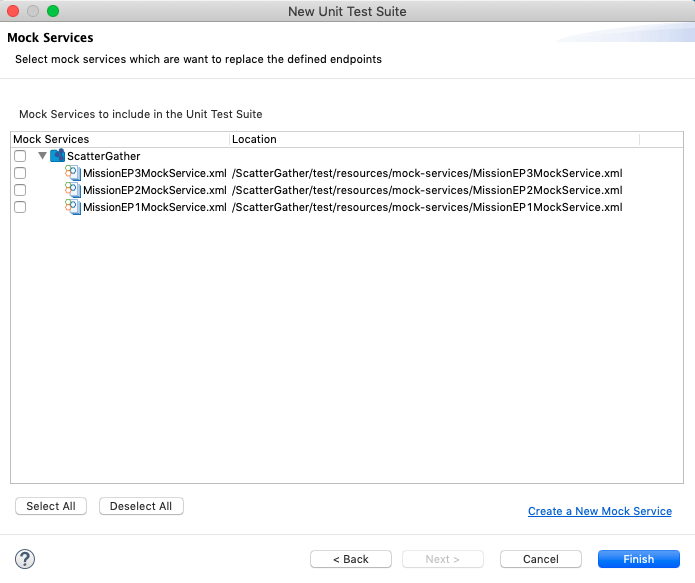
You can use a mock service to simulate the actual endpoint. If you have an already created Mock Service, select the mock service files from the list as shown below. You can also create a new Mock Service for this purpose.
-
Click Finish.
Update the Unit Test Suite
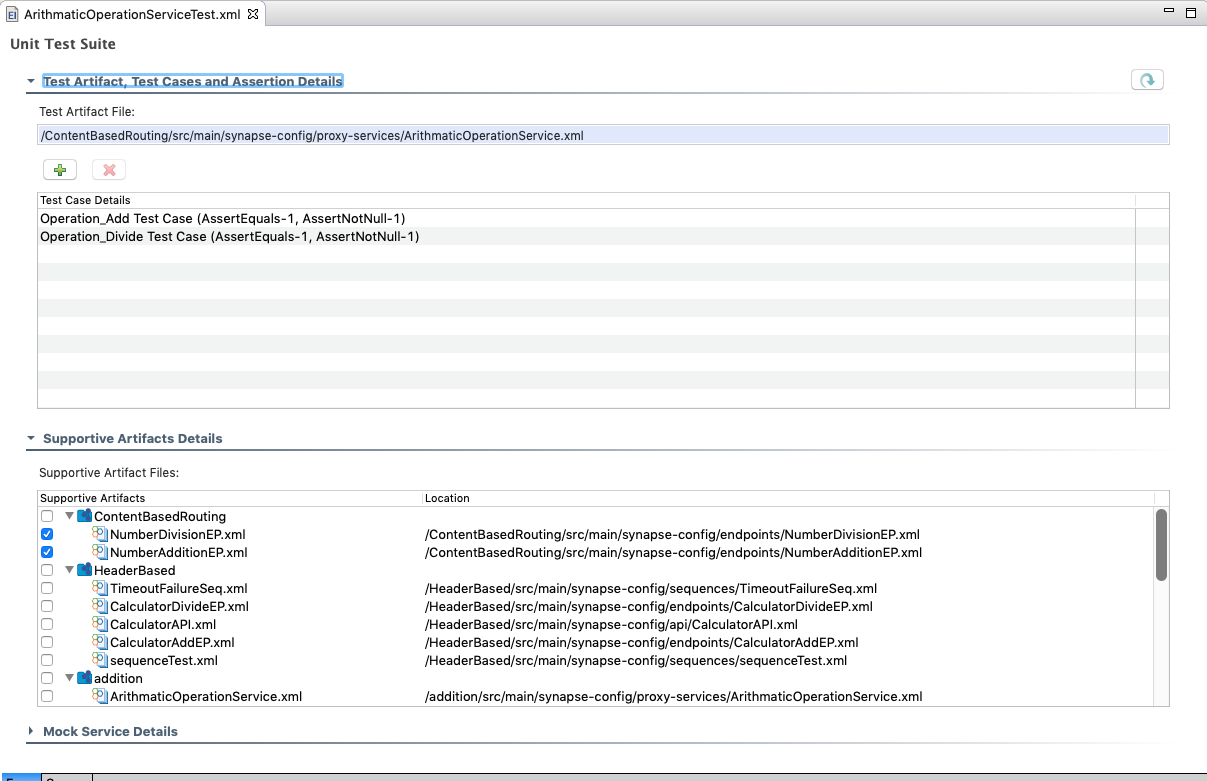
Once you have created a Unit Test Suite in WSO2 Integration Studio, you can find it inside the test folder. You can update the Unit Test Suite by adding test cases and changing the supporting artifacts and mock-services.
-
Open Unit Test Suite from the project explorer. You can use either the design view or the source view to update the unit test suite.
-
In design view, click the '+' button under the Test Artifact, Test Cases and Assertion Details section to add a new test case to the unit test suite.
-
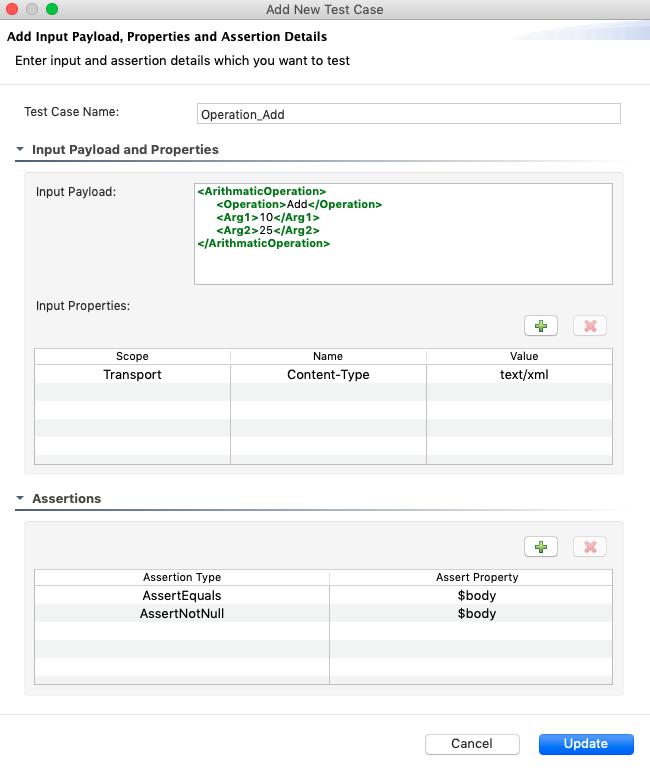
Enter the following information:
- Enter a name for the test case.
-
Update the Input Payload and Properties section:
- Input Payload: The input payload of the test case. This can be JSON, XML, or plain text.
- Input properties: The input properties of the test case. There are three types of properties allowed in unit testing: Synapse(ctx), Axis2(axis2), and Transport($trp) properties.
For sequences, the test suite allows to add all type of properties with the value. For APIs and proxy services, you are only allowed to add transport properties.
Note
For APIs, you also need to specify the Request Path and Request Method in the this section. The Request Path indicates the URL mapping of the API resource. If the URL mapping consists some parameter(s), replace those with values. Also the Request Method indicates the REST method of the resource.
-
In the Assertions section, you can add multiple assertion belonging to two types: AssertEquals check the whether the mediated result and expected values are equeal. AssertNotNull checks whether the mediated result is not null.
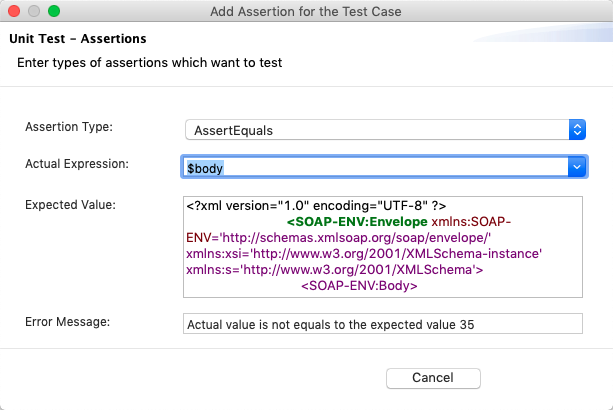
- Assertion Type: Type of the assertion.
-
Actual Expression: Expression that you want to assert.
- $body: assert the payload
- $ctx:"
" : assert synapse property - $axis2:"
" : assert axis2 property - $trp:"
" : assert transport property
- $body: assert the payload
-
Expected Value: Expected value for the actual expression. Type can be a JSON, XML or a plain text.
- Error Message: Error message to print when the assertion is failed.
- Once you have added at least one assertion, click Add.
- Save the unit test suite.
Run Unit Test Suites
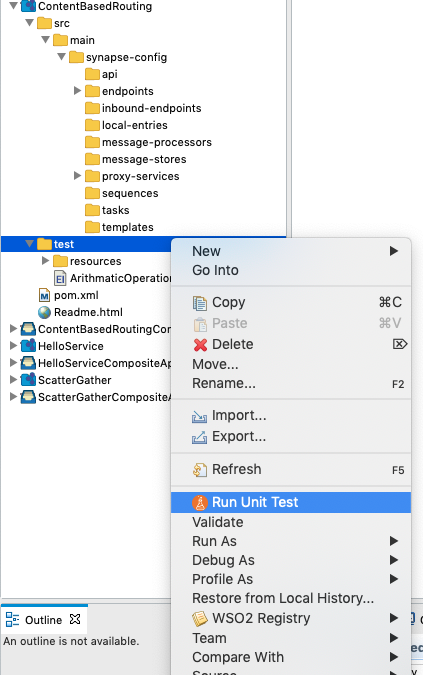
You can run the created Unit Test Suites using the unit testing server that is included in the embedded Micro Integrator of WSO2 Integration Studio. Right-click the test directory and click Run Unit Test to run all the unit test suites at once, or right-click the particular unit test suite and click Run Unit Test to run a selected unit test suite.
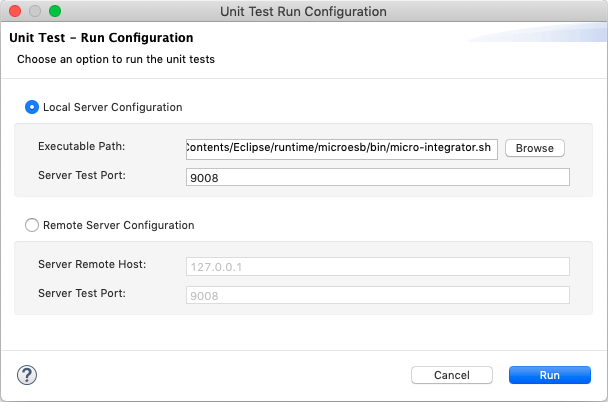
The Unit Test Run Configuration wizard opens. Select one of server run configuration method you want to proceed with Unit Test.
-
Local Server Configuration: Run the Unit Test Suite(s) in embedded unit testing Server in Micro Integrator or local unit testing server.
- Executable Path: Path to the unit testing server.
- Server Test Port: Port of the unit testing server.
-
Remote Server Configuration: Run the Unit Test Suite(s) in remote unit testing server.
- Server Remote Host: Host IP of the remote unit testing server.
- Server Test Port: Port of the remote unit testing server.
-
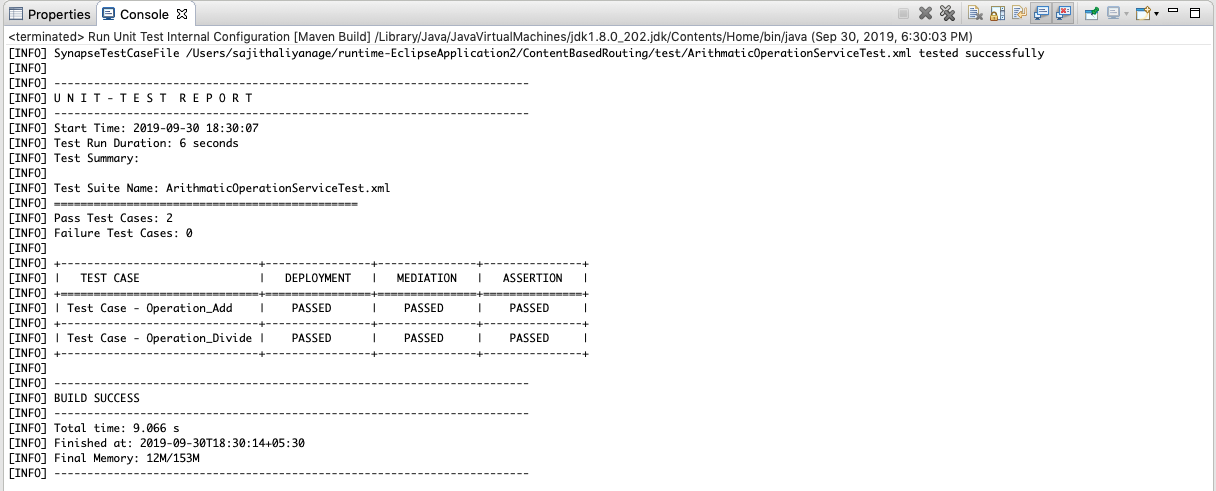
Click Run to start the unit test. It will start the unit testing server in the console and prints the summary report for the given unit test suite(s) using the response from the unit testing server.
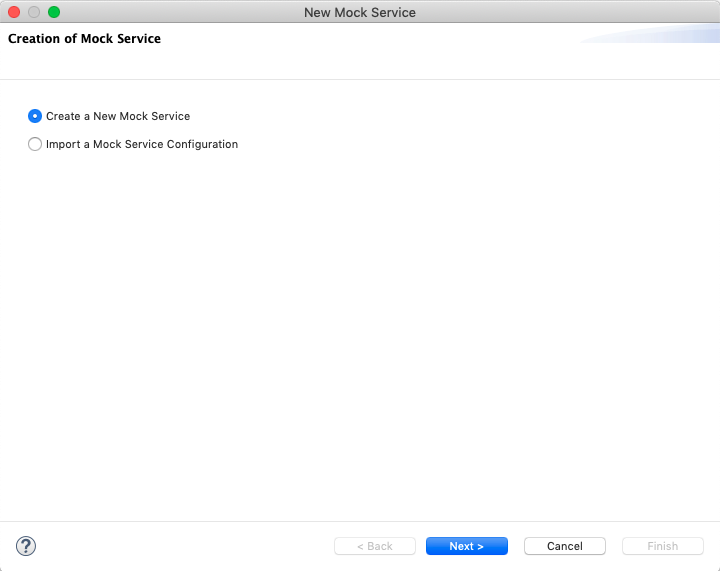
Create Mock Service
Mock services give the opportunity to simulate the actual endpoint.
- Open an existing project that has your integration solution.
-
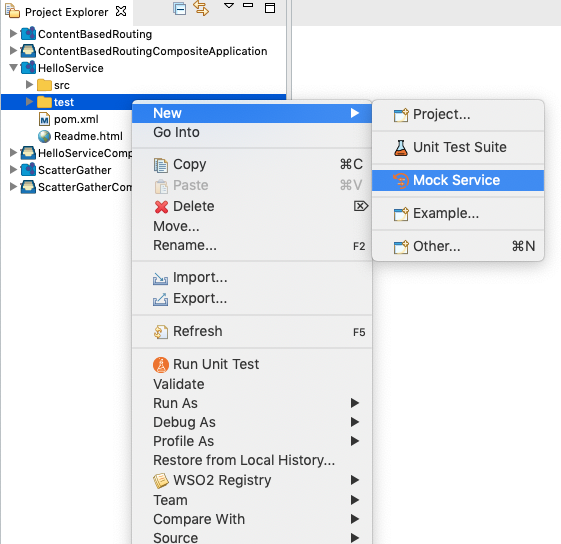
Right-click the test folder parallel to the src folder, and go to New -> Mock Service as shown below.
-
Select Create a New Mock Service and click Next.
-
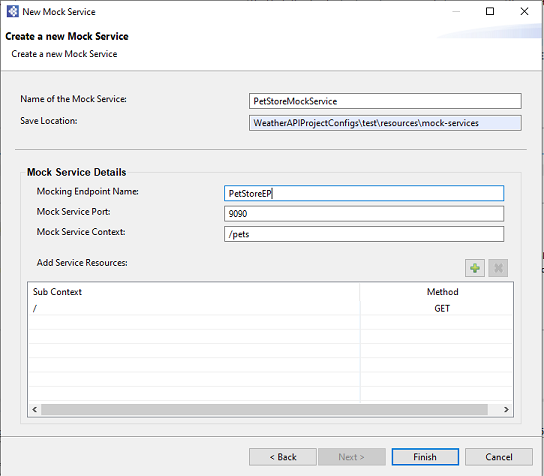
In the Create a new Mock Service page, enter the following details:
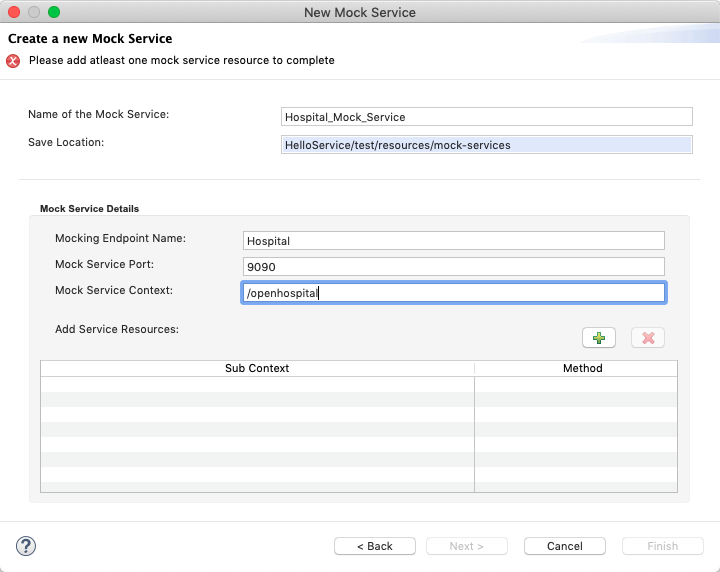
- Name of the Mock Service: A name for the mock service.
- Mocking Endpoint Name: Endpoint name which wants to mock.
- Mock Service Port: Port for the mock service.
- Mock Service Context: Main context for the service starts with '/'.
-
Add multiple resources for the mock service as needed. To add multiple resources click the '+' icon on top of the resources table.
- Service Sub Context: Sub context of the resource starts with '/'.
- Service Method: REST method type of the resource.
-
Fill the Expected Request to the Mock Service Resource section if you want to mock an endpoint based on the coming request headers or payload.
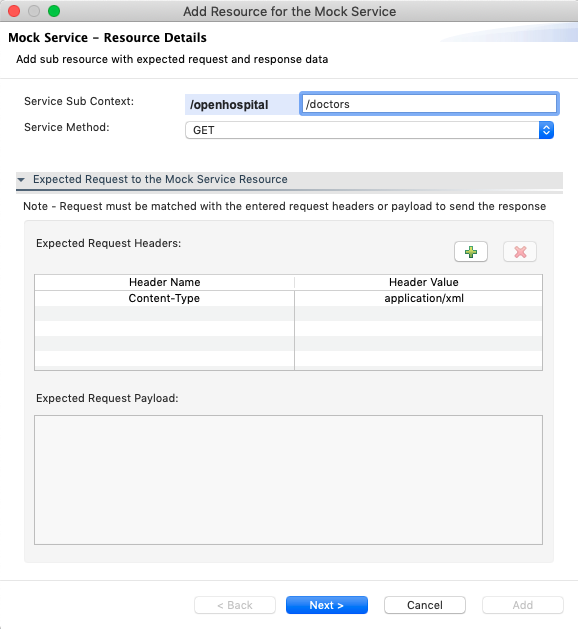
- Header Name: Expected request header name.
- Header Value: Expected request header value.
- Expected Request Payload: Expected request payload to the service.
Note: Entered request headers/payload must me matched with the request to send the response a this mock service.
-
Fill the Response Send Out from the Mock Service Resource section to get a response from the service.
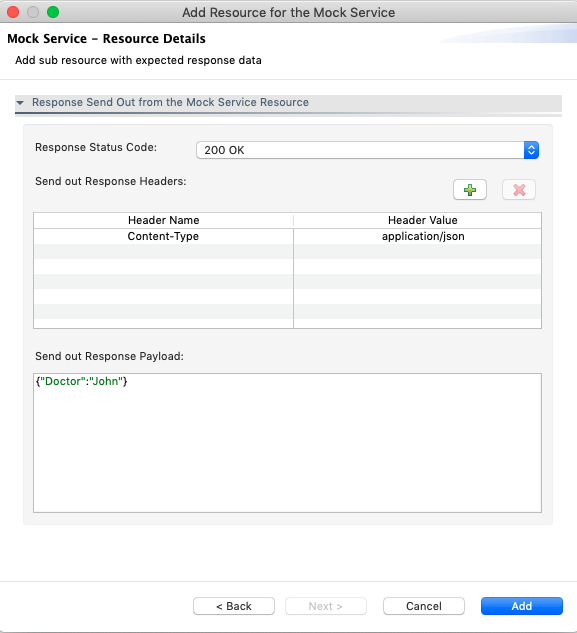
- Response Status Code: Response status code of the mock service.
- Header Name: Response request header name.
- Header Value: Response request header value.
- Send Out Response Payload: Expected response payload from the service.
Note
Please note that the mock service should have a sub context with '/' defined, and additional sub contexts should be defined after that.
- If you are trying to mock an endpoint
http://petstore.com/pets, the wizard should look like below now.
- If you are going to mock the same endpoint with an additional sub context (e.g.,
http://petstore.com/pets/id), you can add it to the same mock service as shown below.
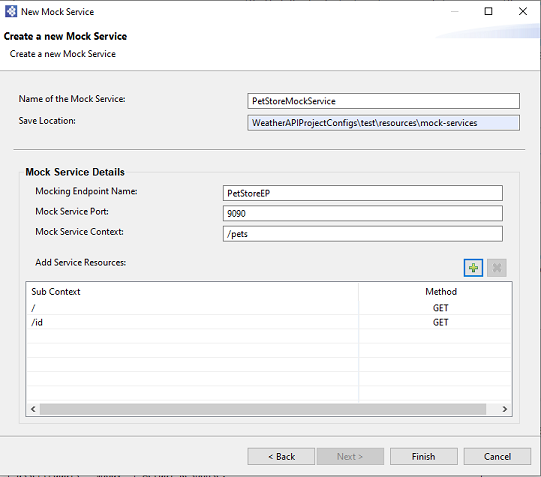
Once you have entered the required details, click Add. It will list the resource under the Add Service Resource table with Sub Context and Method. After that click Finish to create a Mock Service. It will locate under the test → resources → mock-services directory.
