Managing the Registry
The following sections explain how you can manage the Registry using WSO2 Integration Studio.
Adding different remote registry instances
-
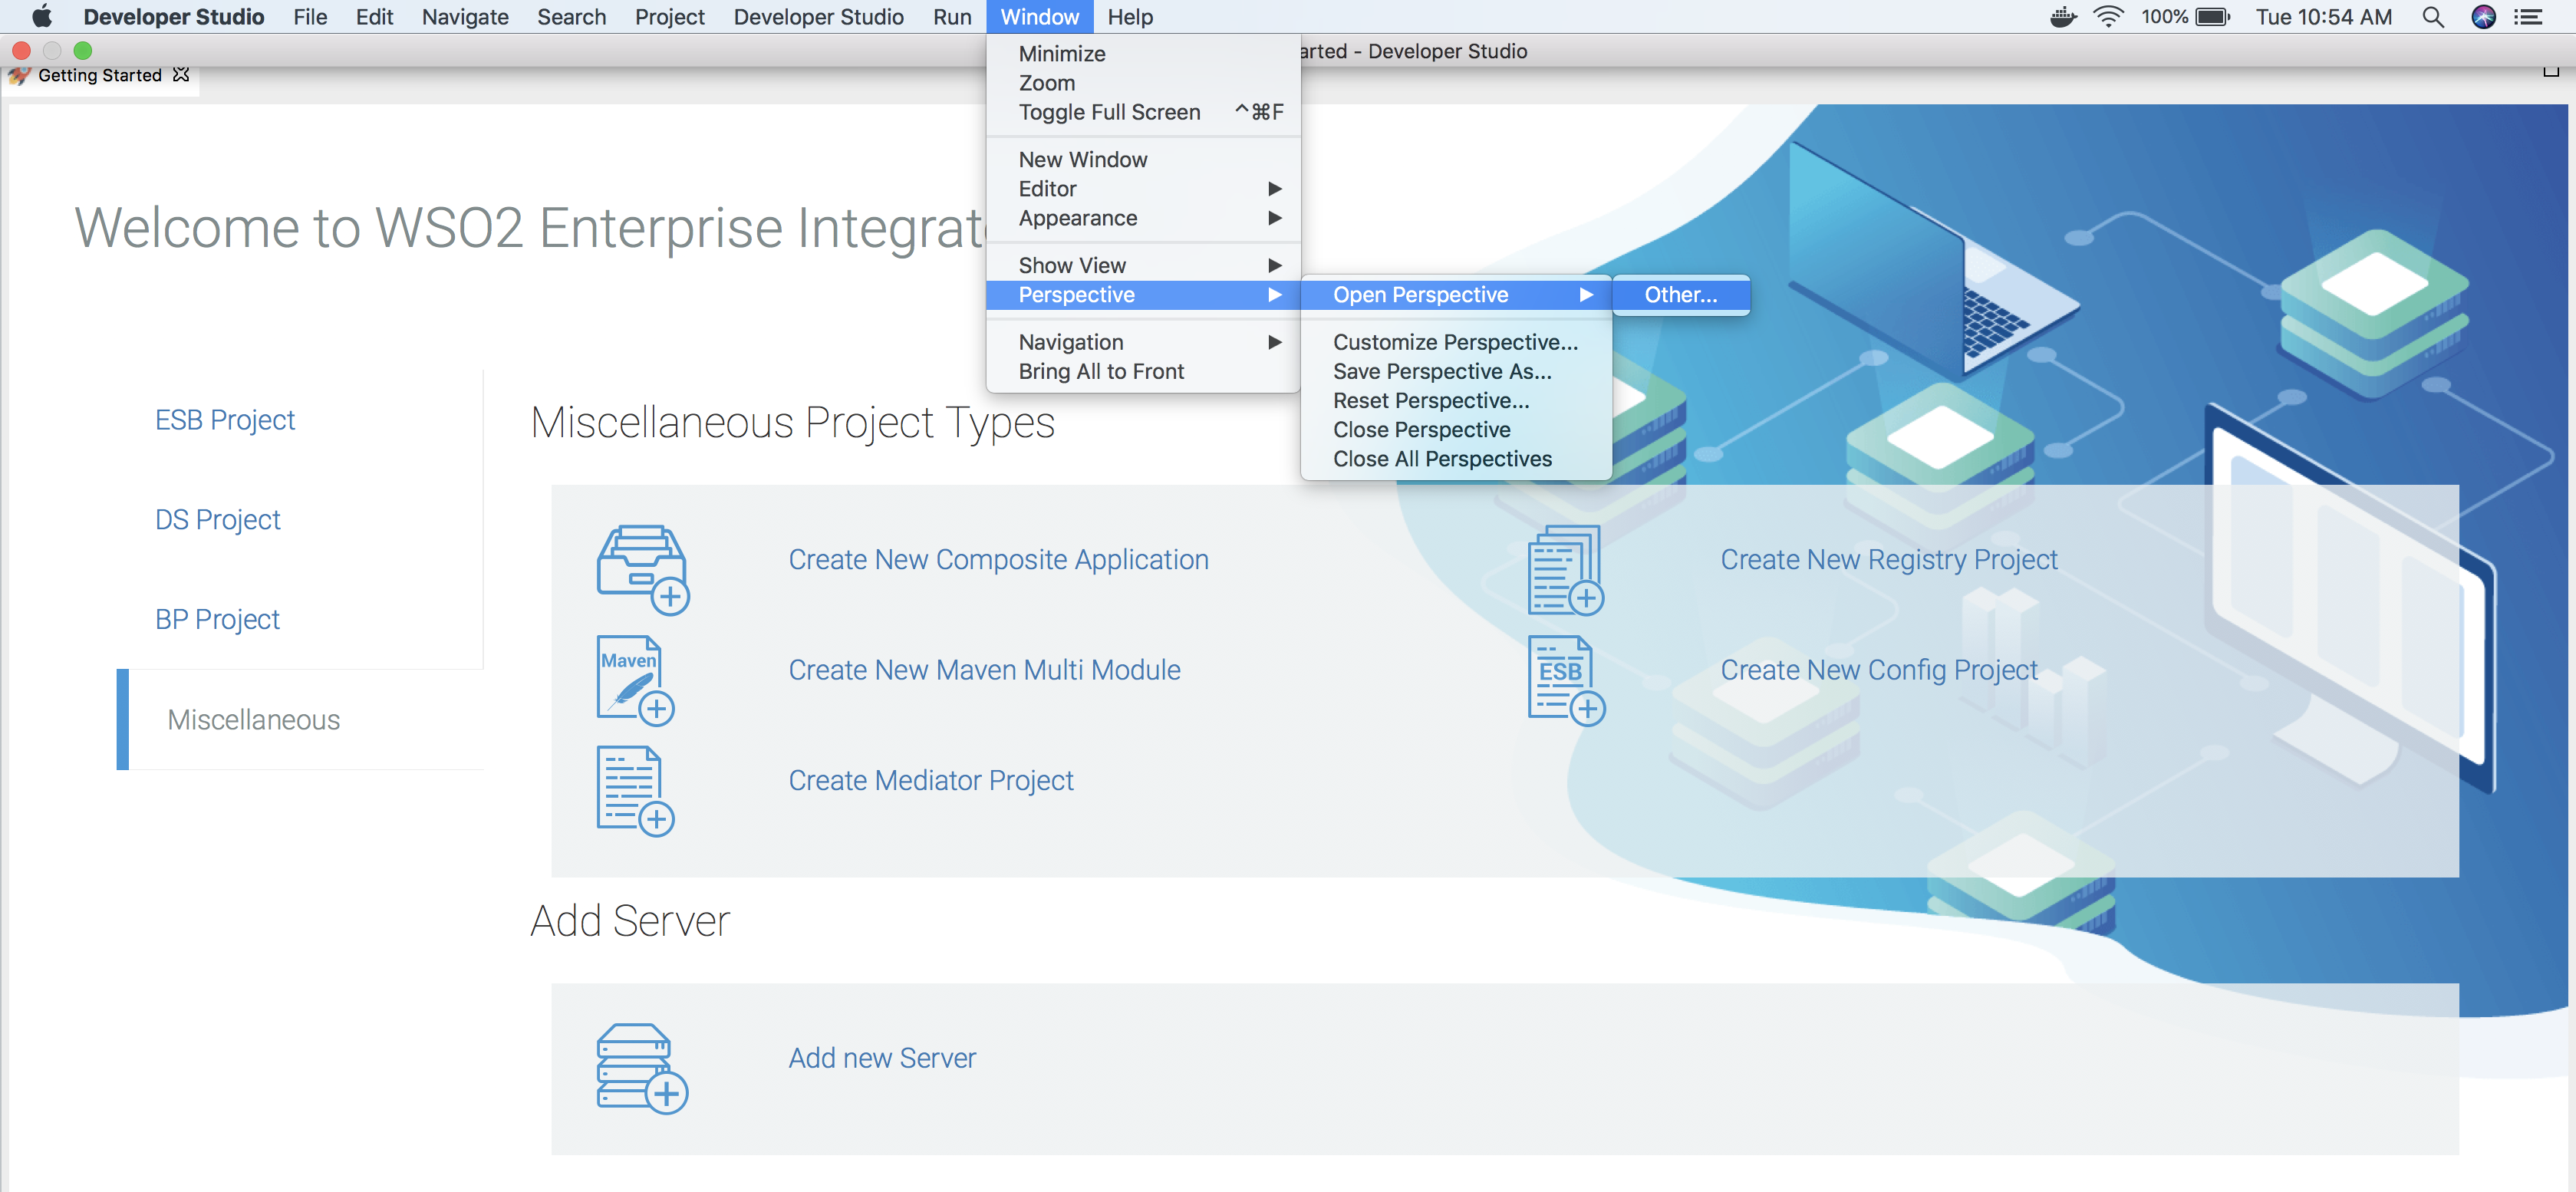
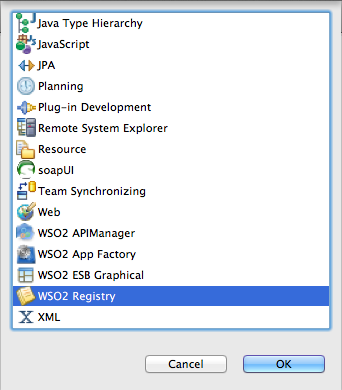
To open the WSO2 registry perspective, click Window -> Open Perspective -> Other -> WSO2 Registry . In this perspective, you will get a WSO2 Registry Browser view.
-
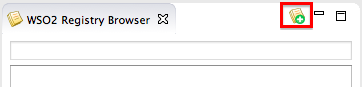
Add a remote registry instance. On the WSO2 Registry Browser view, click the Add Registry icon.
In the dialog box that appears, fill in the necessary information. The default information for the Registry has been automatically filled in. You can either specify root (
/) or any other valid registry path for a collection (eg:/_system/local/_systemetc). Elements down the given path will be loaded in the Registry Browser view.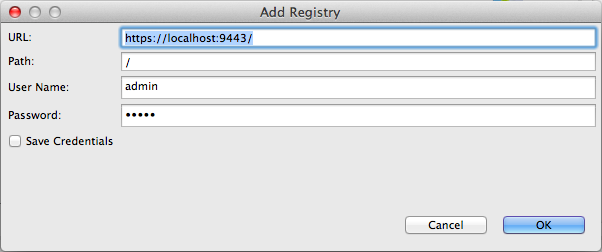
If you selected root (
/) as the path, you will get the following registry tree: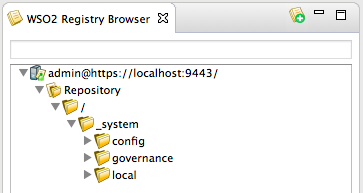
If you selected
/_system/localas the path, you will get the following registry tree:
Adding collections and resources
Info
Do not set the media type for WSDLs and WSDL resources (it is then automatically set to application/xml ). This is done to ensure that the WSDL handler does not intercept the Registry PUT operation.
-
Add a new collection. Expand the
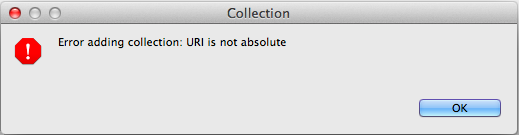
Repositorynode, right-click on the root (/) collection and click Add a new Collection .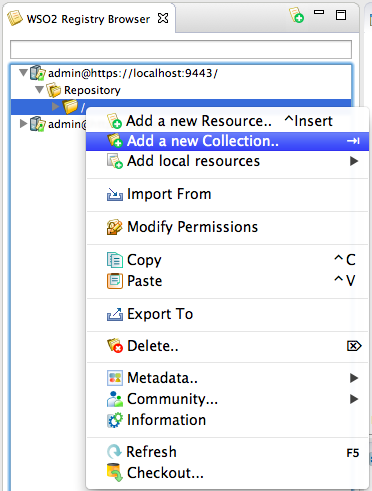
An editor appears where you can enter a name, media type and description for the collection.
To add the collection, save the changes ( CTRL + S ) done in the editor. A new collection with the given name will be added to the selected node.
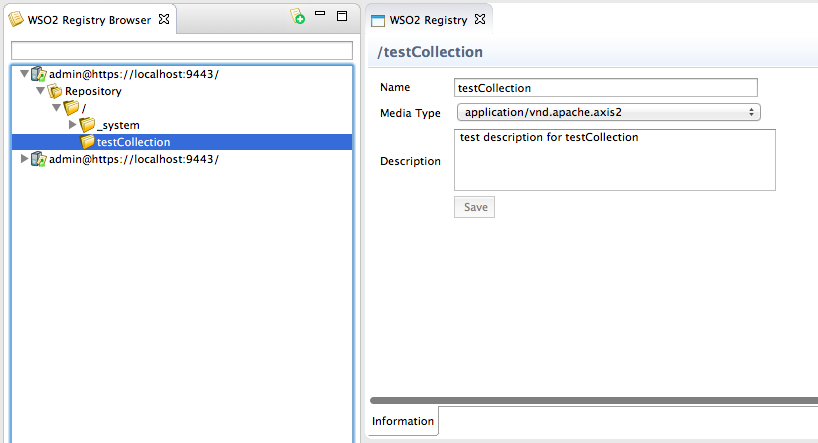
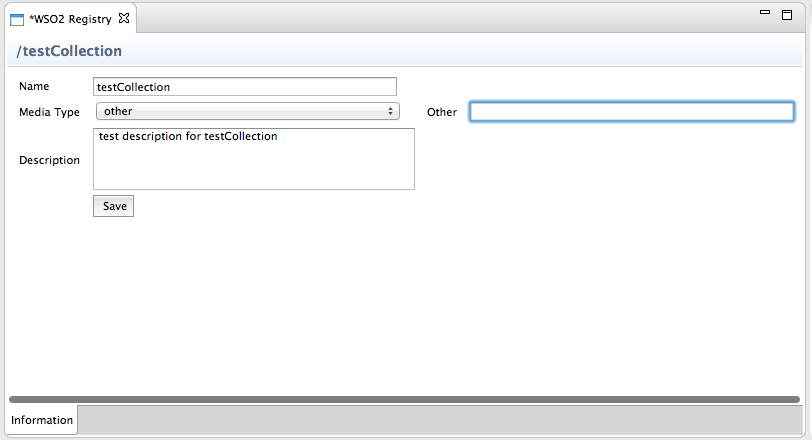
In the Media Type combo box, you have the ability to create your own media type by selecting the Other option.
-
Add a new resource. Select a collection, right-click on it and click Add a new resource . You will get the same editor as you got for the collection. You can add a resource in the following ways:
-
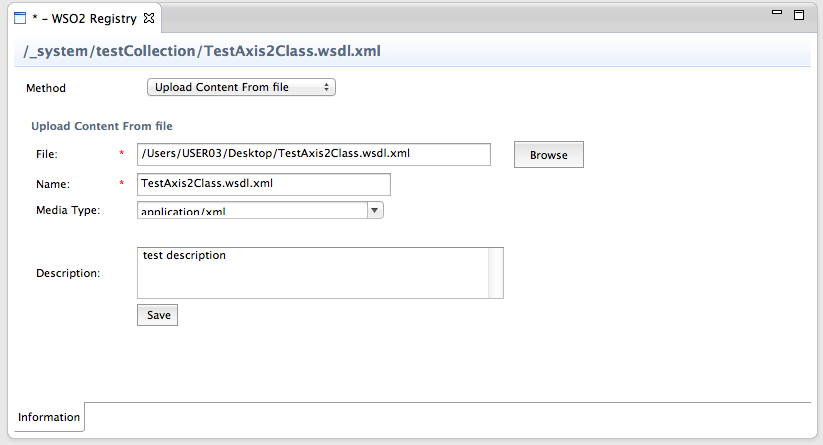
Upload content from file
This is the default method to add a resource. Browse to the file you want to add from the file system. Resource name and media type will be filled accordingly. You can change the default values if required.
-
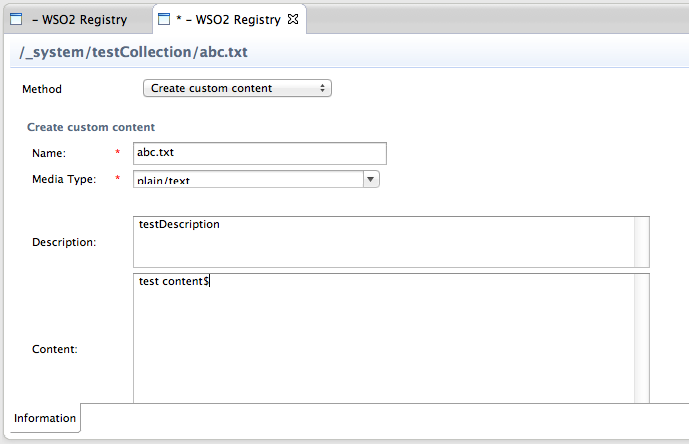
Create custom content
Use this method to create your own resource files from the editor. Give a name, mediatype, description and content for the file. You can edit content according to the specified media type.
-
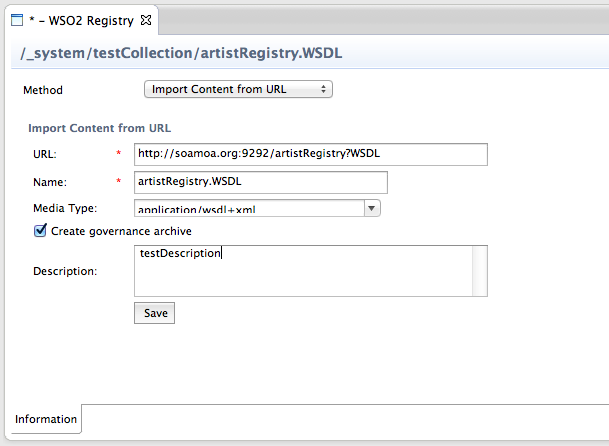
Import content from URL
Using this method, you can import content from a URL. When you give the URL, make sure it does not contain characters like ~ since it is considered as an invalid character for abdera. The name and media type will be filled according to the given URL. You can change the values if required.
-
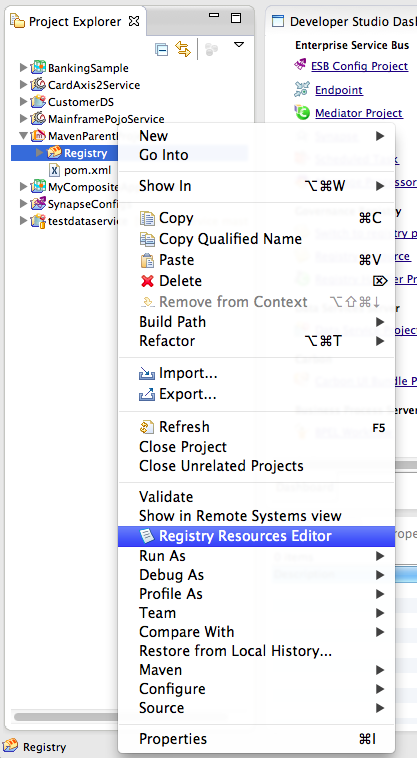
After adding a resource to your G-Reg project, the resource editor appears. If you close the editor and want to open it again at any point, simply select your registry resource project from the Project Explorer, right-click and click Registry Resources Editor .
It is also possible to edit the information later. To edit media type or resource description, right-click on the resource and click Information. You can delete the collection or resource you added by right-clicking on the resource or collection and clicking Delete.
Adding metadata and community features
You can add properties, associations, dependencies, comments, and tags for a resource or collection. There are two main fields of properties you can add.
- Metadata
- Community Features
In the Metadata category, you can add properties, associations and dependencies. In the Community Features category, you can add comments and tags.
Add metadata
-
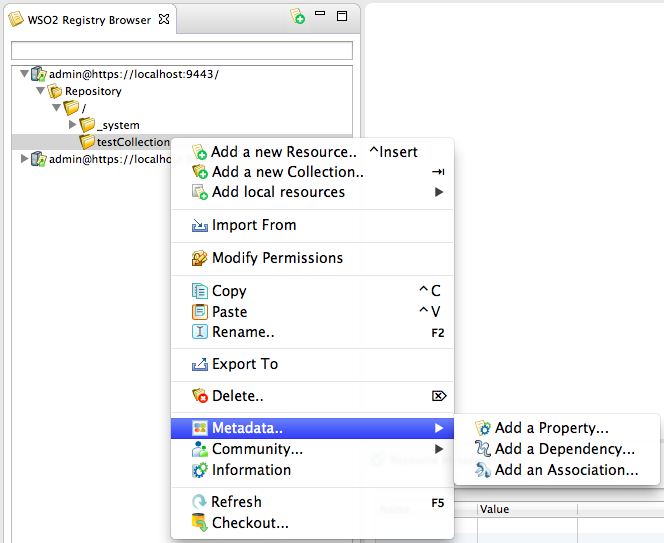
Add a property. Right-click on the collection or resource to which you want to add a property and click Metadata ->Add a Property. On the editor that appears, you can add, edit, and delete properties.
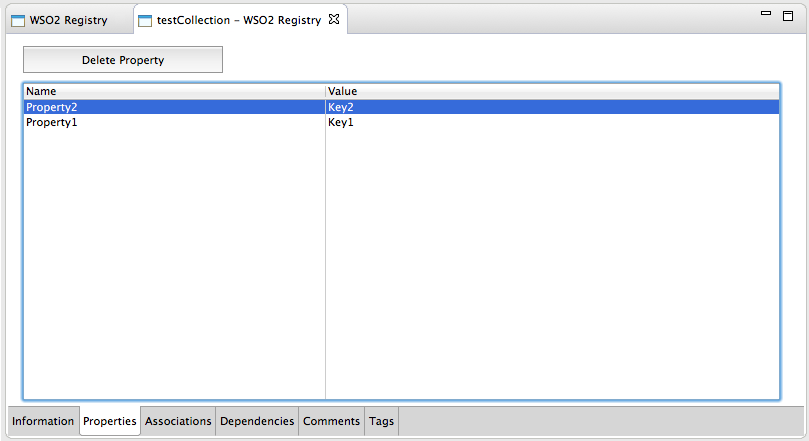
To delete a property, select the property and click Delete Property. You can undo the action by clicking Undelete Property. If not, the property will be removed when you save the editor.
-
Add a dependency. Right-click on the collection or resource to which you want to add a dependency and click Metadata -> Add a Dependency. On the editor that appears, add the dependencies you need.
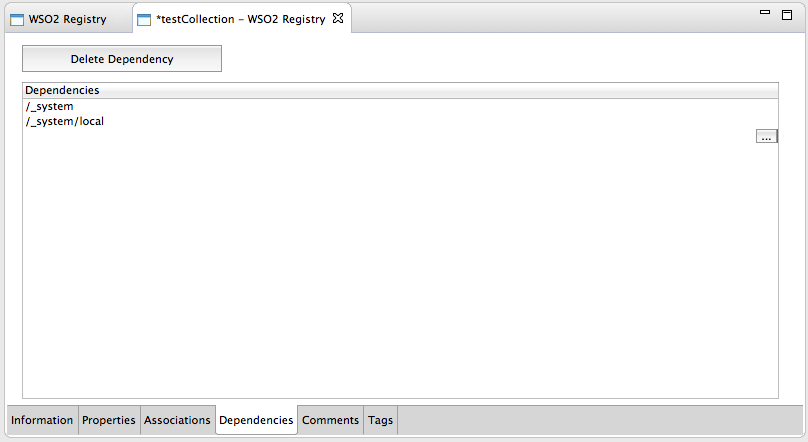
Note that the path should be valid registry paths. If not, an error message appears when you click Save.
-
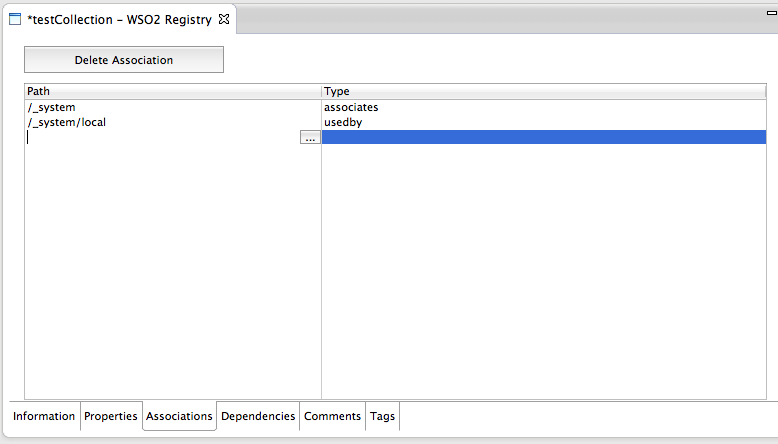
Add an association. Right click on the collection or resource to which you want to add an association and click Metadata -> Add an Association.
On the editor that appears, add the associations necessary. Note that the path should be valid registry paths. If not, an error message appears when you click Save . You can edit the values, delete associations, and undo delete as required.
Add community features
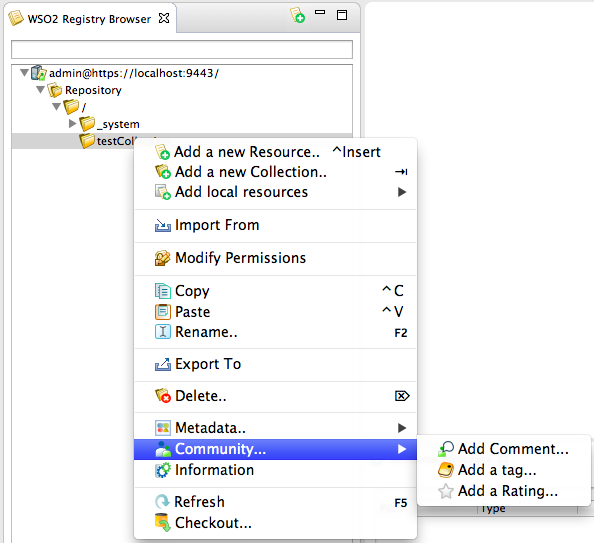
-
Add comment. Right click on the collection or resource to which you want to add a comment and click Community ->Add Comment. On the editor that appears, you can add, edit and delete comments. To delete a comment, select the comment and click Delete Comment .
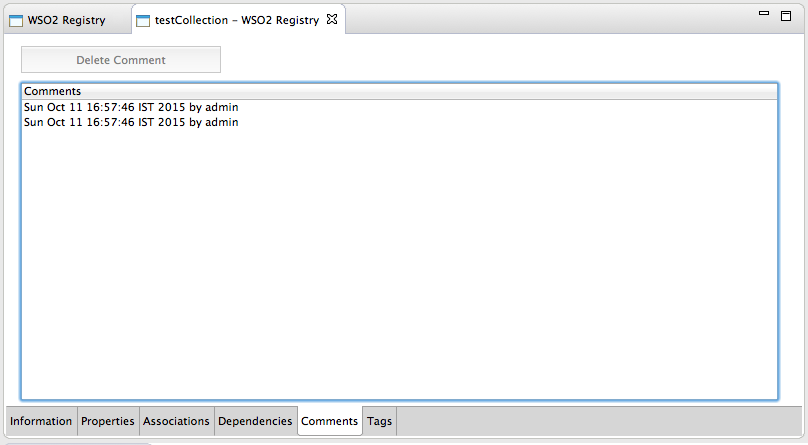
You can undo the action by clicking Undelete Comment. If not, the comment will be removed when you save the editor.
-
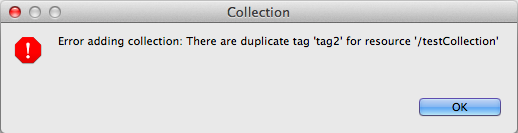
Add a tag. Right click on the collection or resource to which you want to add a tag and click Community ->Add a Tag. On the editor that appears, you can add, edit and delete (or undelete) tags. You can give any string value as a tag.
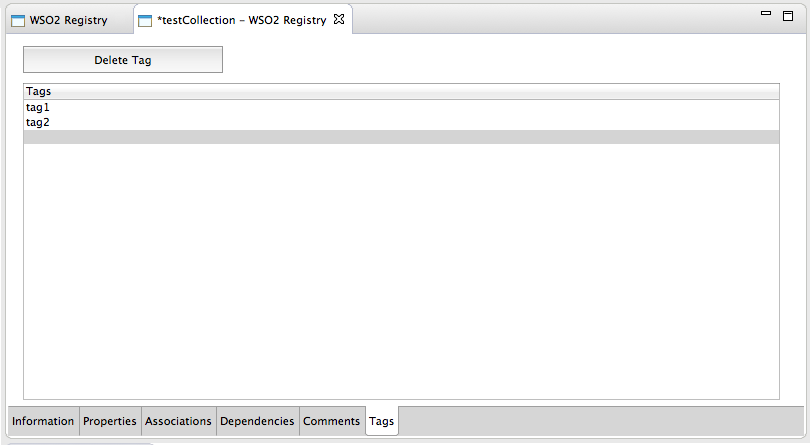
You can not have two tags with the same name.
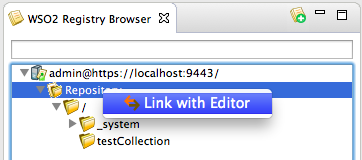
Linking with the editor
If you click on the Link with Editor option, the mouse pointer will focus on the path of the active editor of the WSO2 Registry Browser.
Link With Editor option is available only in the Repository level, since it is a global function. To
activate the Link With Editor option, right-click Repository
and click Link With Editor. The same functionality is available in
the toolbar of the WSO2 Registry Browser view as well.
Now you can open several resources in seperate editors by double clicking on the resource. You can swap among different editors. You will see the correct path related to the selected resource focused in the WSO2 Registry Browser view.
Adding multiple files and folders from file system
You can add multiple folders and files from the local file system. This option is availabe for a collection. Right-click on the collection to which you want to add multiple files and folders, click Add local resources, and choose the option you want.
- Multiple files
- Folder
Select multiple files or folders that you want to add and click OK. Click OK on the confirmation message. The selected multiple resources will be added under the collection.
Importing/exporting resources and collections
With this functionality, you can import a resource and collection from the same registry instance or a different registry instance that you have added. Similarly, you can export a resource or collection to the same registry instance or a different registry instance. Import From is only applicable for a collection since you cannot import a collection or resource under a resource.
Import From
Go to the collection to which you want to import resources, right-click and click Import From . On the dialog box that appears, select the resources that you want to import from the available registry instances. Browse through the registry instance, select the resource or collection you need and click OK .
Click OK on the confirmation message that appears. The imported resource will be added under the selected collection.
Export To
Go to the collection or resource you want to export to another location. Right-click and click Export To. On the dialog box that appears, choose the location to which you want to export the resource. Browse the registry, select the path and click OK .
Click OK on the confirmation message that appears. Now you will see the selected resource has been exported to the given location.
Drag and drop resources and collections
With this functionality, you can drag any resource or collection and drop it to a location of the same registry instance or different registry instance that is available.
Before dropping the resource, you will get a confirmation message. After confirming, the resource will be added to the dropped location.
Modifying permission
You can modify the permission of a resource or collection by right-clicking on the resource or collection and clicking Modify Permissions .
In the dialog box that appears, you will see available roles and their permissions. You can define the permissions and click OK.

Refreshing the registry
You can refresh the registry instance which will enable a sync with the latest updates. This option is available in all stages. You can select Refresh by right-clicking as well as from the toolbar of the WSO2 Registry Browser view.
Viewing information per resource and collection
You can view information related to a resource or collection by right-clicking and clicking Information.
It is a multi-tab editor which includes general information, properties, associations, dependencies, tags and comments. You have the ability to edit them at the same time.
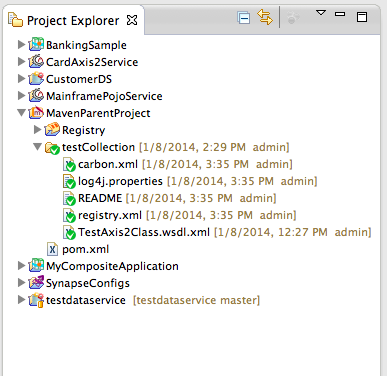
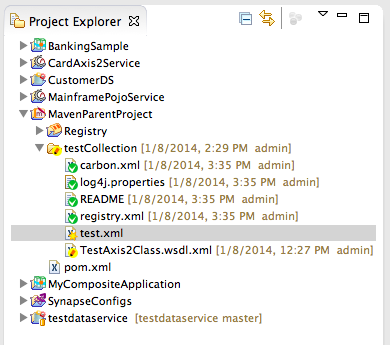
Checking-out a collection to a local project
You can check-out a resource or a collection to a local project in the workspace. Right-click on the resource or collection and click Checkout .
Select the checkout location. If you have any projects in the workspace, they are shown in the dialog box. If not, the dialog box is blank. As a result, you have to create a project in the workspace before checking-out.
A checked-out resource can have several states.
- Synched
- Updated
- Conflicted
- Added
- Resolved
When you check-out, it is at the sync state so the folder will have a green icon.
If you double click a resource, edit and then save, the state will change to Updated and the folder icon will be yellow .
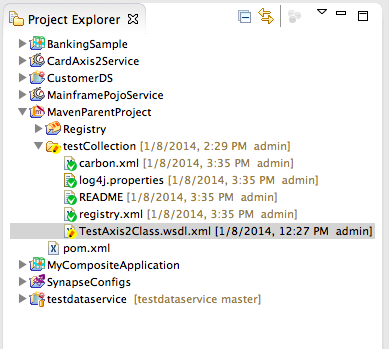
If you add a new file, the state will change to Added and the folder will have a star icon.
Updating the registry
The changes you did in the checked-out folder can be checked-in to the registry. When you check-in, you can not check-in resource wise. You have to check-in the whole folder.
To check-in, right-click the folder that has been updated, which will have an icon in yellow , and click WSO2 Registry -> Commit changes as user.
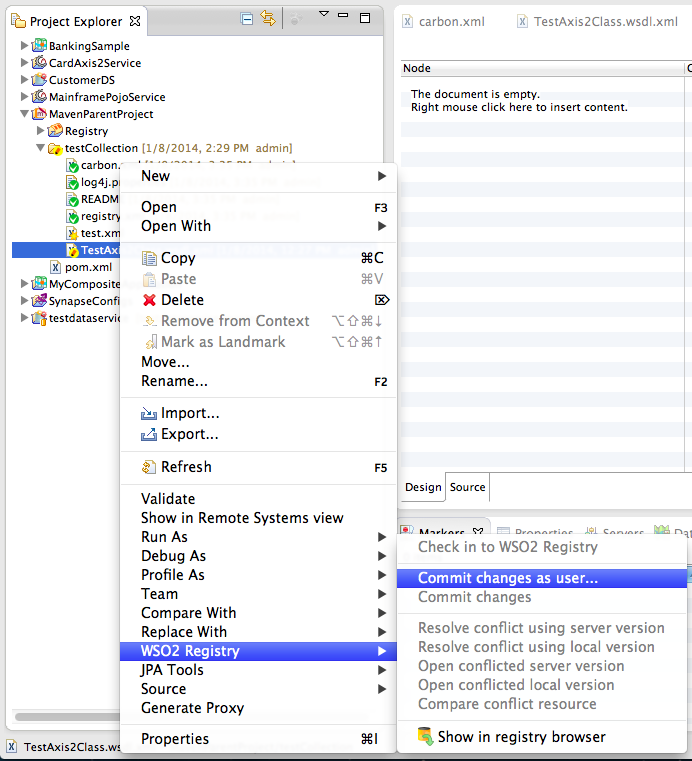
If you have several registry instances with different users, you can choose as to what user you want to commit the folder. Give the correct credentials and you will get a message confirming that the commit was successful.
After committing the changes, the folder will be changed to the Sync stage again where the folder icon will be green again.
Viewing and restoring versions
Go back to the WSO2 Registry perspective. Resources have different versions. If there are versions available for the resource, it will be displayed in the right-click menu of the resource. The five latest versions are displayed.
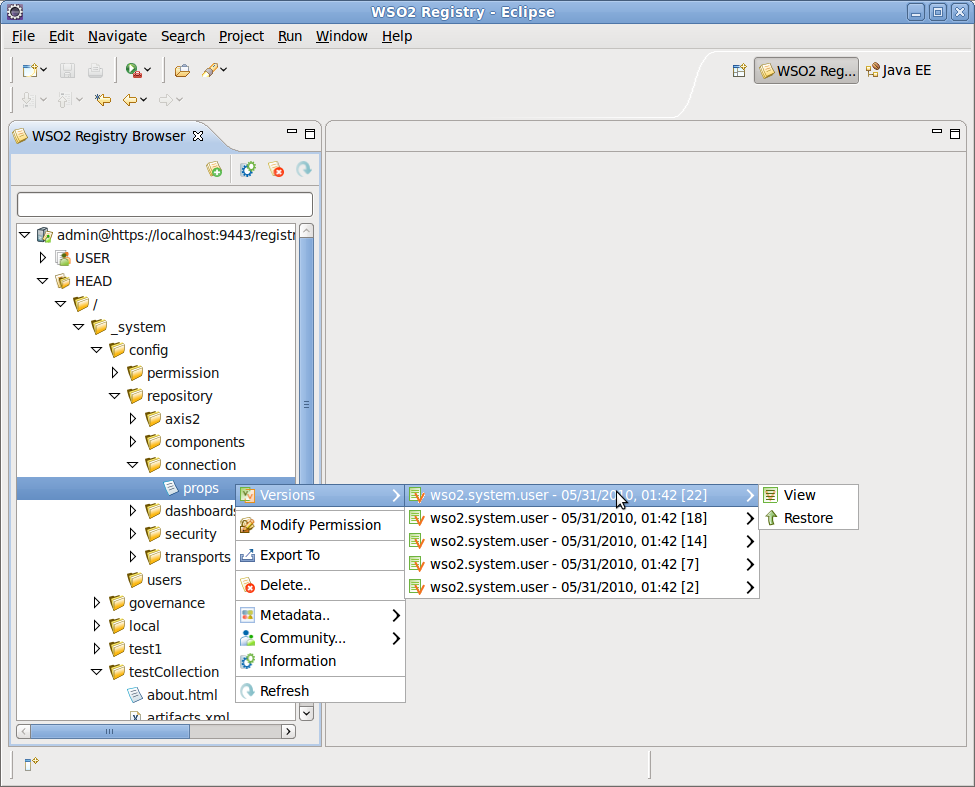
You can either view or restore a version. When you click View , the content of the version is displayed. The Restore option will reset the selected version to the previous version.
Changing role permissions of resources
You can change resources and set permissions to those resources of the given role. This feature is availble for non-admin roles. Go to a non-admin role such as everyone or wso2.annonymous.role , right-click and click Change Permission .
A wizard appears where you can select resources or collections from available registry instances. You can make multiple selections from this registry browser.
You can assign permissions to the selected resources. Permission will be grayed if you select multiple resources and not all of them are already assigned to that permission. Select the permissions you want to add and click Finish . The selected permissions will be added to the resources you choose.
Top