Streaming Integrator Tooling Overview
Info
This page describes the latest publicly-available version of Streaming Integrator Tooling. If you cannot see some of the user interface elements described here, update your Streaming Integrator Tooling installation.
The Streaming Integrator Tooling is a developer tool that is shipped with the Streaming Integrator to develop Siddhi applications. It allows provides three interfaces to develop Siddhi applications
-
Source View : This allows you to write Siddhi applications in the Siddhi Query Language. This supports auto-completion and tracking syntax errors.
-
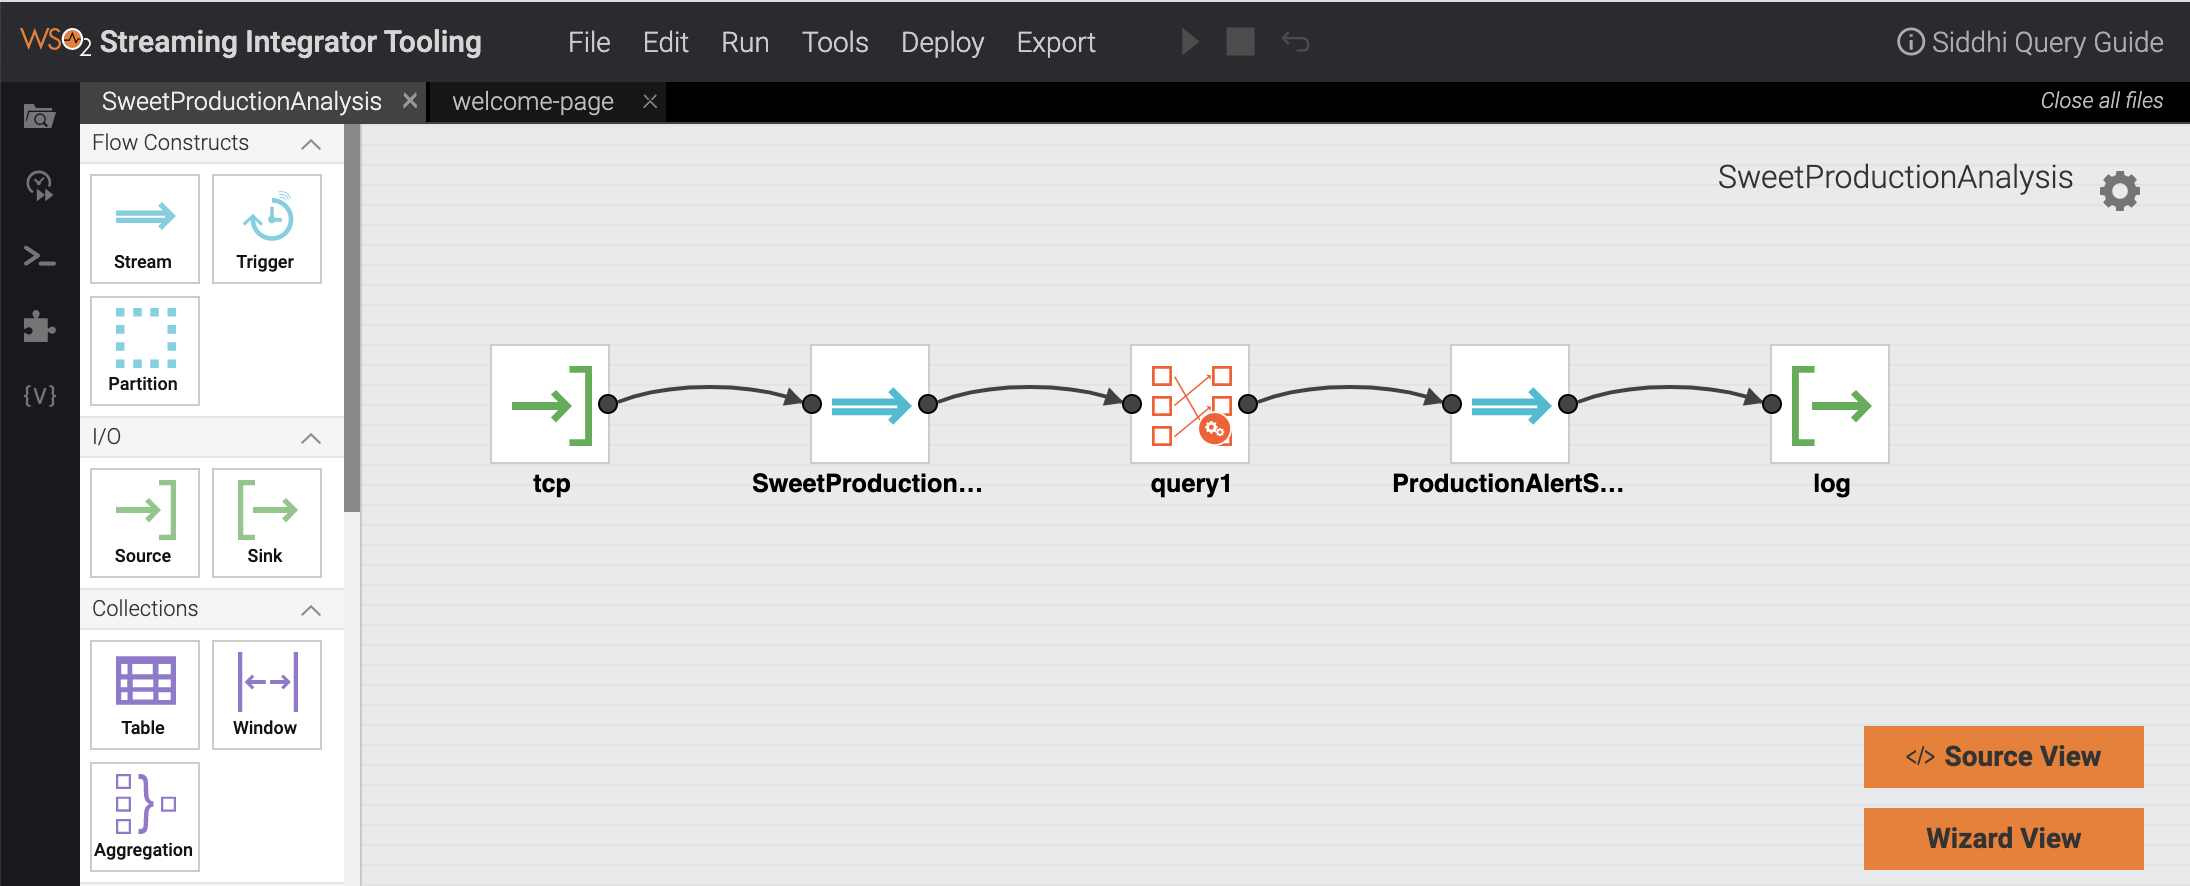
Design View :This interface visualizes the event flow of a Siddhi application, and allows you to compose the applications by dragging and dropping Siddhi components to a graph.
-
Wizard View: This is a wizard with a page for each component of a Siddhi application that displays the relevant configuration parameters as fields. This wizard can be directly accessed from the Welcome Page. Only ETL (Extract, Transform, Load) applications can be created/viewed in this interface. For a Siddhi application to be considered an ETL application, it must include all of the following components:
- A source configuration
- A sink configuration (the sink type can be any of the supported sink types other thanlog)
- A Siddhi query that performs a transformation.
For more information, see Creating an ETL Application via SI Tooling tutorial.
Once a Siddhi application is created, you can simulate events via the Streaming Integrator Tooling to test whether it works as expected.
Starting Streaming Integrator Tooling
To start and access the Streaming Integrator Tooling, follow the steps below:
-
Start the Streaming Integrator Tooling by issuing one of the following commands from the
<SI_HOME>/bindirectory.- For Windows:
streaming-integrator-tooling.bat - For Linux:
./streaming-integrator-tooling.sh
- For Windows:
-
Access the Streaming Integrator Tooling via the
http://localhost:/editorURL. The Streaming Integrator Tooling opens as shown below.Info
The default URL is
http://localhost:9390/editor. If required, you can change the host name (i.e.,localhost) or the web UI application name (i.e.,editor). For instructions, see Changing the Host Name and Context Path of SI Tooling.
Welcome Page
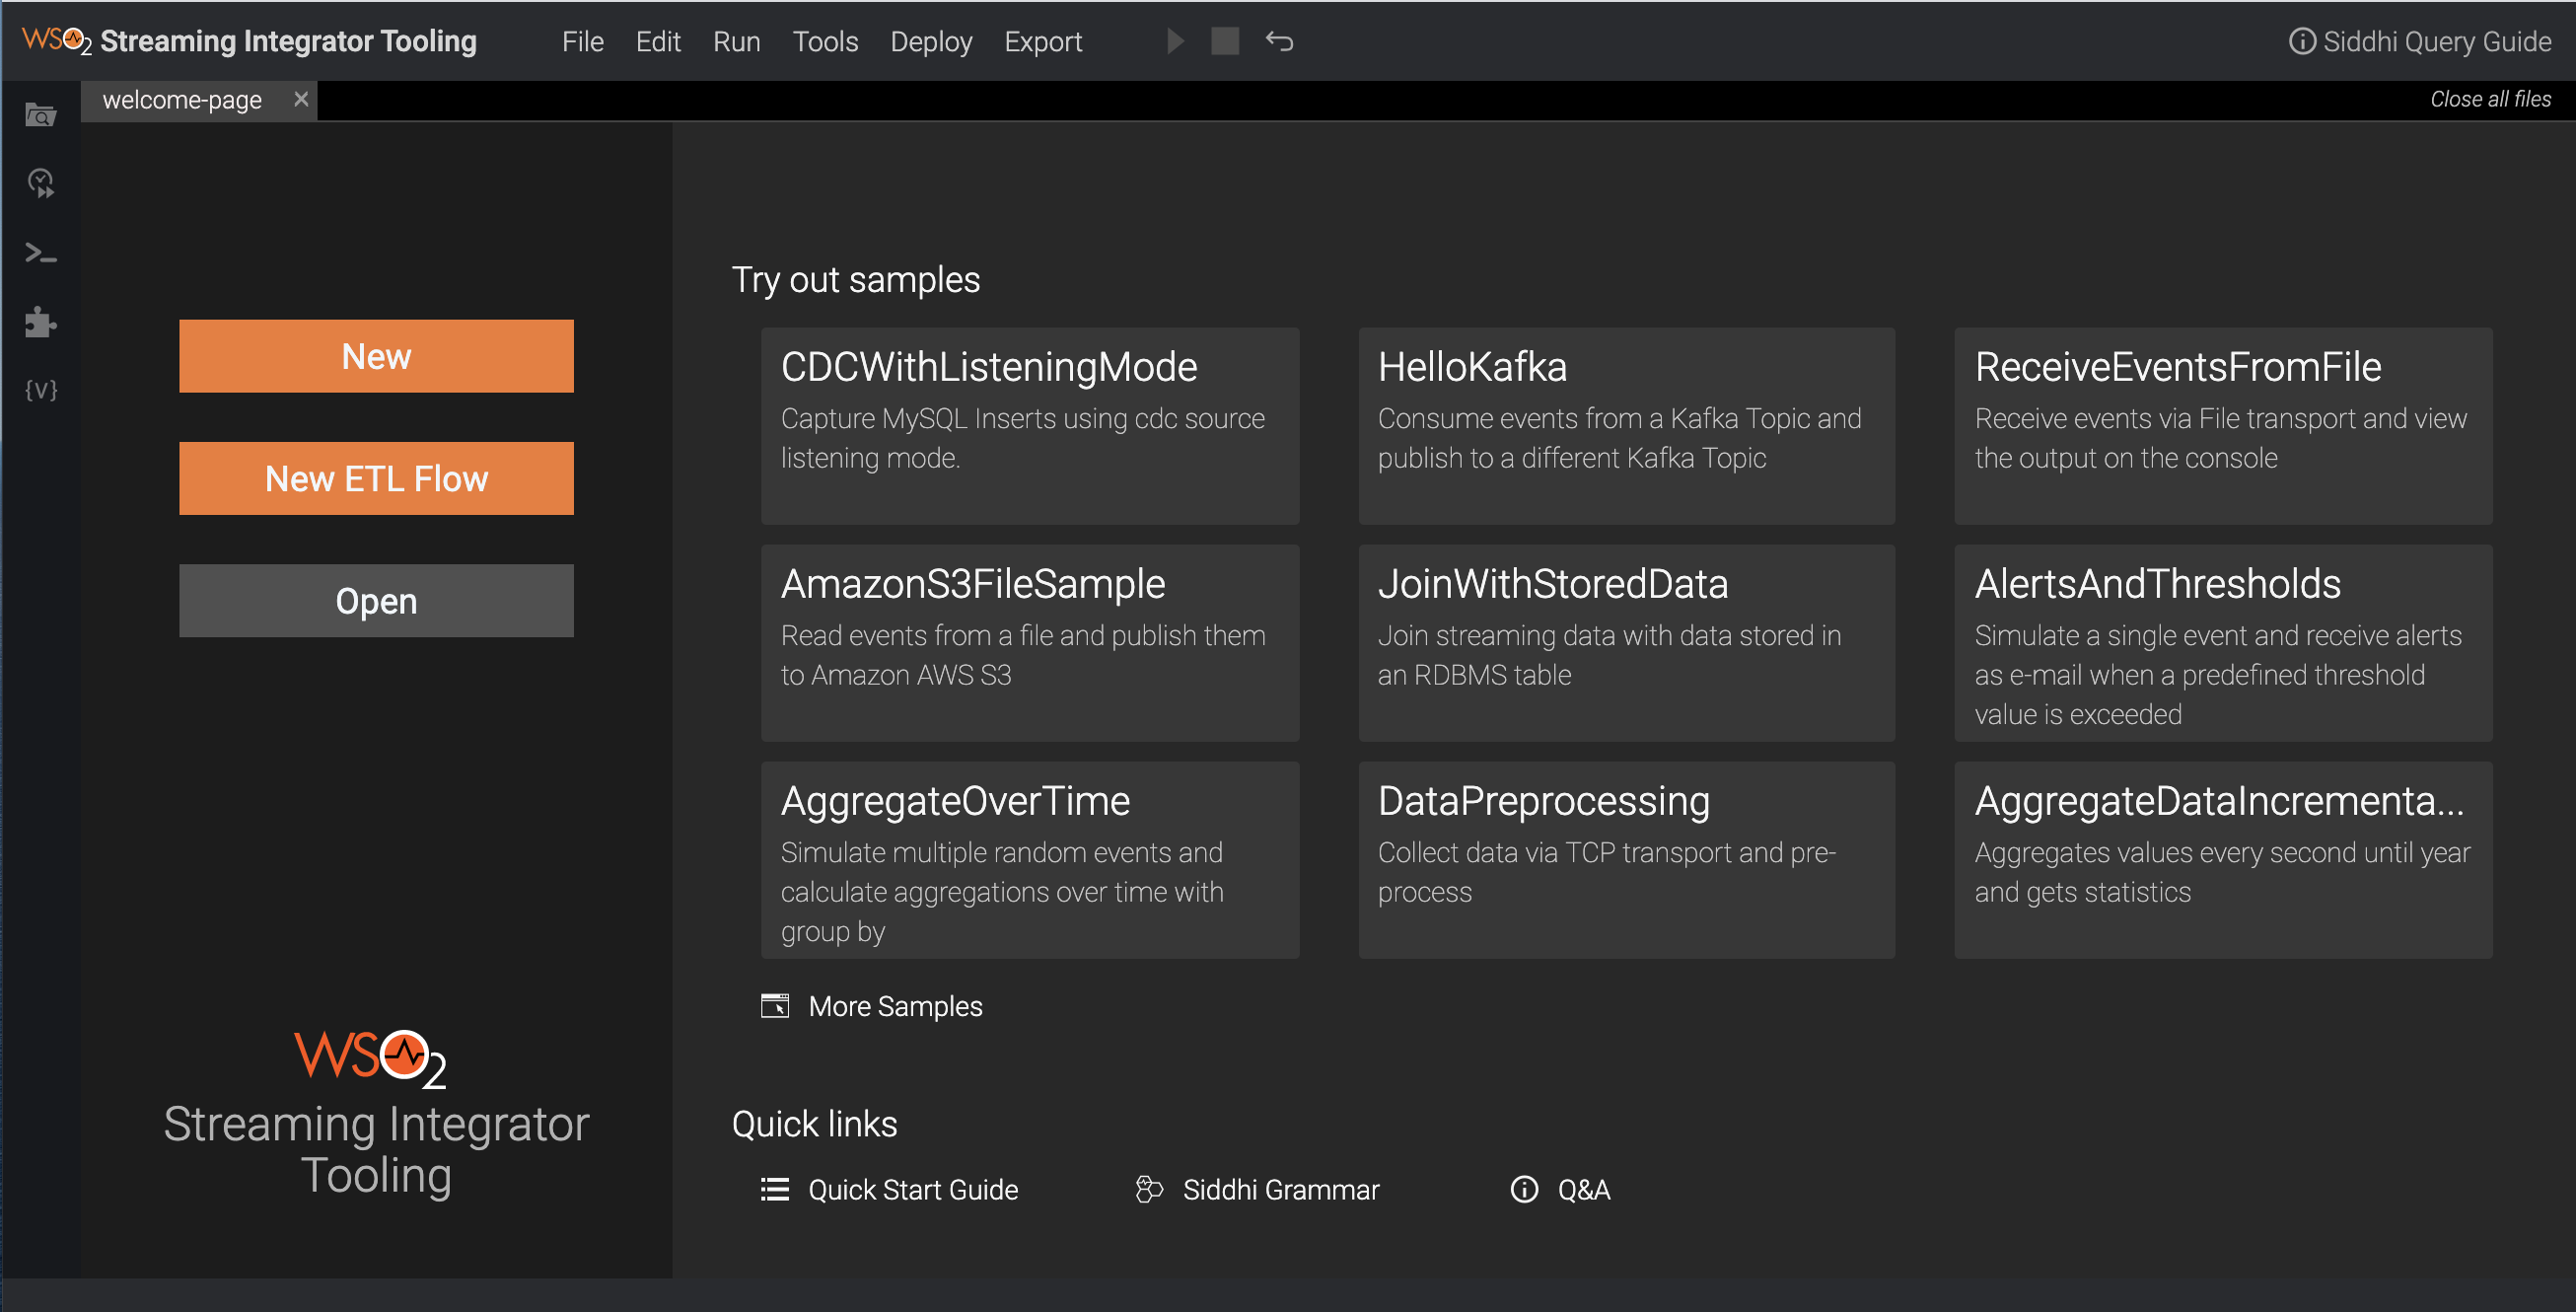
The Welcome to the Streaming Integrator Tooling Tour Guide is open by default. You can take a tour by following the instructions on the dialog box, or close it and proceed to explore the Streaming Integrator Tooling on your own. You can also access this dialog box by clicking Tools -> Tour Guide . Once you close the dialog box, you can try the following:
-
New Click this to open a new untitled Siddhi file.
-
Open Click this to open a Siddhi file that is already saved in the
workspacedirectory of the Streaming Integrator Tooling. If the file is already opened in a new tab, clicking Open does not open it again. The default path to theworkspacedirectory is<SI_Home>/wso2/server/deployment. -
New ETL Flow Click this to open a wizard with which you can create a Siddhi application with ETL functionality by entering values for the required parameters instead of constructing Siddhi queries by writing code or via a graphical interface. To understand how this is done, follow the Creating an ETL Application via SI Tooling tutorial.
-
Try out samples
The pre-created samples provided out of the box are listed in this section. When you click on a sample, it opens in a new tab without a title. -
More Samples
Click this to view the complete list of samples in the samples directory. This allows you to access samples other than the ones that are displayed by default is the Try out samples section. When you click on a sample, it opens in a new tab without a title. -
Quick links
This section provides links to more resources.
Menu items
This section explains the options that are available in the File , Edit and Run menus.
File menu Items
The File menu includes the following options.
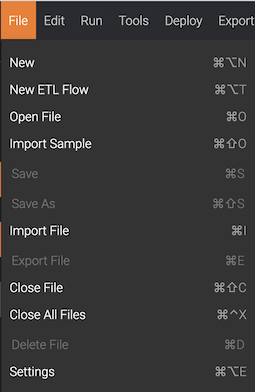
-
New
Click this to open a new untitled Siddhi file. For more information, see the Creating an ETL Application via SI Tooling tutorial. -
New ETL Flow Click this to create a new ETL application via the ETL wizard. For instructions,
-
Open File Click this to open a Siddhi file that is already saved in the
workspacedirectory of the Streaming Integrator Tooling. If the file is already opened in a new tab, clicking Open does not open it again. The default path to theworkspacedirectory is<SI_Home>/wso2/server/deployment. ` .When a Siddhi file is opened, its source view is displayed by default.
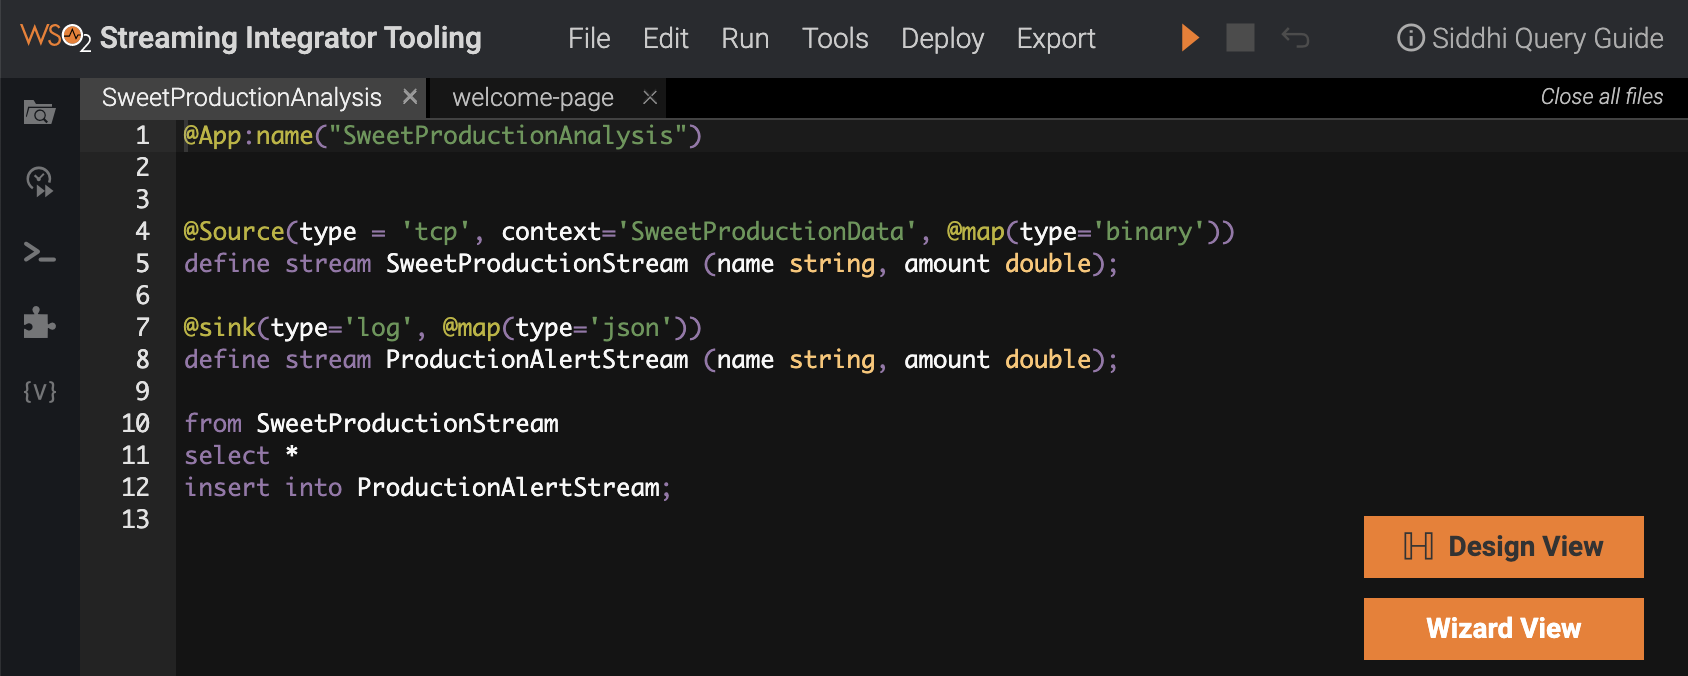
To view a design view where the elements of the Siddhi application are graphically represented, click Design View. As a result, a graphical view of the Siddhi application is displayed as shown in the following example.
-
Import Sample
Click this to import a sample from the samples diretory to a new tab. The sample opens in an untitled Siddhi file. Once you save it, it can be accessed from theworkspacedirectory. -
Save
Click this to save an edited or new file to theworkspacedirectory. -
Save As
Click this if you want to save an existing saved file with a different name. If you click this for an untitled Siddhi file, the normal save operation is executed (i.e., same operation carried out when you click Save ). -
Import File
Click this to open a file from a system location. This file is opened in a new tab in the saved state with the same file name with which it is imported. -
Export File Click this to export a saved file to a system location. This is only applicable to Siddhi application tabs that are in a saved state.
-
Close File Click this to close a currently active Siddhi application that is already open in a tab.
-
Close All Files Click this to close all the Siddhi files that are currently open.
-
Delete File
Click this to delete the currently active Siddhi file from theworkspacedirectory. Only Siddhi files that are already saved can be deleted. -
Settings
Click this to change the theme and the font size used in the Streaming Integrator Tooling. The default theme is Twilight .
Edit menu Items
The Edit menu includes the following options.
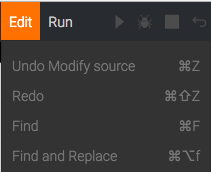
-
Undo
Click this to undo the last edit made to the Siddhi application that you are currently editing. Only unsaved edits can be undone. -
Redo
Click this to redo the edit that was last undone in the Siddhi application that you are currently editing. The redo operation can be carried out only if you have not saved the Siddhi application after you undid the change. -
Find Click this to search for a specific string in the currently active Siddhi application tab.
-
Find and Replace
Click this to search for a specific string in the currently active Siddhi application tab, and replace it with another string. -
Reformat Code
Click this to reformat the Siddhi queries in the Siddhi application that you are currently creating/editing in the source view.Info
This menu option is only visible when you are working in the source view.
-
Auto-Align
Click this to horizontally align all the Siddhi components in a Siddhi application that you are creating/editing in the design view.Info
This menu option is only visible when you are working in the design view.
Run menu Items
The Run menu includes the following options.
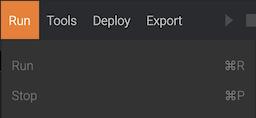
-
Run
Click this to start the Siddhi application in the Run mode. Only saved Siddhi applications can be run.Info
This menu option is enabled only when a Siddhi application is being created/edited in the source view.
-
Stop
Click this to stop a Siddhi application that is already running.
Tools menu items
The Tools menu provides access to the following tools that are shipped with the Streaming Integrator Tooling.
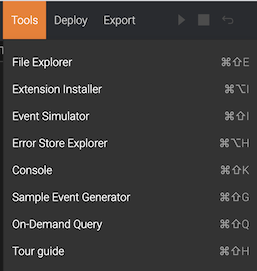
-
File Explorer
The file explorer. This is also avaible in the Side Panel.
-
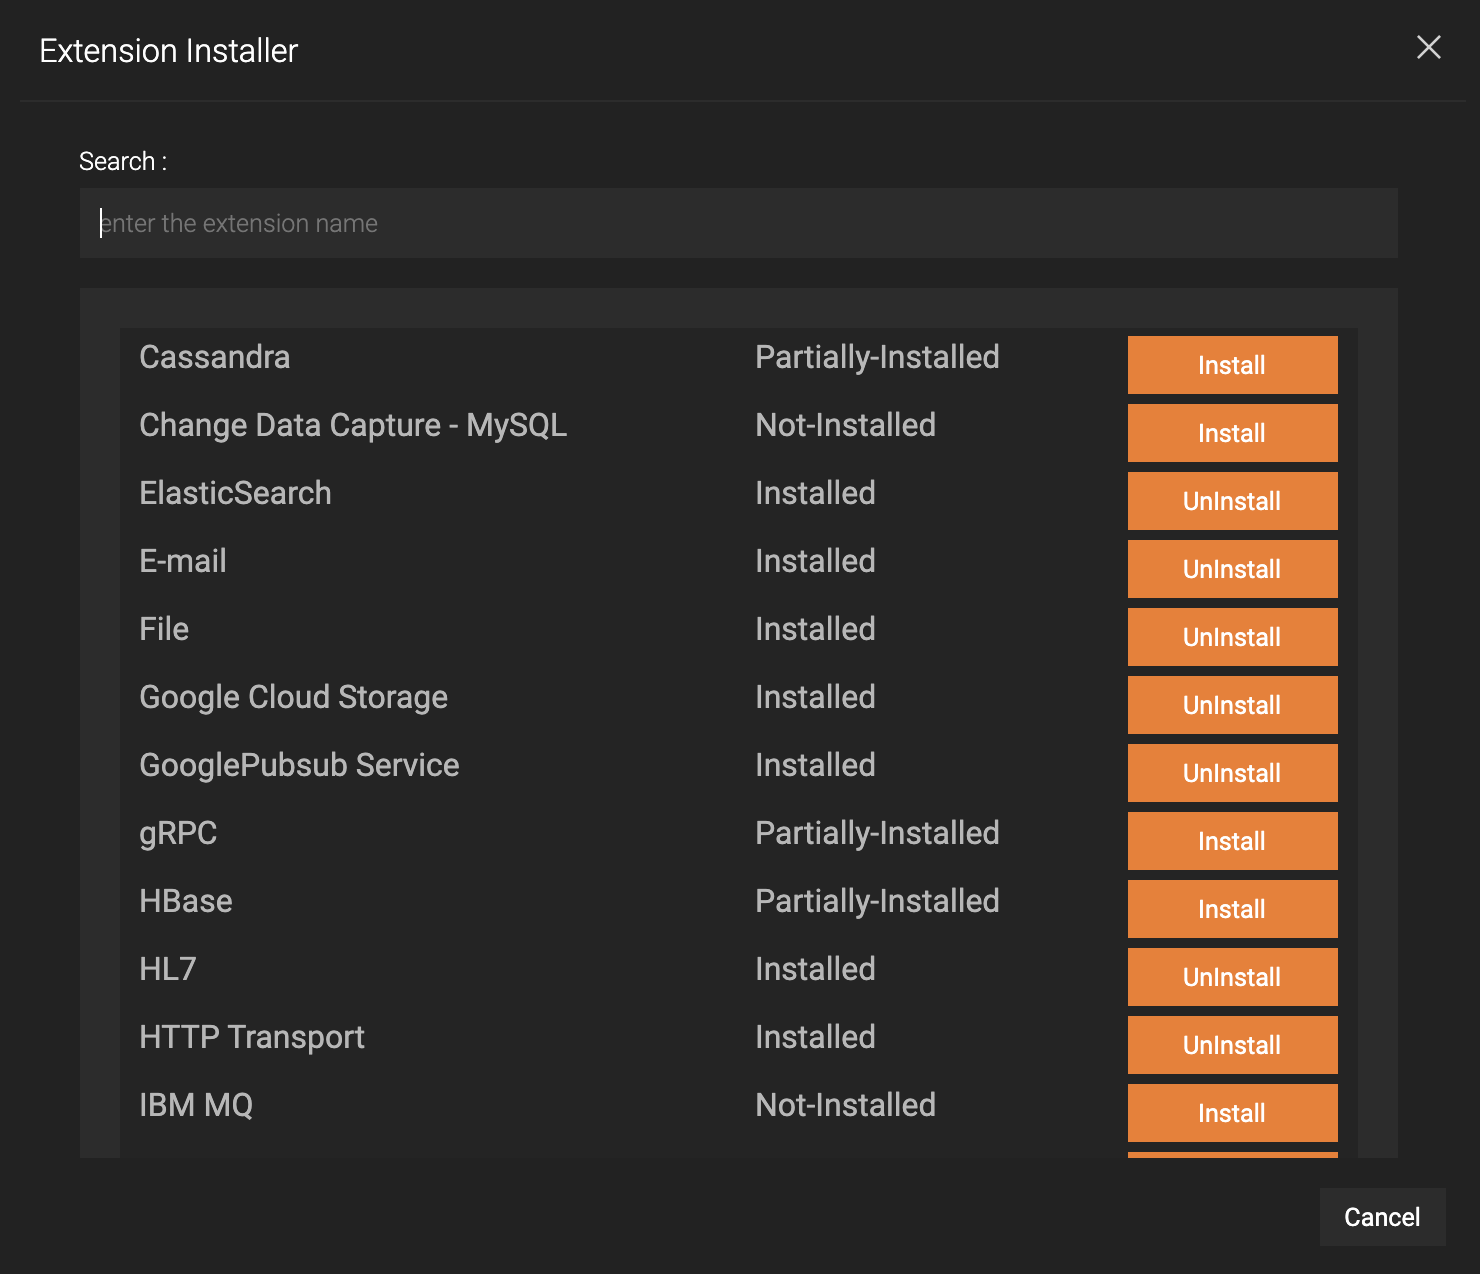
Extension Installer
This opens the Extension Installer dialog box (shown below) where you can search for the required extension and install/uninstall it by clicking Install or Uninstall as appropriate. Once you install/uninstall an extension, you need to restart the Streaming Integrator Tooling. For detailed instructions, see Installing Siddhi Extensions.
-
Event Simulator
Simulation can be carried out in two ways:
- Single Simulation
- Feed Simulation
For detailed information about event simulation, see Simulating Events.
The event simulator can also be accessed from the Side Panel. -
Error Store Explorer
This opens the Error Store Explorer in which you can view, correct and replay the streaming events with errors that are stored in the error store.
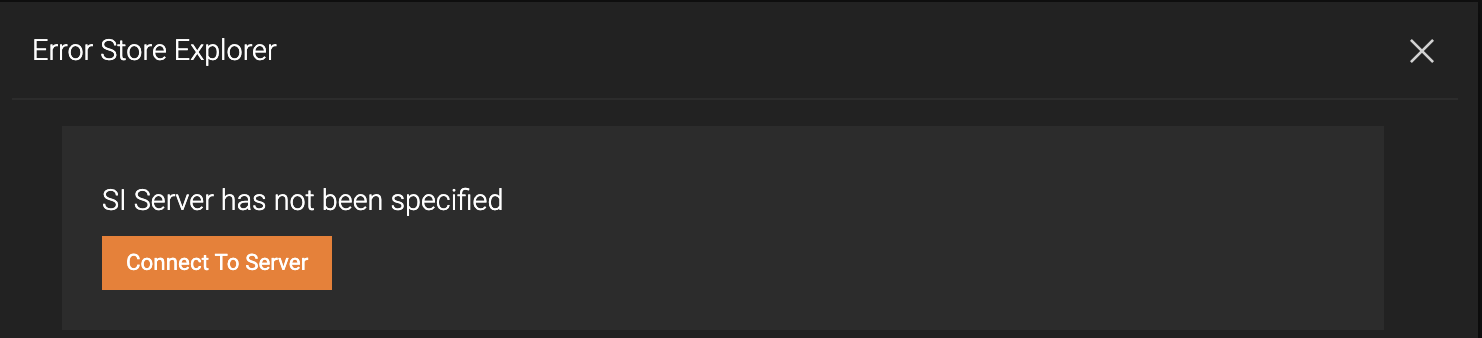
In order to use it, first you need to connect it to the SI server by clicking Connect to Server and then entering the server configurations in the dialog box that appears.
Once the Error Store Explorer is connected to an SI server, you can get an overview of events with errors as shown in the example below.
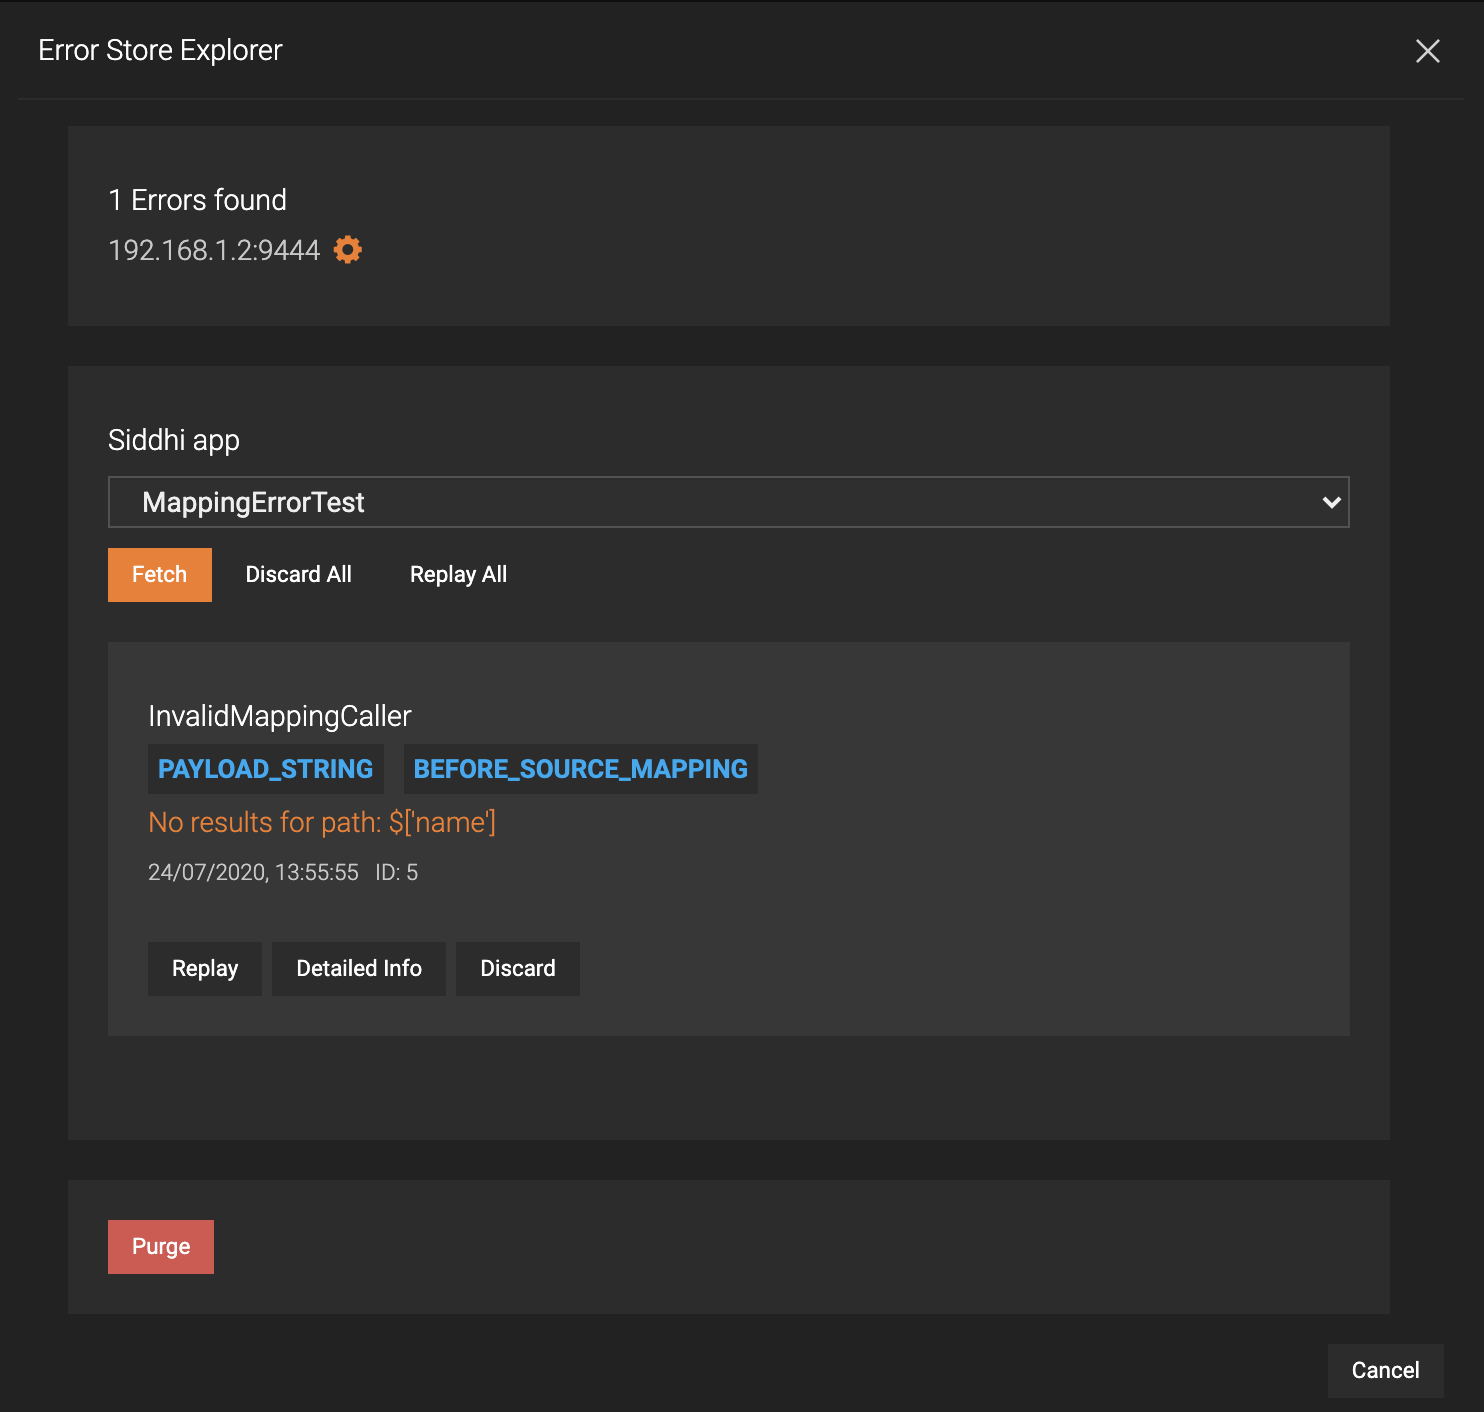
Here, you can do the following:
-
Fetch Errors: At a given time, the Error Store Explorer displays the number of events with errors from the time it was last fetched/refreshed. To get the latest errors, select the required Siddhi application in the Siddhi app field and click Fetch.
-
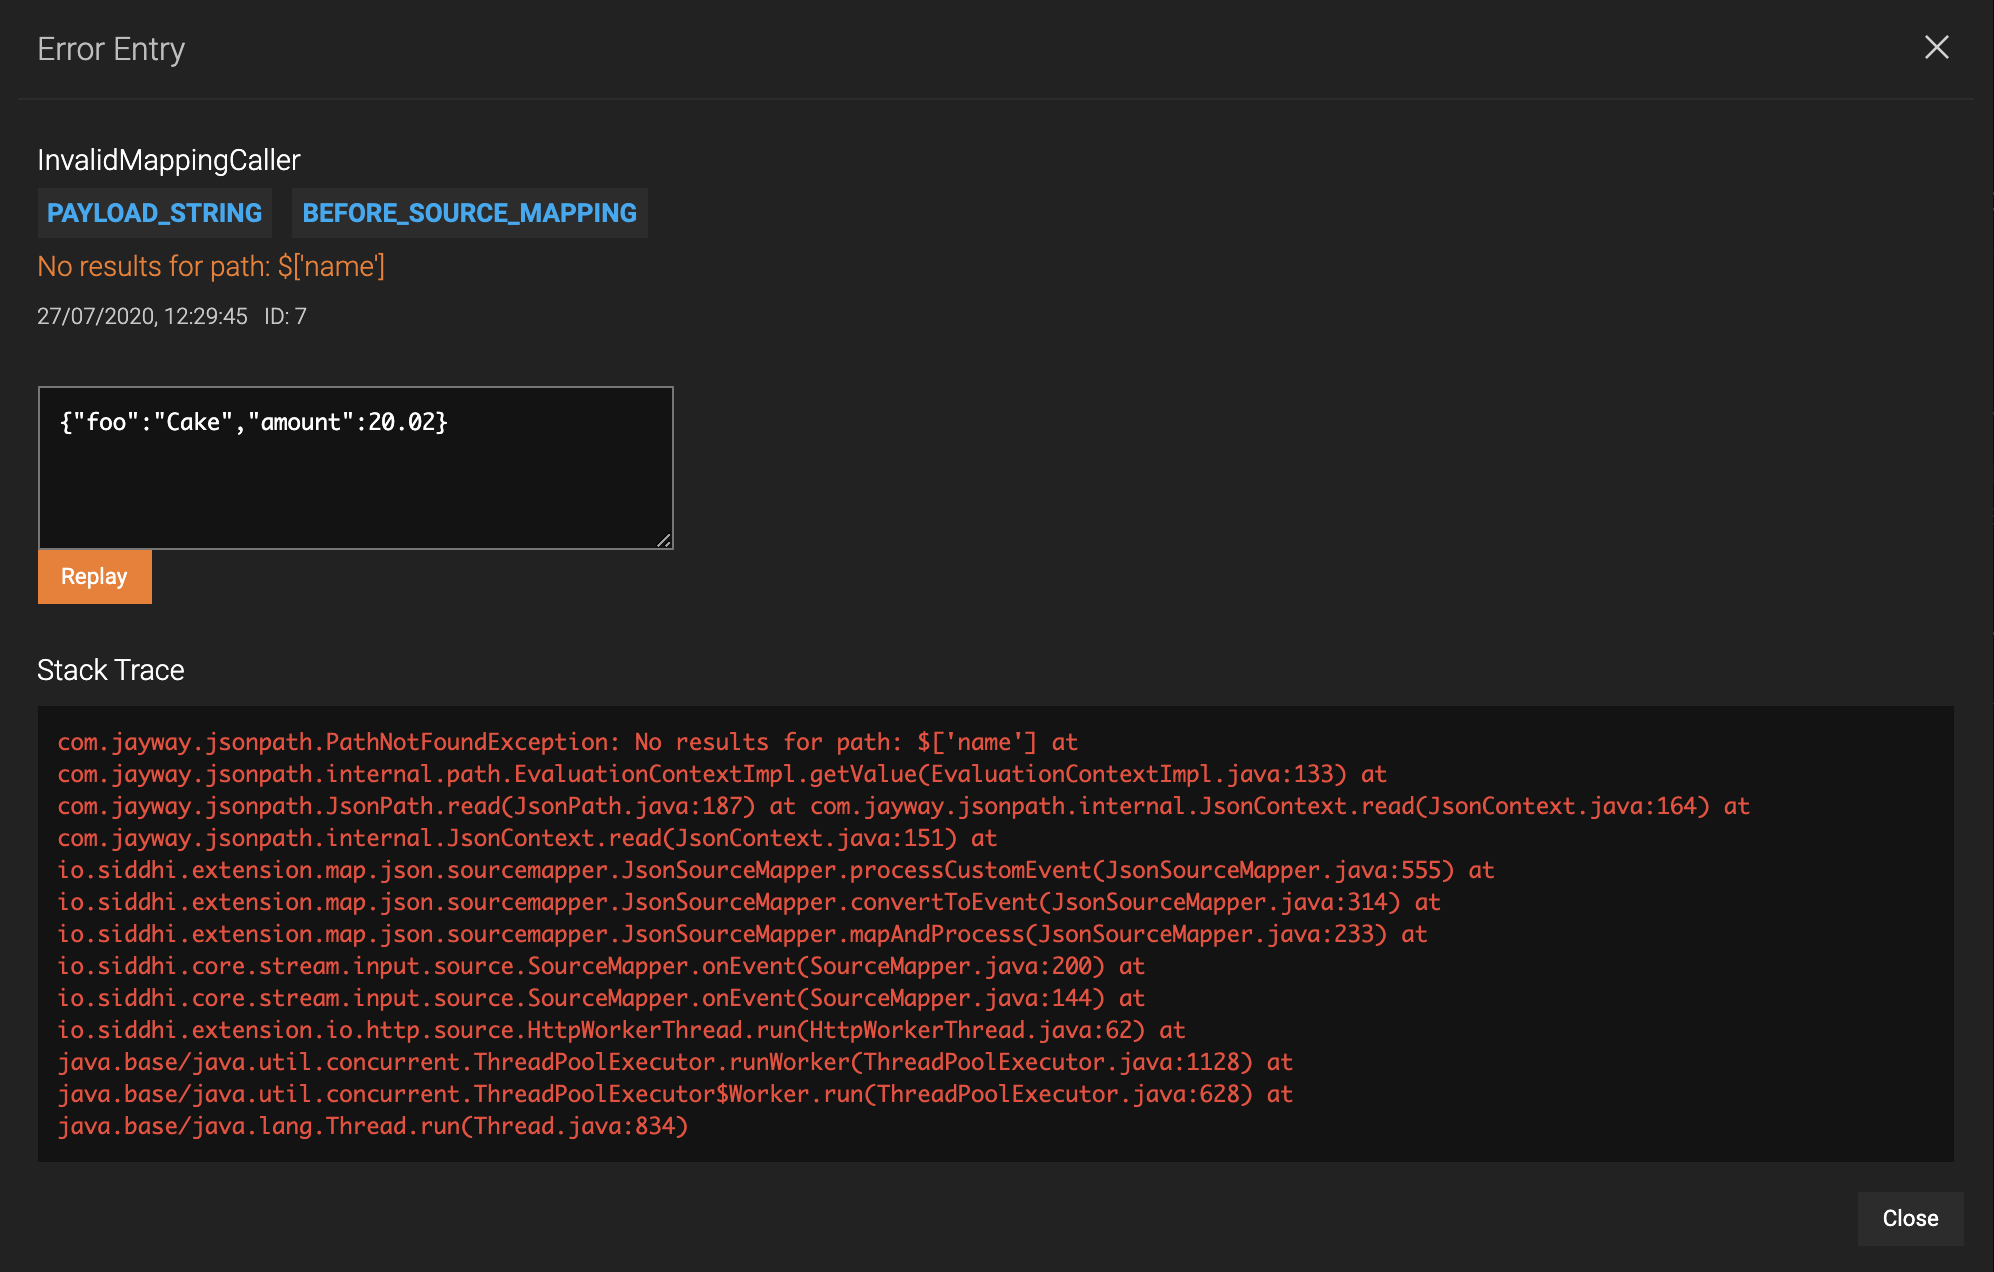
View details: To view details of a specific error, click Detailed Info for the relevant event. Then the details of the error are displayed in the Error Entry dialog box as shown in the example below.
-
Replay events: This can be done in one of the following three methods:
-
To replay all the events for the selected Siddhi application without making any changes, click Replay All.
-
To replay a single event without making any changes, click Replay for the specific event.
-
To make any changes to the event before replaying, click Detailed Info for the relevant event and open the Error Entry dialog box. Then make the required changes to the event (which is displayed in an editable field) and click Replay.
Info
Note that only mapping errors can be corrected before replaying.

-
-
Discard events: To discard all the erroneous events for the selected Siddhi application, click Discard All. To discard a specific erroneous event, click Discard for the relevant event.
-
Purge Events: To periodically purge events, click Purge. This opens the Purge Error Store dialog box. In the Retention Period (days) field, enter the number of past days for which you want to retain the erroneous events in the store and then click Purge. As a result, all the events except the ones stored in the specified number of past days are removed from the error store.
To understand how to save messages with errors in the error store, see Handling Errors.
To understand how to view and analyze events with errors in the Error Store Explorer, see Handling Requests with Errors.
-
-
Console
This is an output console that provides feedback on various user activities carried out on the Streaming Integration Tooling. It is accessible from the Side Panel.
-
Sample Event Generator
This opens the Sample Event Generator as follows.
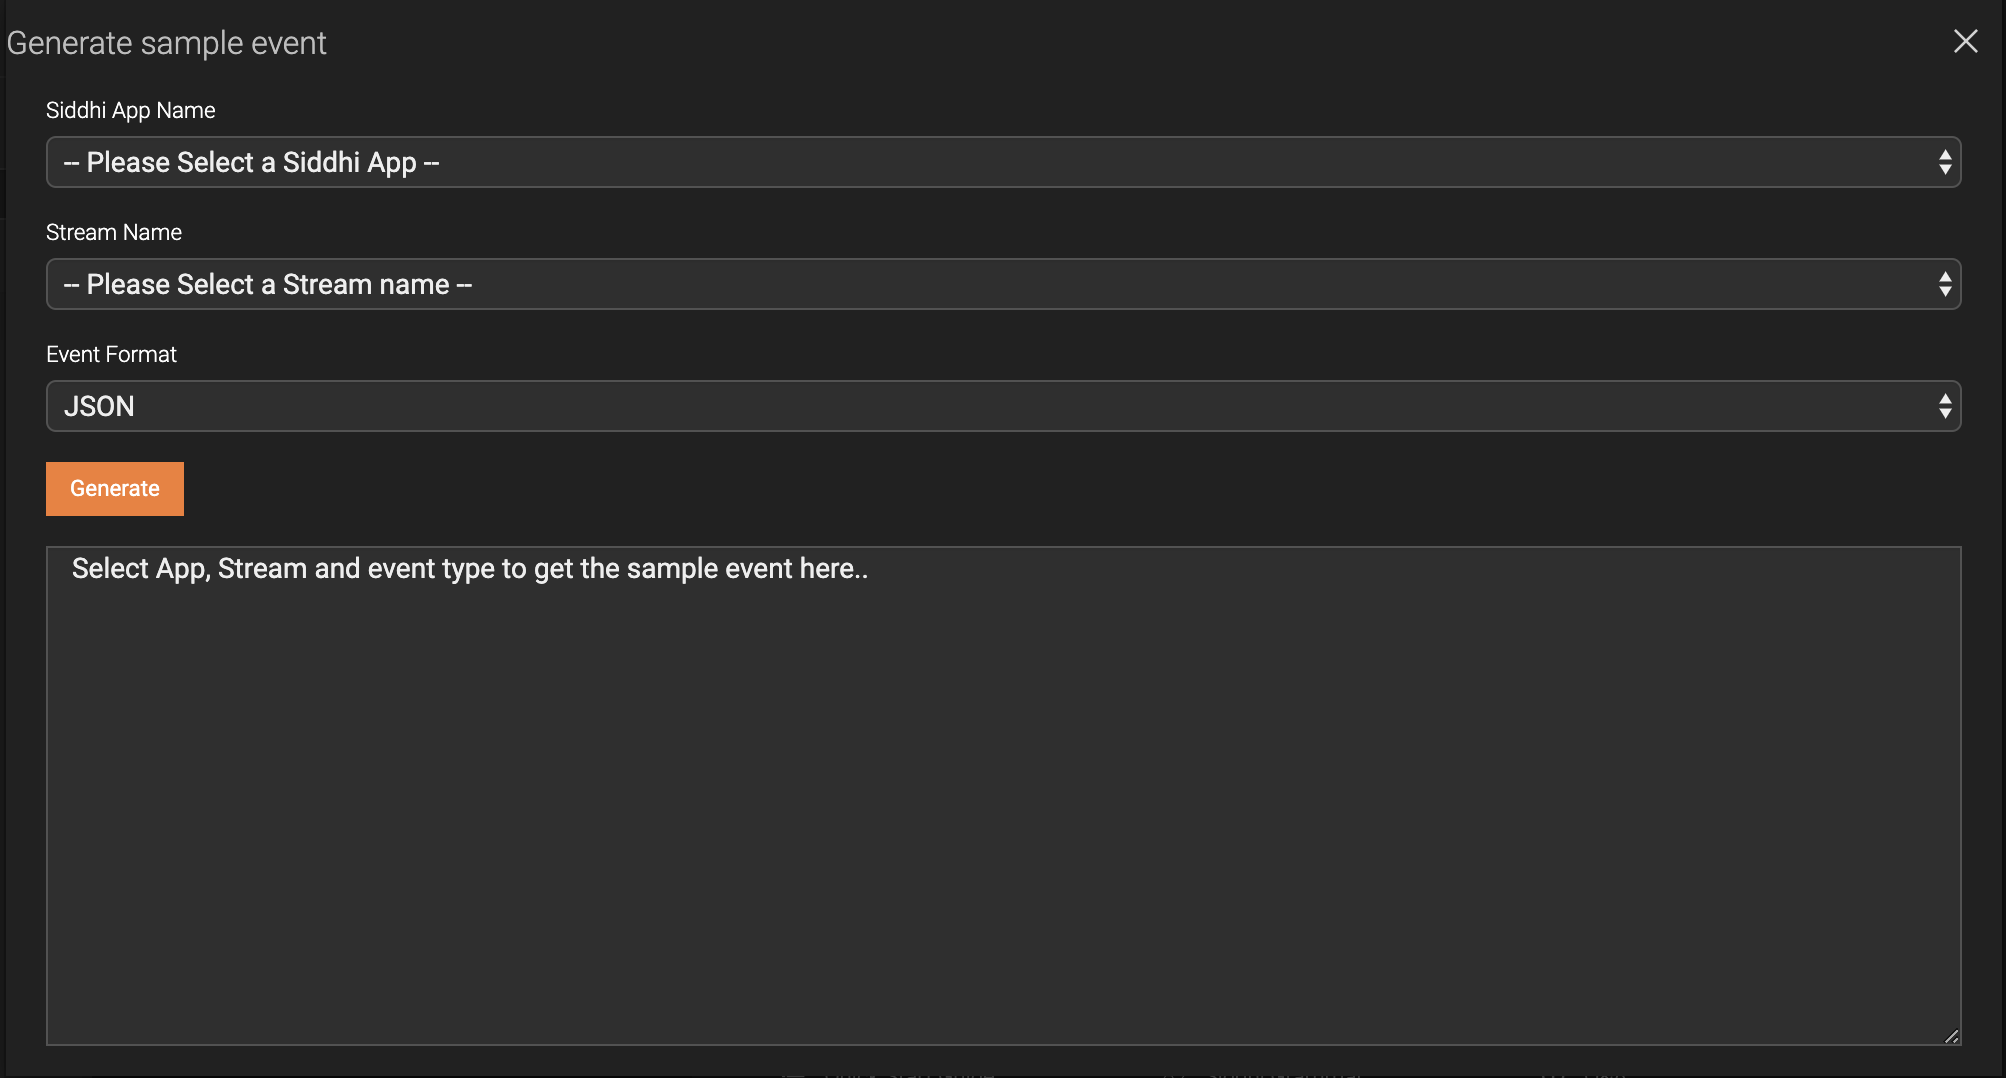
Here, you can generate sample events for a selected stream within a selected Siddhi application in a specified format. -
On-Demand Query
This opens the On-Demand Query dialog box.
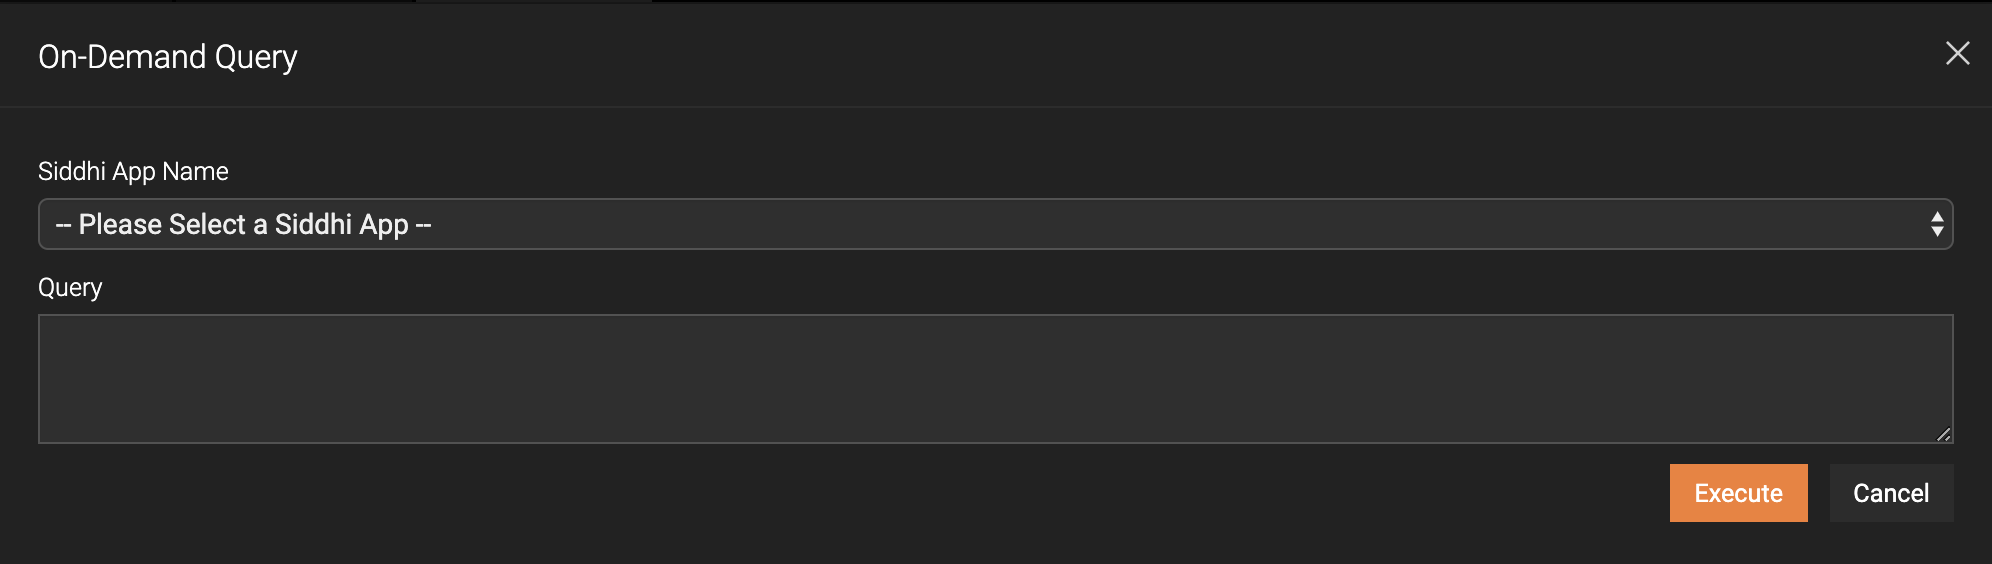 Here, you can select a Siddhi application, and then enter a query to
manipulate the store in which that Siddhi Application saves data.
You can enter queries that can update record, insert/update records,
retrieve records and delete records. For more information about
actions you can carry out for stores, see Storage Integration - Performing CRUD operations via REST API.
Here, you can select a Siddhi application, and then enter a query to
manipulate the store in which that Siddhi Application saves data.
You can enter queries that can update record, insert/update records,
retrieve records and delete records. For more information about
actions you can carry out for stores, see Storage Integration - Performing CRUD operations via REST API. -
Tour Guide
This opens a dialog box named Welcome to the Streaming Integrator Tooling Tour Guide which guides you to understand Streaming Integrator Tooling. When you start the Streaming Integrator Tooling and access it, this dialog box is open by default.
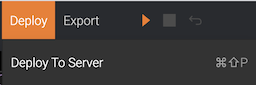
Deploy menu items
The Deploy menu has the following option to select one or more Siddhi applications and deploy them to one or more Streaming Integrator servers. For more information, see Deploying Siddhi Applications.
Export menu items
The Export menu has the following options that allow you to export Siddhi applications in a format that can be deployed in a containerized environment.
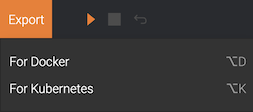
-
For Docker This opens the Export Siddhi Apps for Docker image wizard. For more information, see Exporting Siddhi Applications - Exporting Siddhi applications as a Docker Image.
-
For Kubernetes This opens the Export Siddhi Apps For Kubernetes CRD wizard. For more information, see Exporting Siddhi Applications - Exporting Siddhi Applications for Kubernetes.
Side Panel
File Explorer
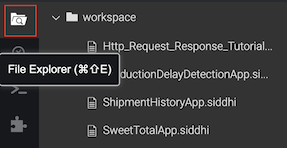
This provides a view of all the files saved as shown in the example above.
Event Simulator
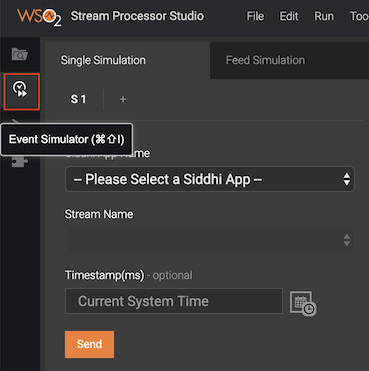
Simulation can be carried out in two ways:
- Single Simulation
- Feed Simulation
For detailed information about event simulation, see Simulating Events.
Output Console
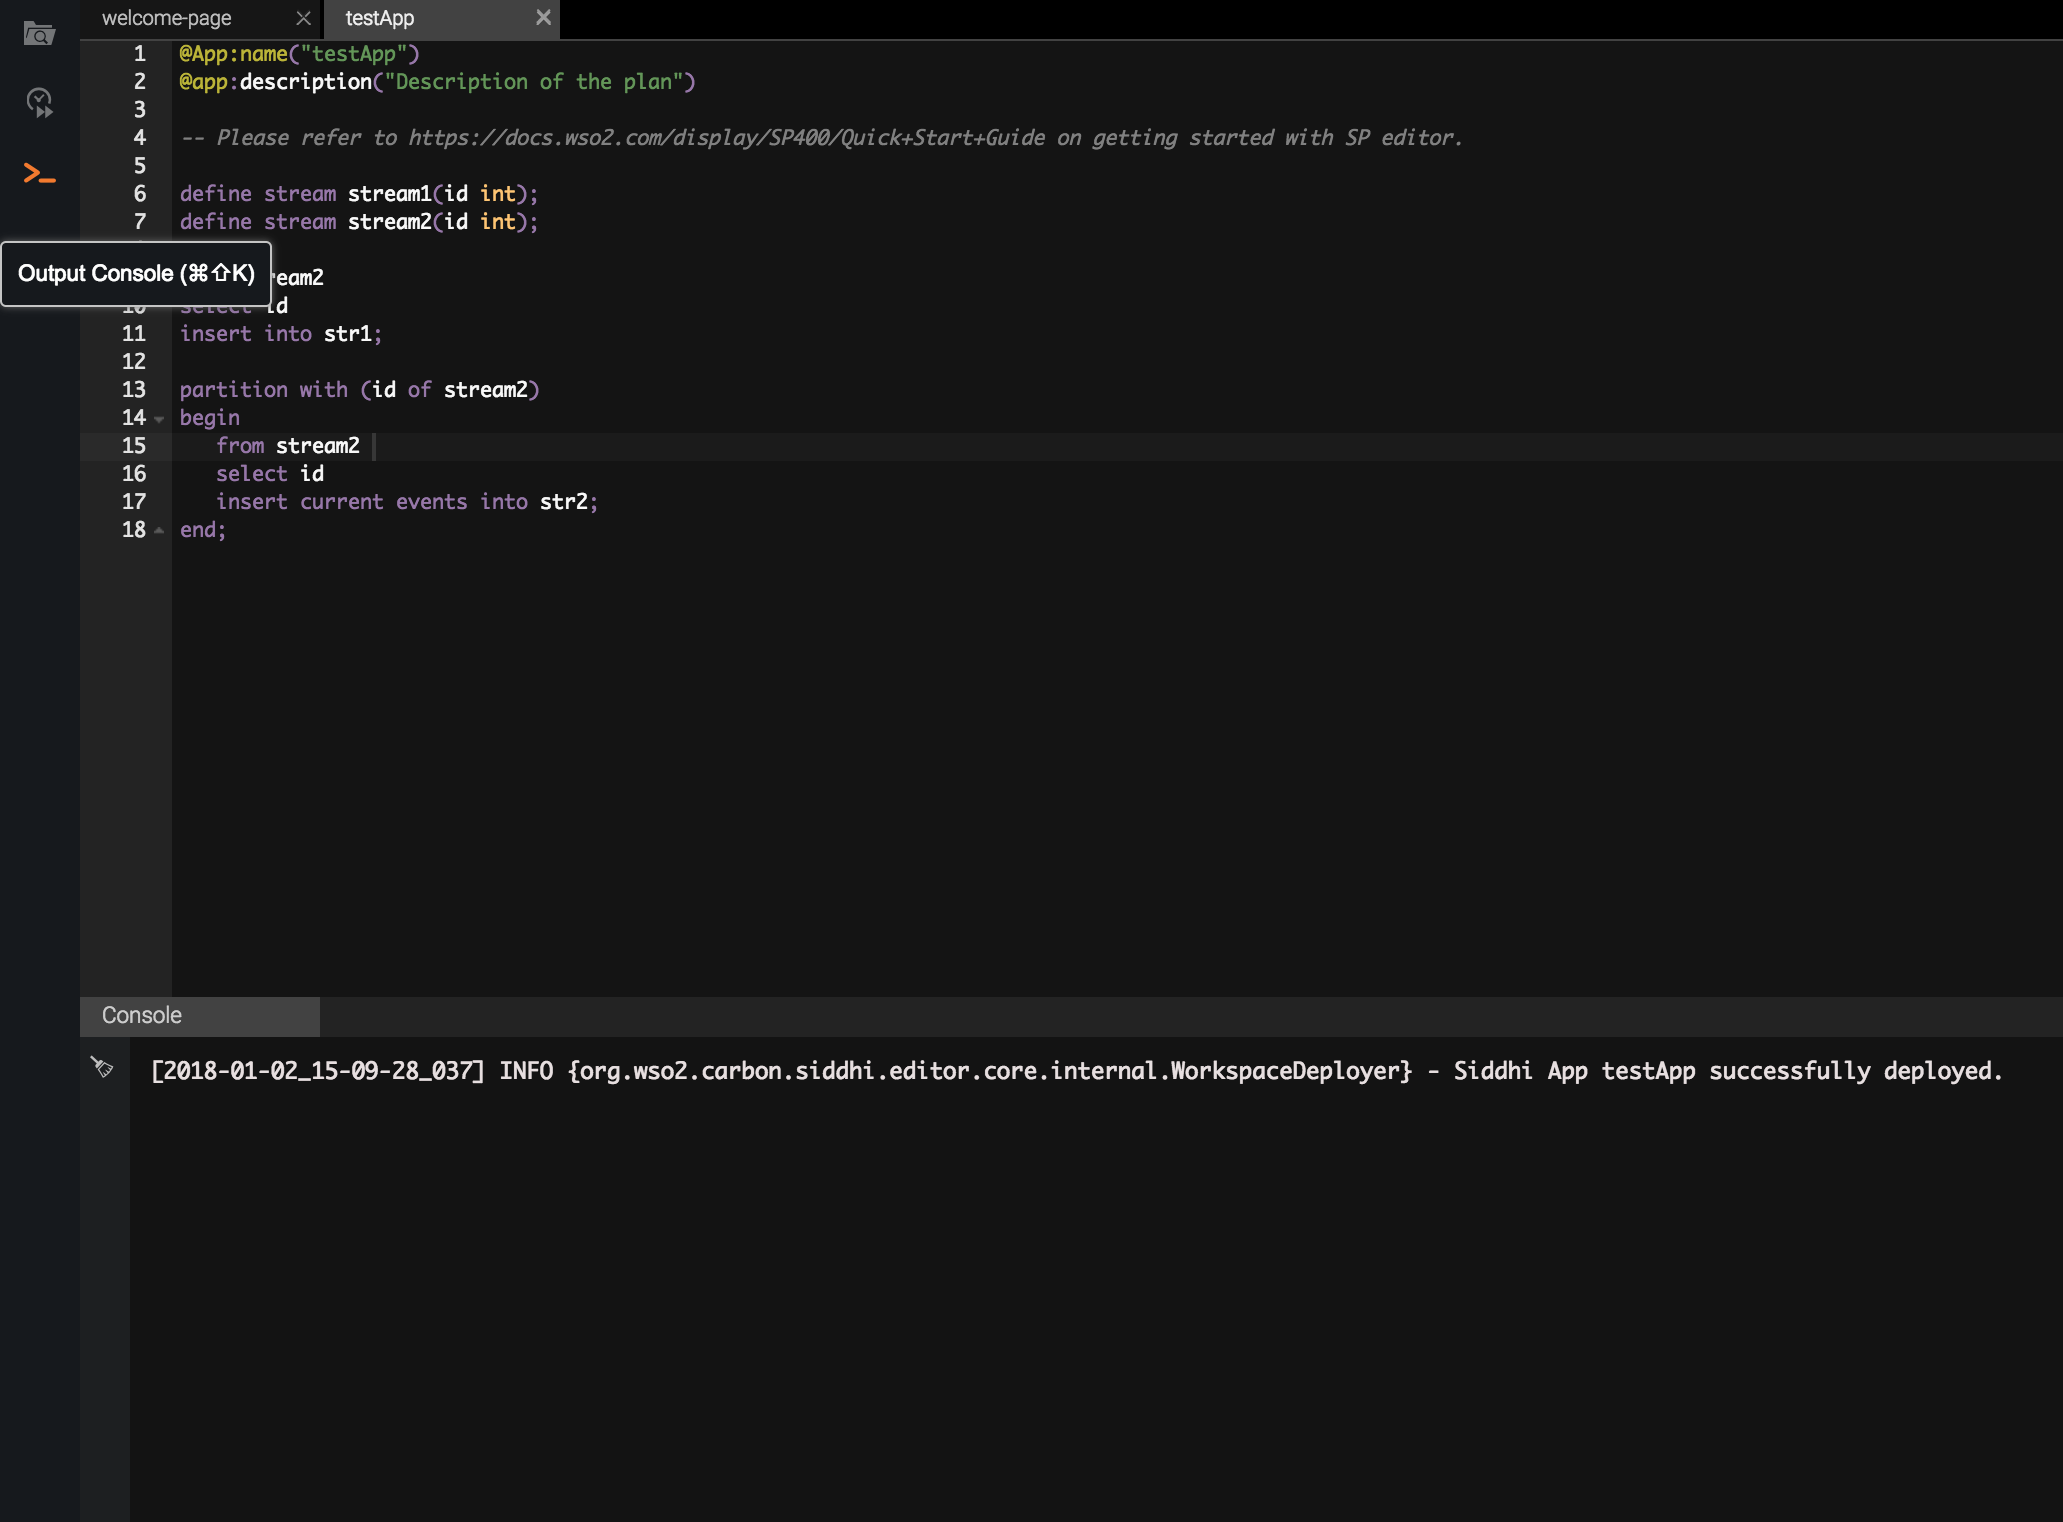
This provides feedback on various user activities carried out on the Streaming Integrator.
Operator Finder
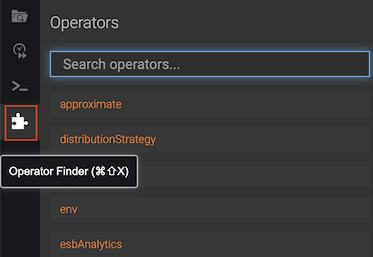
Click the Operator Finder icon to search for the Siddhi extensions that you want to use in your Siddhi applications.
- For the complete list of Siddhi extensions that you can search for via the Operator Finder, see Siddhi Extensions.
- For detailed instructions to find and use a Siddhi extension via the Operator Finder demonstrated with an example, see Creating a Siddhi Application.
Template Variables
![]()
Click this icon to open the Templated Variables side panel (shown below) where you can open the templated attributes in the currently saved Siddhi applications and provide variables to be applied when running the Siddhi applications.
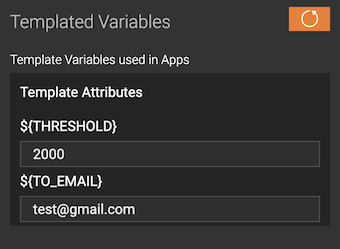
For more information about templated variables, see Siddhi Documentation - Siddhi as a Local Microservice - Running with environmental/system variables.
Toolbar

-
Run icon
Click this to start a currently open Siddhi application in the Run mode. This icon is enabled only for saved Siddhi applications. -
Stop icon
Click this to stop a Siddhi application that is currently running. -
Revert icon
Click this to revert the unsaved changes in the Siddhi application that is currently being created/edited.