Data Integration
What you'll build
A data service provides a web service interface to access data that is stored in various datasources. The following sections describe how you can use WSO2 Integration Studio to work with data services' artifacts.
Tip
Note that this feature is currently supported in WSO2 Integration Studio for relational datasources and CSV files.
Let's get started!
Step 1: Set up the workspace
-
Download the relevant WSO2 Integration Studio based on your operating system. The path to the extracted/installed folder is referred to as
MI_TOOLING_HOMEthroughout this tutorial. -
To demonstrate how data services work, we will use a MySQL database as the datasource. Follow the steps given below to set up a MySQL database:
- Install the MySQL server.
-
Download the JDBC driver for MySQL from here. You will need this when you configure the MySQL server with the Micro Integrator.
-
Create a database named
Employees.
4. Create a user and grant the user access to the Database.CREATE DATABASE Employees;CREATE USER 'user'@'localhost' IDENTIFIED BY 'password'; GRANT ALL PRIVILEGES ON Employees.* TO 'user'@'localhost'; -
Create the Employee table inside the Employees database:
USE Employees;
CREATE TABLE Employees (EmployeeNumber int(11) NOT NULL, FirstName varchar(255) NOT NULL, LastName varchar(255) DEFAULT NULL, Email varchar(255) DEFAULT NULL, Salary varchar(255));
INSERT INTO Employees (EmployeeNumber, FirstName, LastName, Email, Salary) values (3, "Edgar", "Code", "[email protected]", 100000);
Step 2: Creating a data service
Follow the steps given below to create a new data service.
Creating a Maven Multi Module project
All the data services' artifacts that you create should be stored in a Data Service Module. Follow the steps given below to create a module:
-
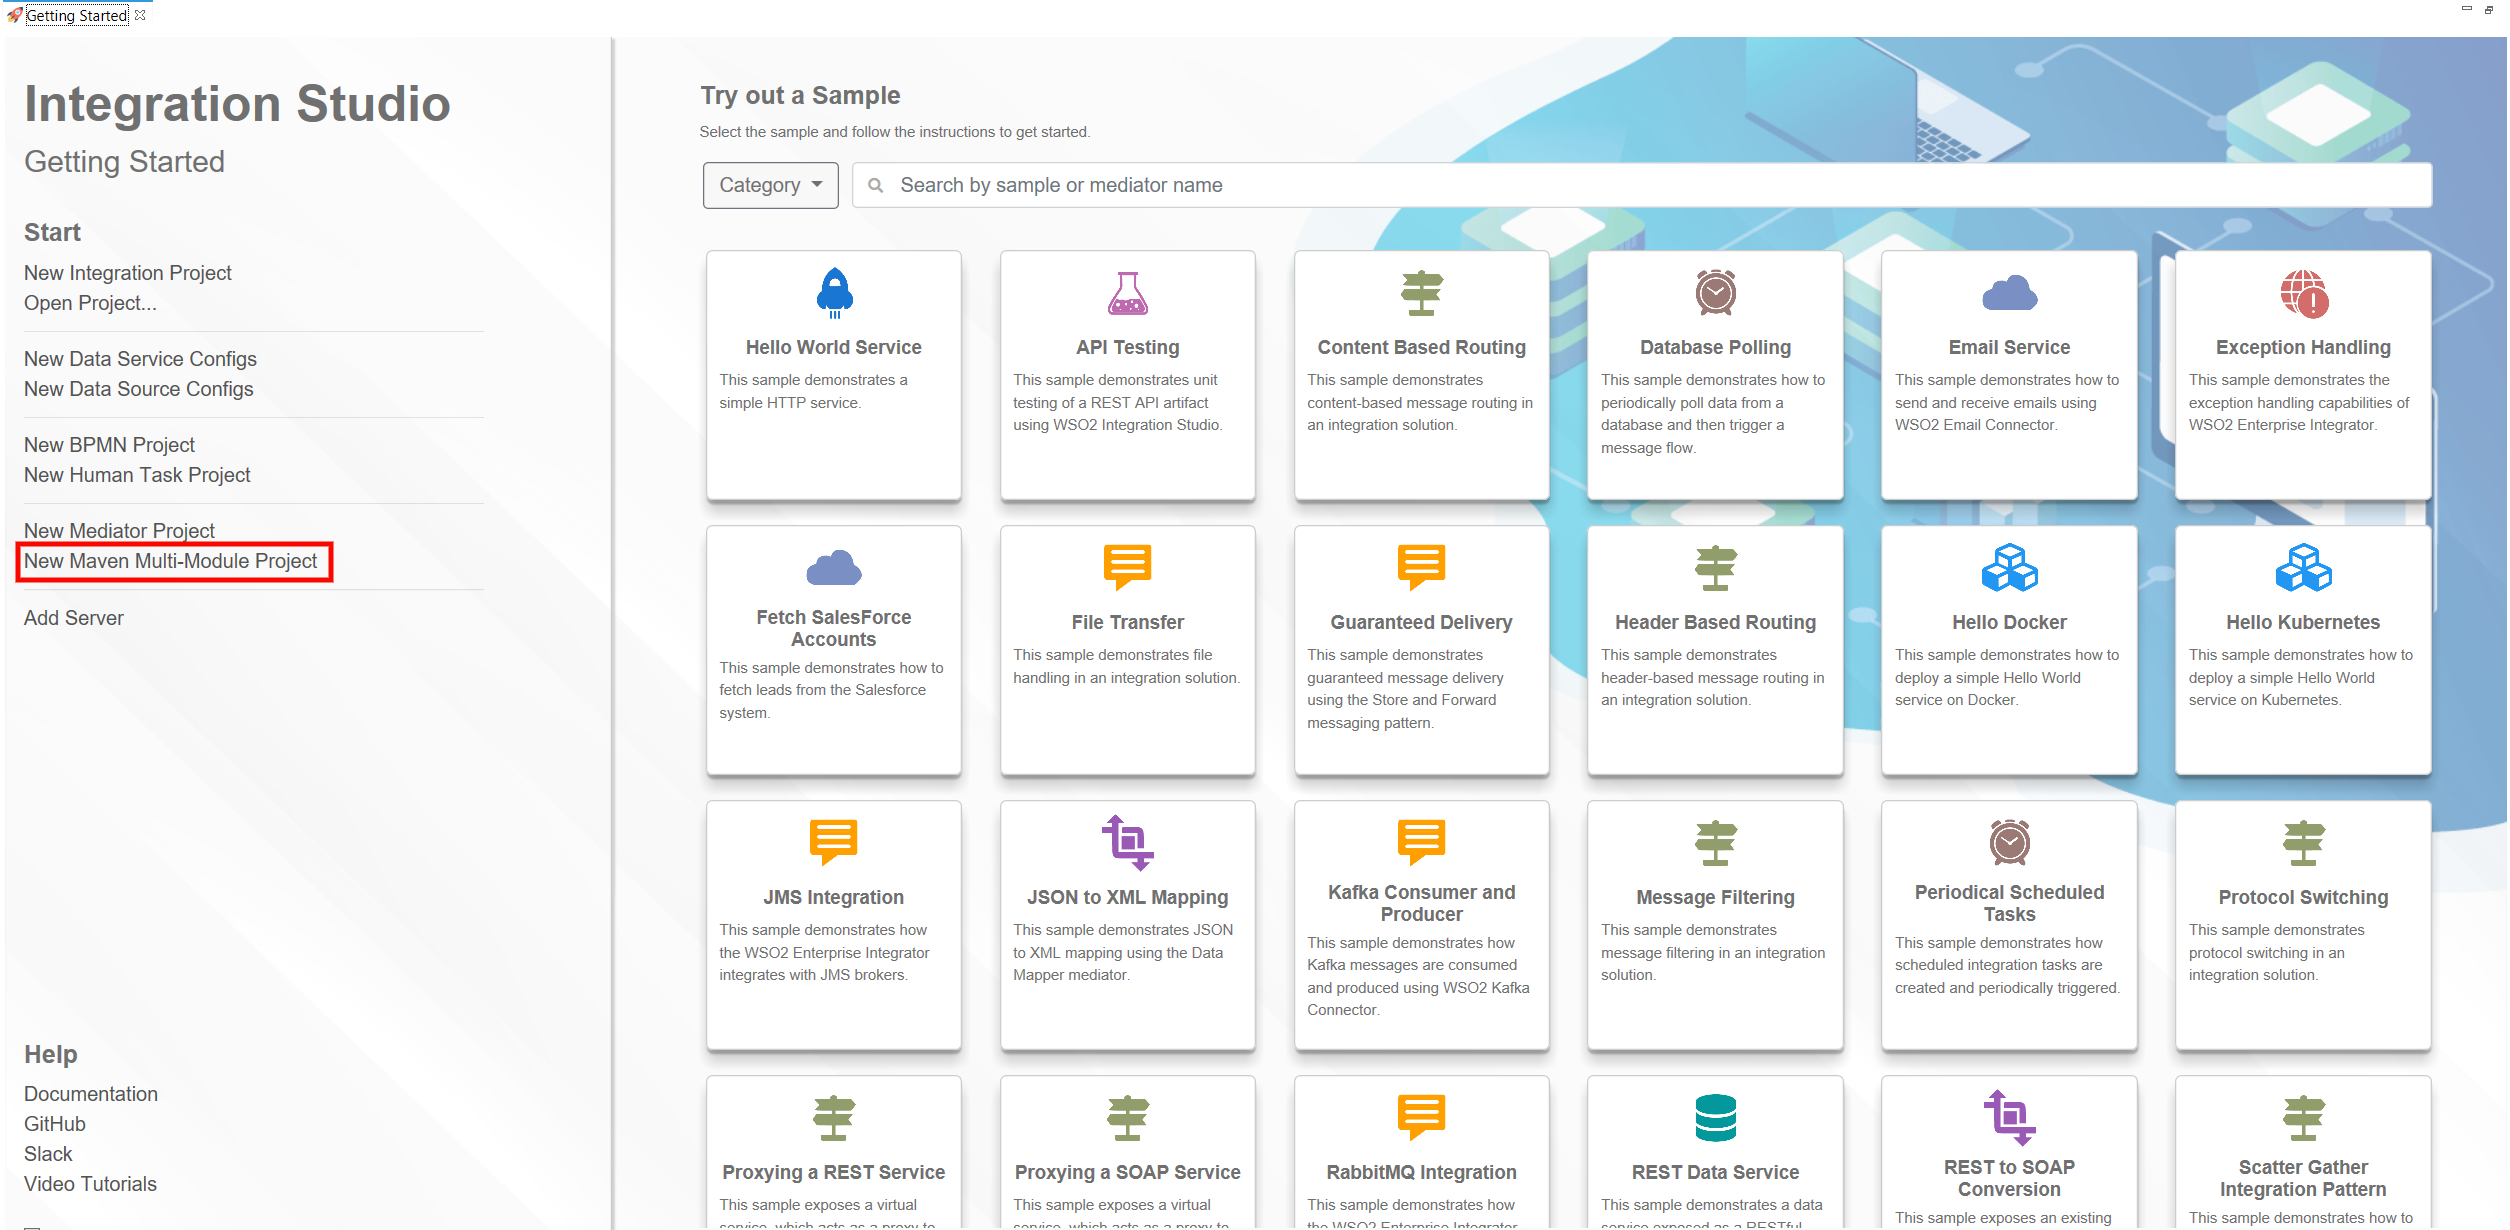
Open WSO2 Integration Studio and click New Maven Multi Module Project in the Getting Started tab as shown below.
-
In the Maven Modules Creation dialog box that opens, give a name (artifactId) for the project.
- If required, change the Maven information about the project.
- Click Finish. The new project will be listed in the project explorer.
Creating a data service module
All the data services' artifacts that you create should be stored in a Data Service Module. Follow the steps given below to create a module:
- Right click on the created Maven Multi Module Project and goto New -> Data Service Configs.
- In the New Data Service Configs dialog box that opens, give a name for the config module and click Next.
- If required, change the Maven information about the config module.
- Click Finish. The new module will be listed in the project explorer.
Creating the data service
Follow the steps given below to create the data service file:
- Select the already-created Data Service Config module in the project
explorer, right-click and go to New -> Data Service.
The New Data Service window will open as shown below.

- To start creating a data service from scratch, select Create New Data Service and click Next to go to the next page.
-
Enter a name for the data service and click Finish:
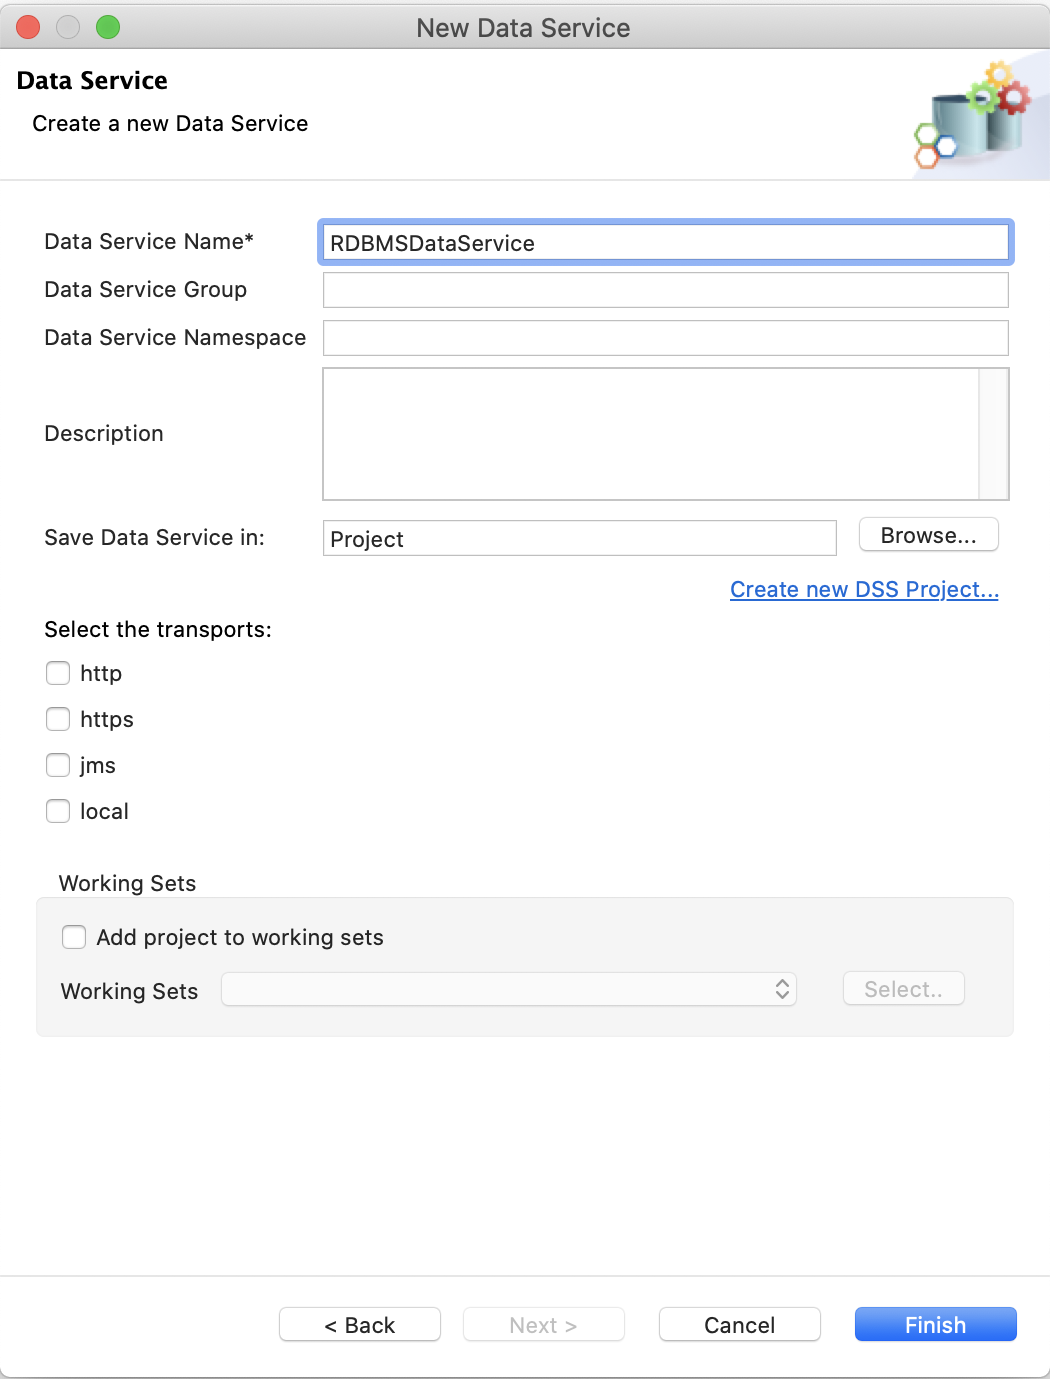
Property Description Data Service Name RDBMSDataService
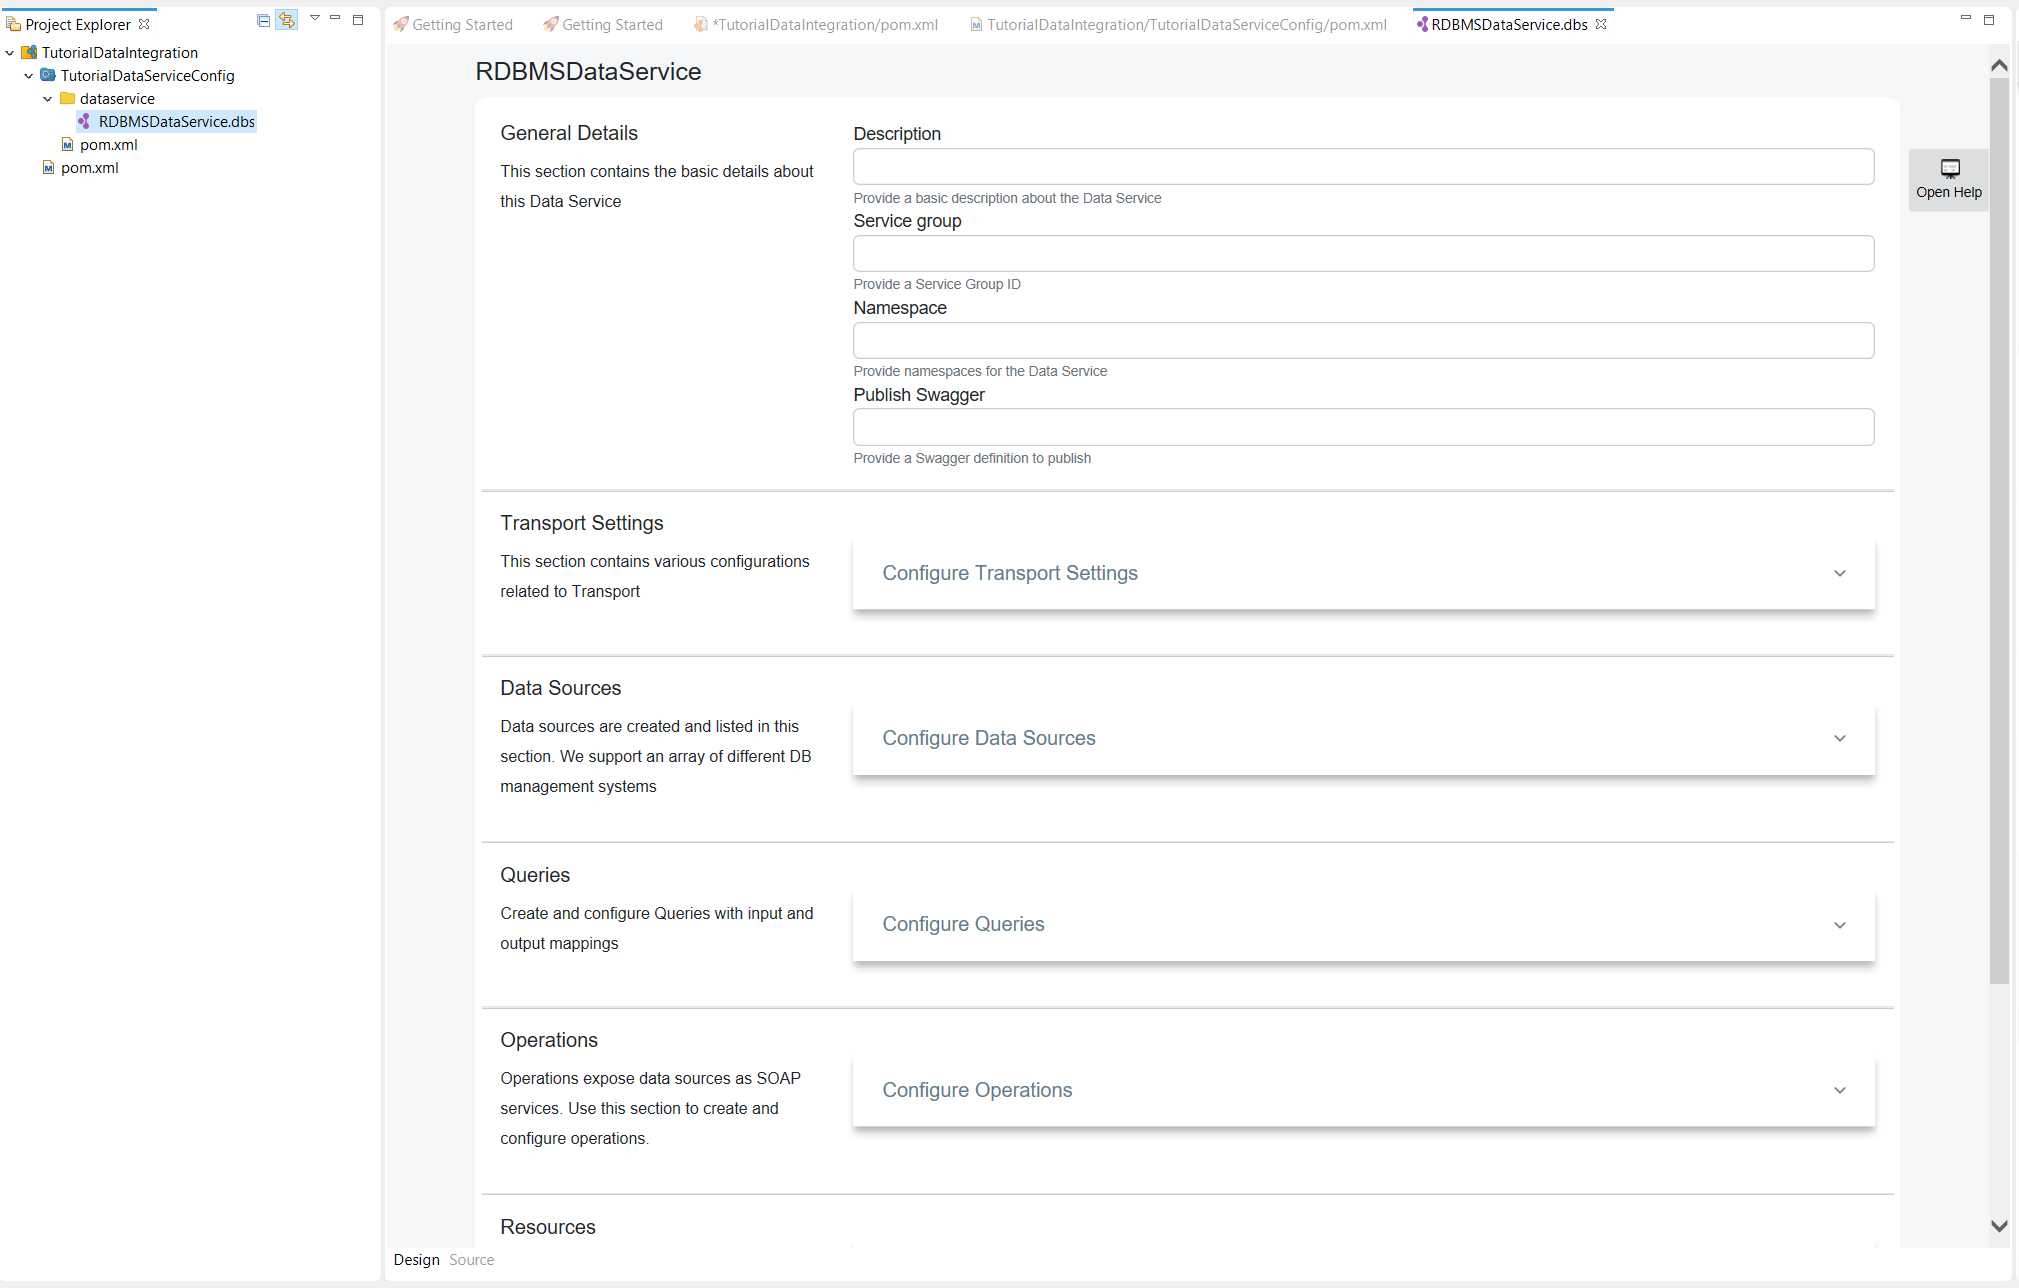
A data service file (DBS file) will now be created in your data service module as shown below.
Creating the datasource connection
- Click Data Sources to expand the section.

- Click Add New to open the Create Datasource page.

-
Enter the datasource connection details given below.
Property Description Datasource ID Datasource Datasource Type RDBMS Datasource Type (Default/External) Leave Default selected. Database Engine MySQL Driver Class com.mysql.jdbc.Driver URL jdbc:mysql://localhost:3306/Employees User Name user Password password -
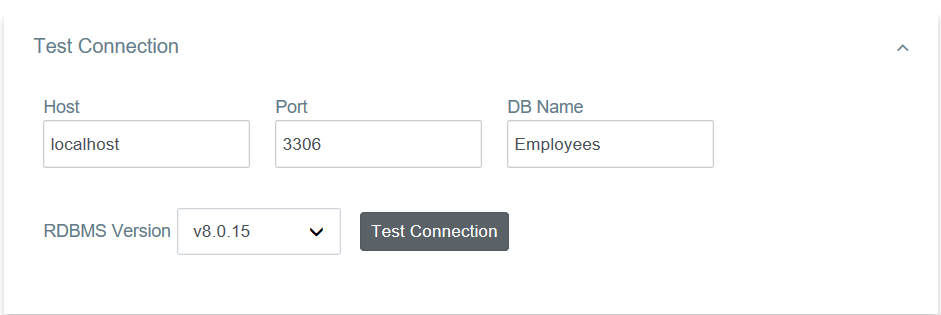
Click Test Connection to expand the section.
-
Click the Test Connection button to verify the connectivity between the MySQL datasource and the data service.
- Save the data service.
Creating a query
Let's write an SQL query to GET data from the MySQL datasource that you configured in the previous step:
- Click Queries to expand the section.
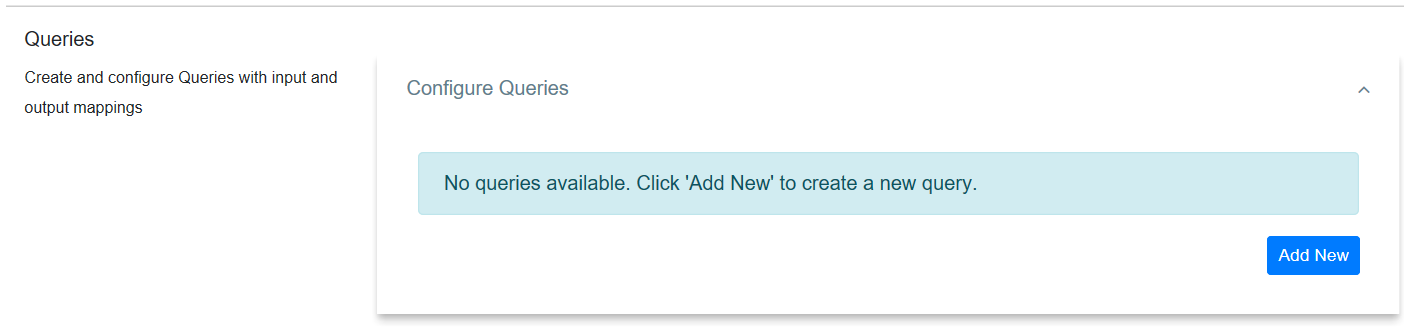
- Click Add New to open the Add Query page.
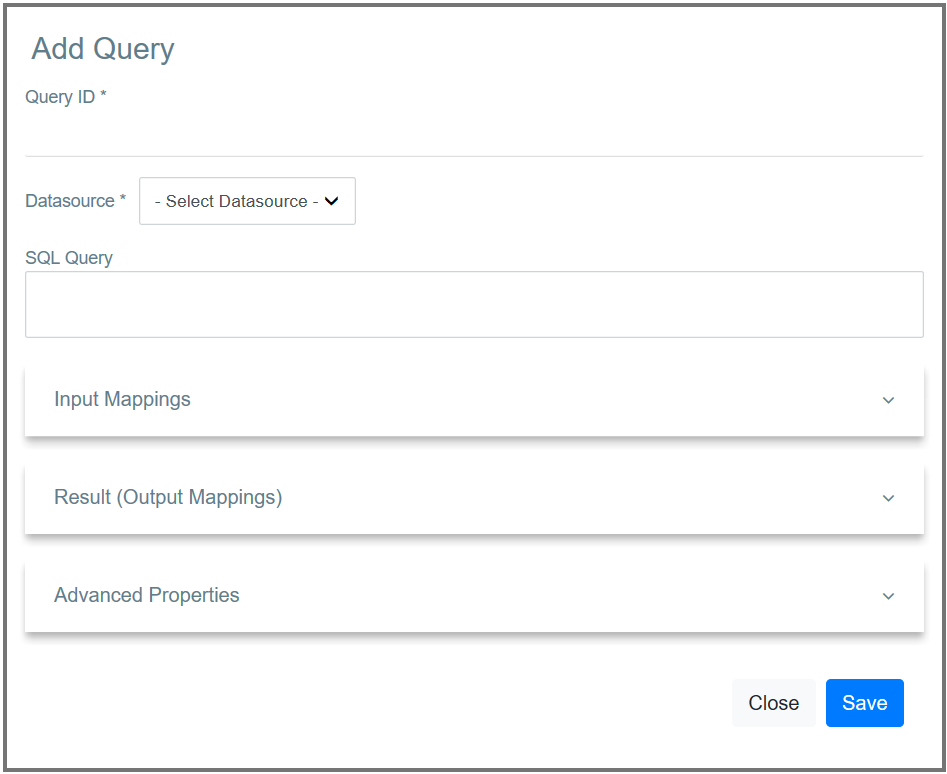
-
Enter the following query details:
Parameter Description Query ID GetEmployeeDetails Datasource Datasource SQL Query select EmployeeNumber, FirstName, LastName, Email from Employees where EmployeeNumber=:EmployeeNumber -
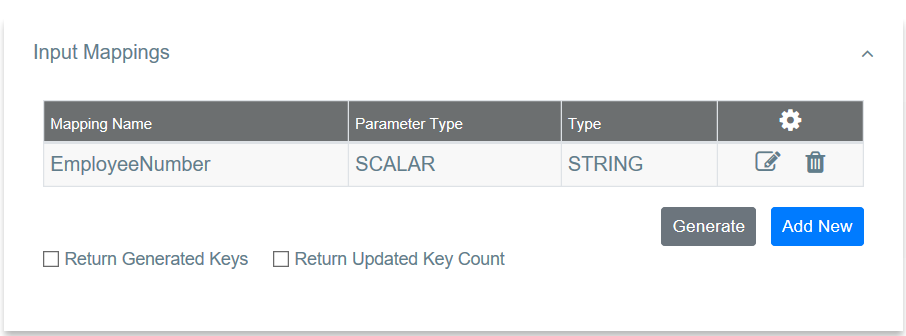
Click Input Mappings to expand the section.
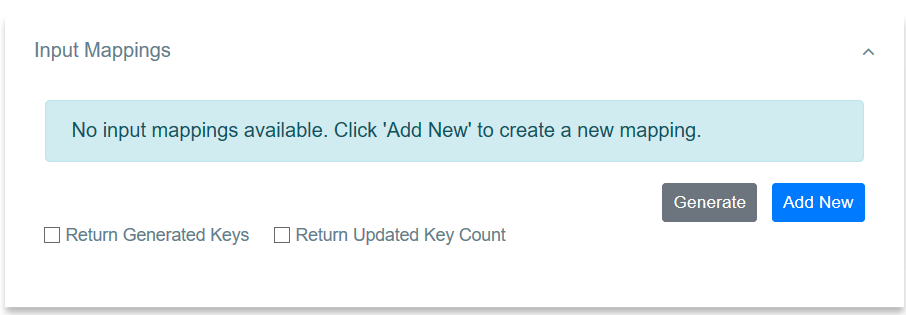
-
Click Generate to generate input mappings automatically.
Tip
Alternatively, you can manually add the mappings: 1. Click Add New to open the Add Input Mapping page. 2. Enter the following input element details.
Property Description Mapping Name EmployeeNumber Parameter Type SCALAR SQL Type SCALAR -
Save the input mapping.
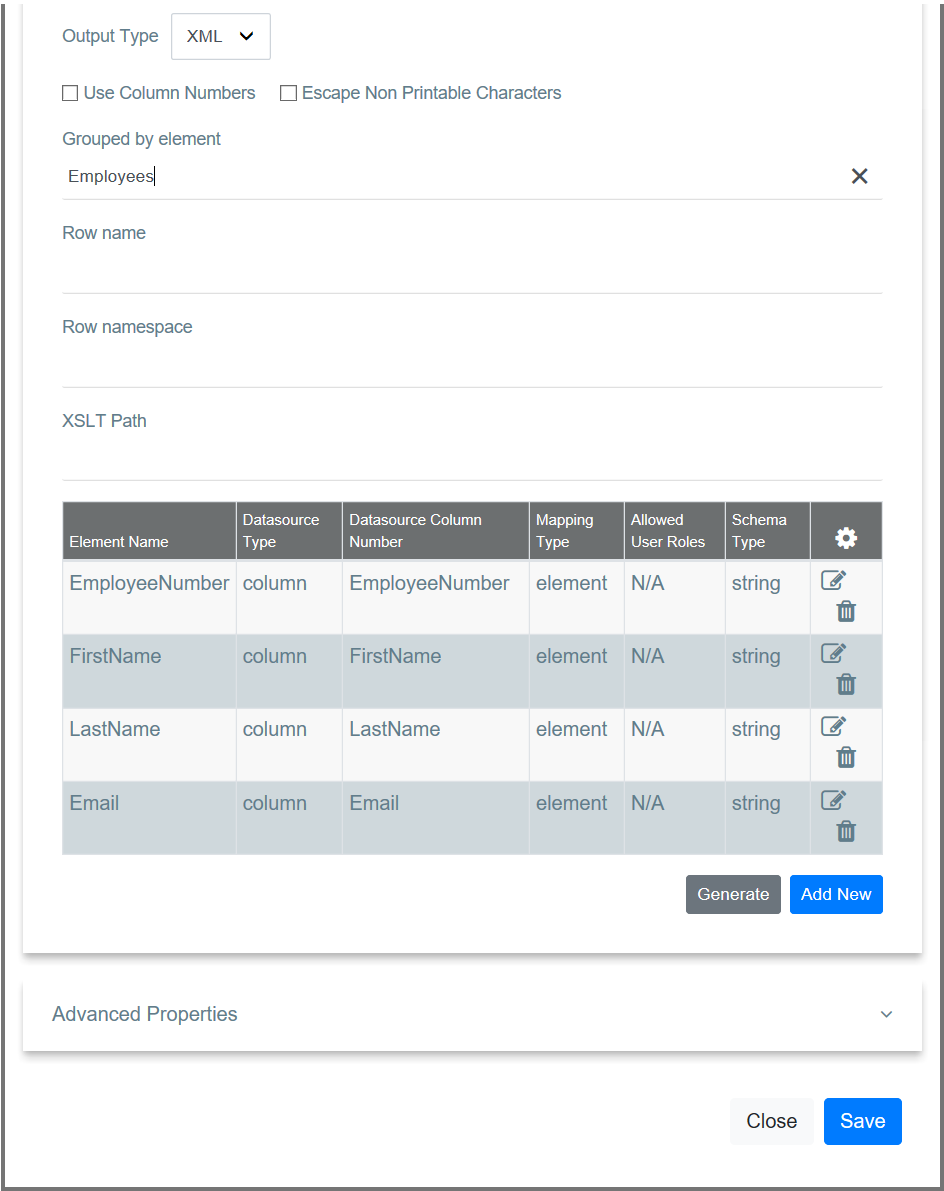
- Click Result (Output Mappings) to expand the section.
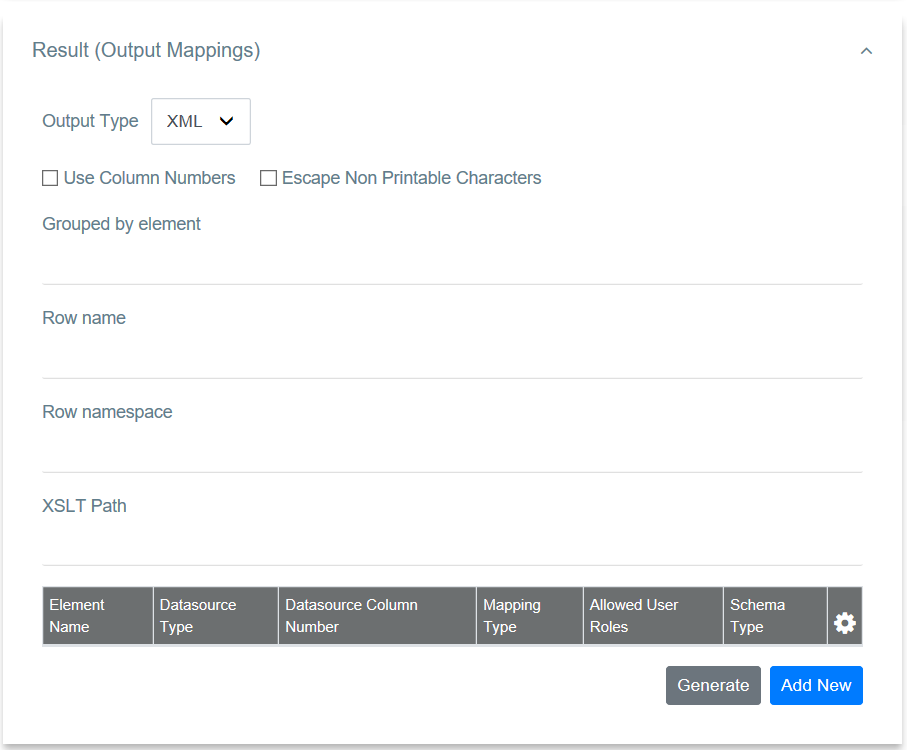
-
Enter the following value to group the output mapping:
Property Description Grouped by Element Employees -
Click Generate to generate output mappings automatically.
Tip
Alternatively, you can manually add the mappings: 1. Click Add New to open the Add Output Mapping page. 2. Enter the following output element details.
Property Description Datasource Type column Output Field Name EmployeeNumber Datasource Column Name EmployeeNumber Schema Type String
3. Save the element. 4. Follow the same steps to create the following output elements:| Datasource Type | Output Field Name | Datasource Column Name | Schema Type | |-----------------|-------------------|------------------------|-------------| | column | FirstName | FirstName | string | | column | LastName | LastName | string | | column | Email | Email | string | -
Click Save to save the query.
Creating a resource to invoke the query
Now, let's create a REST resource that can be used to invoke the query.
- Click Resources to expand the section.
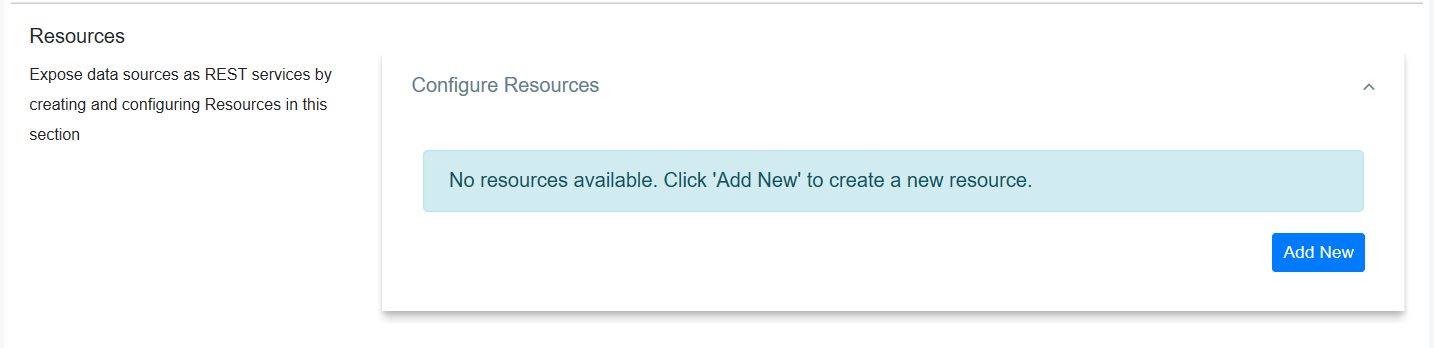
- Click Add New to open the Create Resource page.
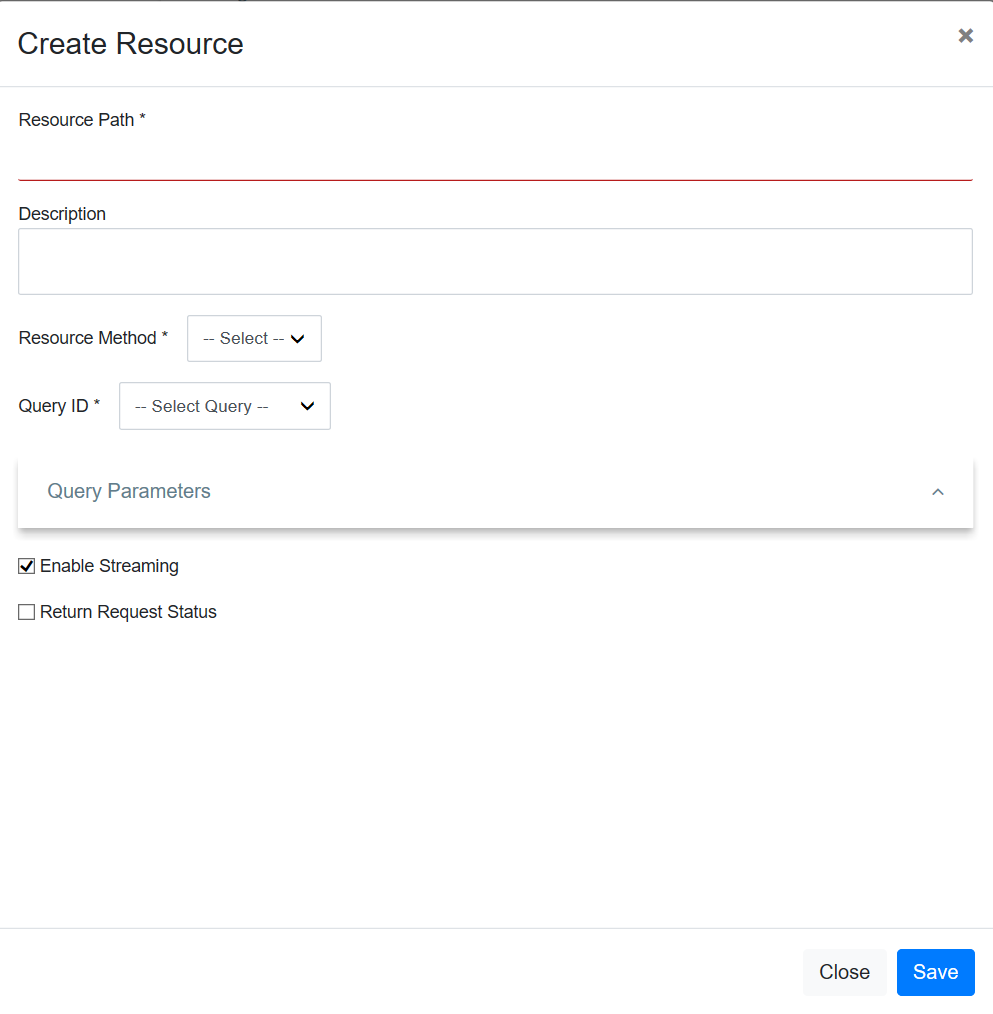
-
Enter the following resource details.
Property Description Resource Path Employee/{EmployeeNumber} Resource Method GET Query ID GetEmployeeDetails -
Save the resource.
Step 3: Package the artifacts
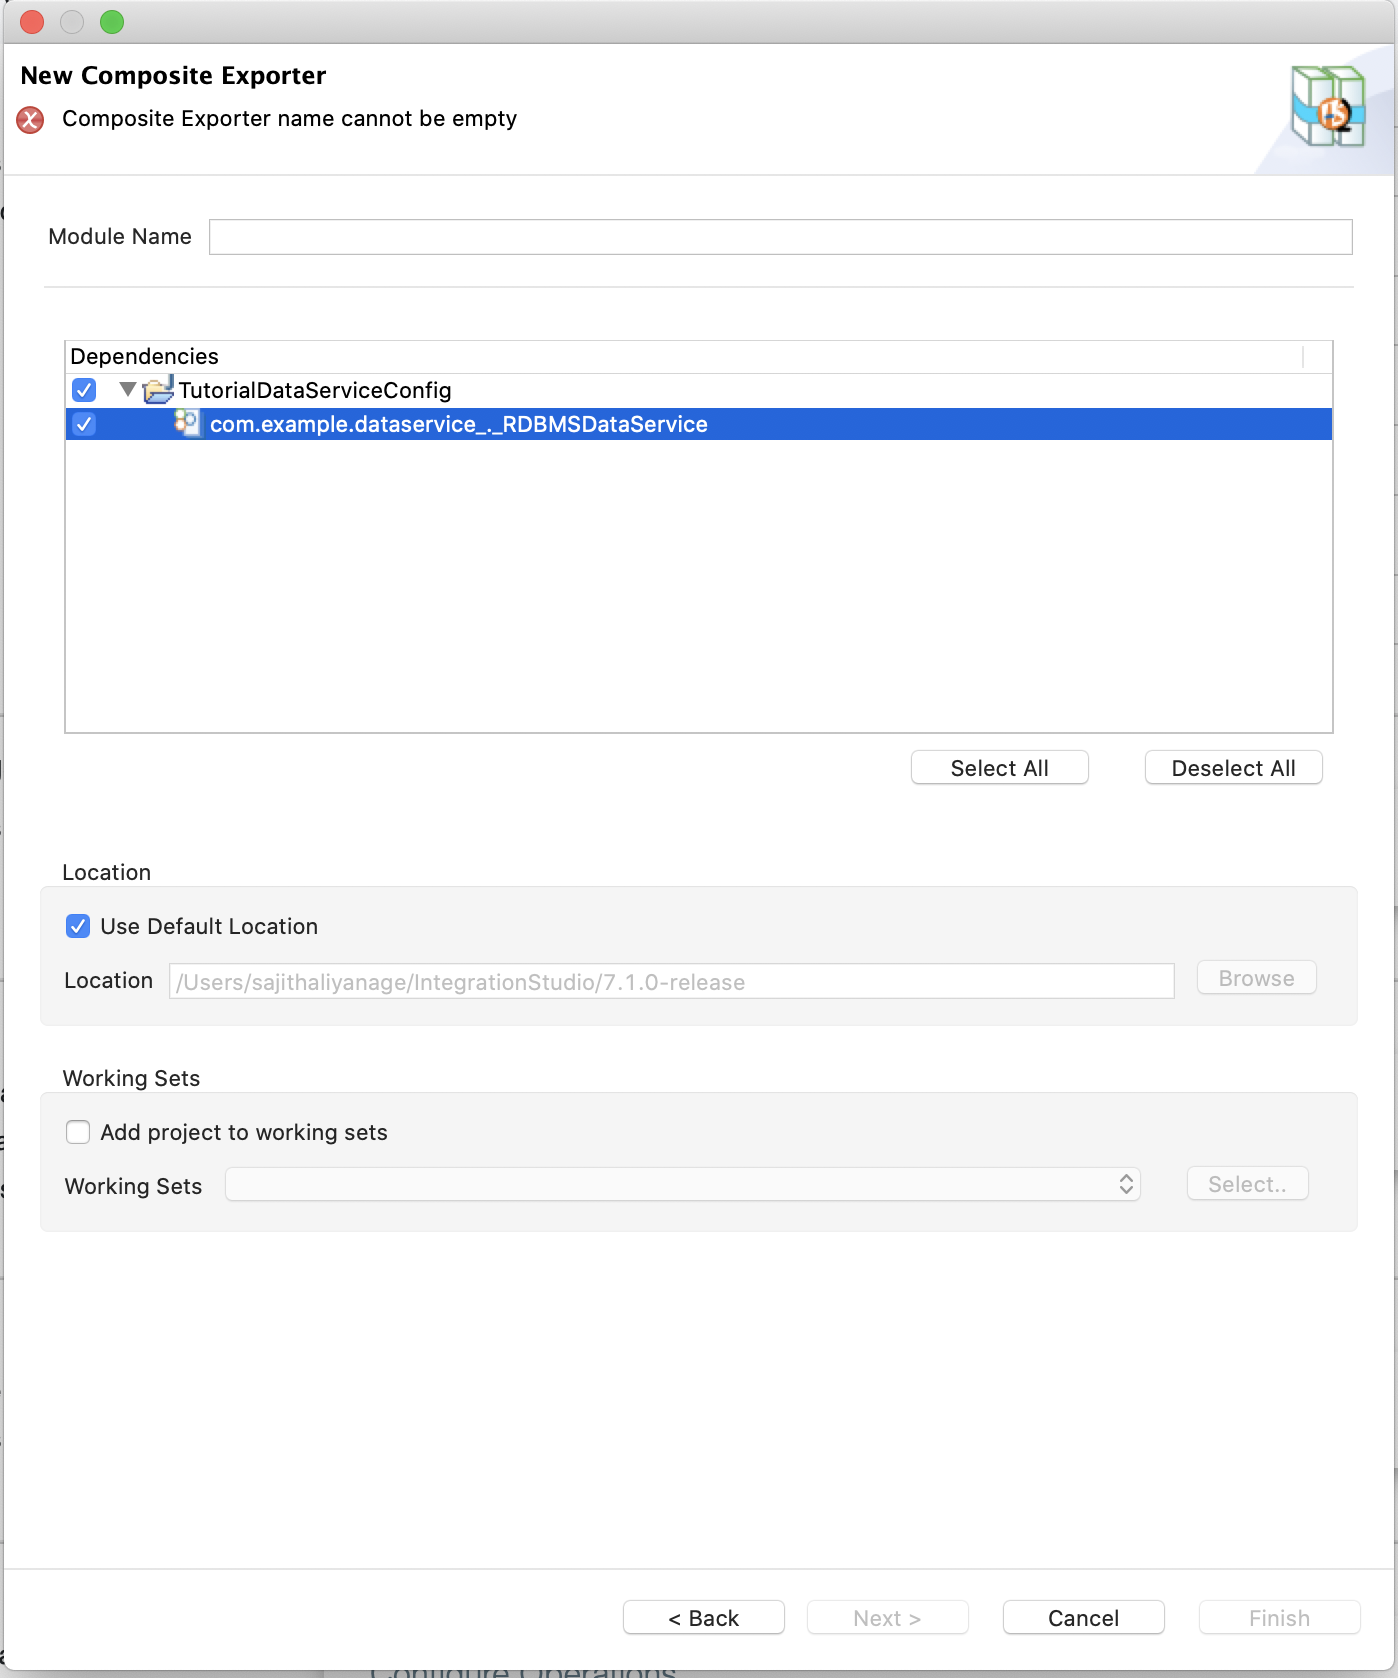
Create a new composite exporter module
- Right-click the Maven Multi Module Project go to New -> Composite Exporter.
- In the dialog box that opens, select the data service file, and click Finish.
Package the artifacts in your composite exporter to be able to deploy the artifacts in the server.
- Open the
pom.xmlfile in the composite application. - Ensure that your data service file is selected in the POM file.
- Save the file.
Step 4: Configure the Micro Integrator server
We will use the embedded Micro Integrator of WSO2 Integration Studio to run this solution.
To add the MySQL database driver to the server:
- Click the Embedded Micro Integrator Configuration (
 ) icon on the upper menu to open the dialog box.
 - Click the (
 ) icon to add the MySQL driver JAR (see Setting up the Workspace) to the
 /libdirectory of the embedded Micro Integrator.
If the driver class does not exist in the relevant directory, you will get an exception such as Cannot load JDBC driver class com.mysql.jdbc.Driver when the Micro Integrator starts.
Step 5: Build and run the artifacts
To test the artifacts, deploy the packaged artifacts in the embedded Micro Integrator:
- Right-click the composite exporter module and click Export Project Artifacts and Run.
- In the dialog box that opens, confirm that the required artifacts from the composite exporter module are selected.
- Click Finish.
The artifacts will be deployed in the embedded Micro Integrator and the server will start.
- See the startup log in the Console tab.
- See the URLs of the deployed services and APIs in the Runtime Services tab.
Step 6: Testing the data service
Let's test the use case by sending a simple client request that invokes the service.
Send the client request
Let's send a request to the API resource to make a reservation. You can use the embedded HTTP Client of WSO2 Integration Studio as follows:
-
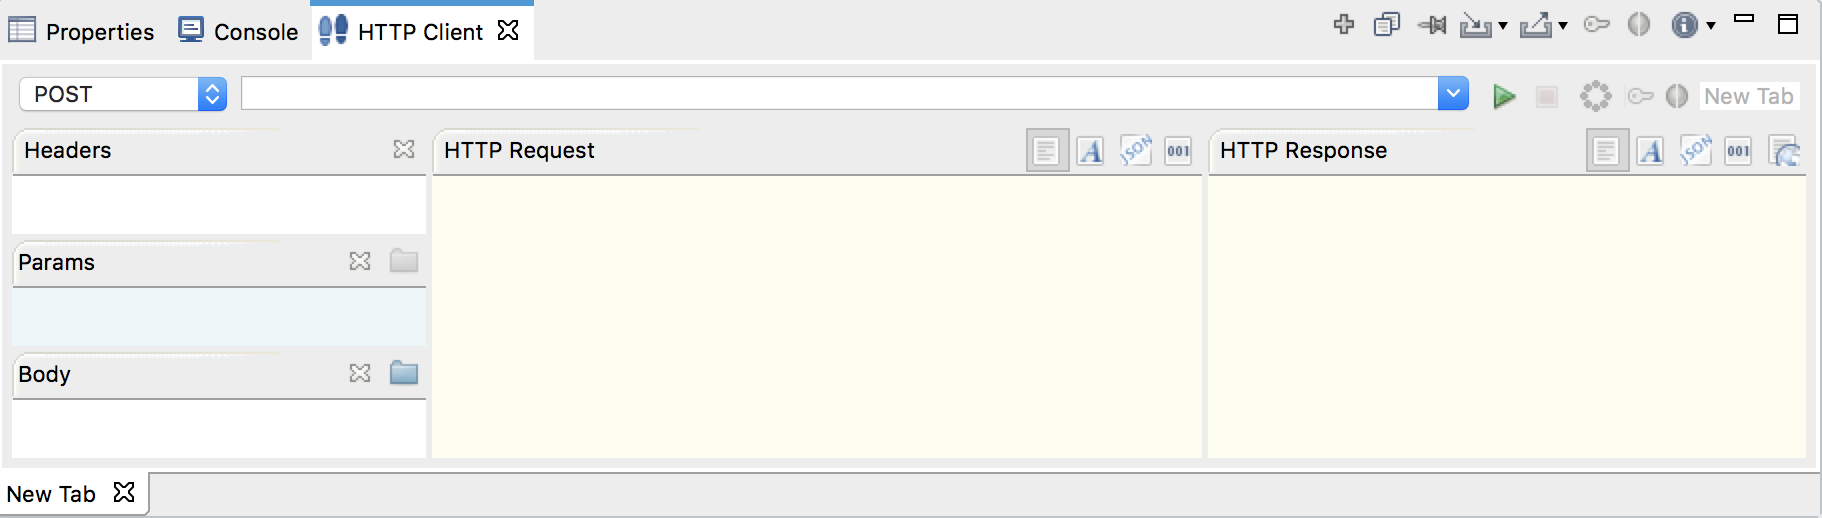
Open the HTTP Client of WSO2 Integration Studio.
Tip
If you don't see the HTTP Client pane, go to Window -> Show View - Other and select HTTP Client to enable the client pane.
-
Enter the request information as given below and click the Send icon (
 ).
).Method GETURL http://localhost:8290/services/RDBMSDataService.HTTPEndpoint/Employee/3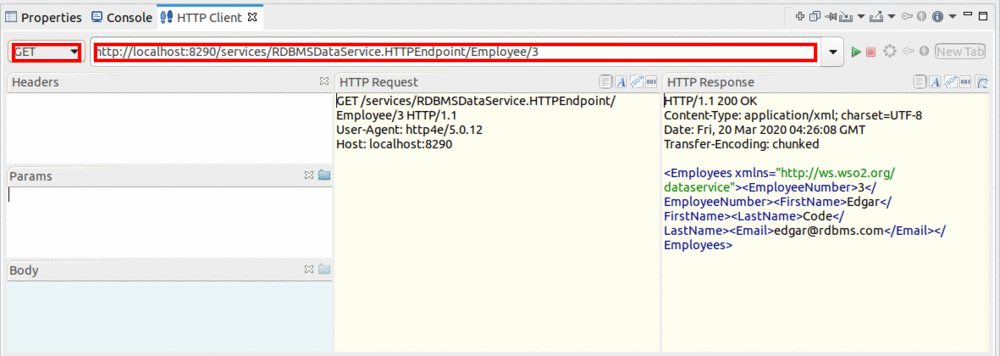
If you want to send the client request from your terminal:
- Install and set up cURL as your REST client.
- Execute the following command.
curl -X GET http://localhost:8290/services/RDBMSDataService.HTTPEndpoint/Employee/3
Analyze the response
You will see the following response received to your HTTP Client:
<Employees xmlns="http://ws.wso2.org/dataservice">
  <EmployeeNumber>3</EmployeeNumber>
  <FirstName>Edgar</FirstName>
  <LastName>Code</LastName>
  <Email>[email protected]</Email>
</Employees>